FE-FC Holden Discussion Forum
April 20, 2024, 12:50:41 AM *
Welcome, Guest. Please login or register.

Login with username, password and session length
News: Are you a member of one of the FE-FC Holden Car Clubs of Australia ? If you are, get access to the Club-Member-only area of this discussion board. Send an IM to the board admin, including your real name and club to get access.
 
  Home Help Search Calendar Login Register  
  Show Posts
Pages: [1] 2 3 ... 5
1  Technical Board / General Technical / Re: Tailgate questions on: August 03, 2016, 02:24:07 PM
Thanks for the help fellas. We've played around with the shape and profile of the groove that holds the lower tailgate seal. Getting a good even pressure on the seal all the way along so will just have to see how it goes. The extra rubber on upper gate may be an option if needed. Zulu, haven't seen those hinge seals before. Can they be bought new anywhere?
2  Technical Board / General Technical / Re: Tailgate questions on: July 26, 2016, 07:14:33 PM
Any idea where they were leaking from? The centre or ends?
3  Technical Board / General Technical / Re: Tailgate questions on: July 26, 2016, 12:13:48 AM
The way it should have been done. They must have realized how stupid an idea it was for the lower to go over the upper for water issues   Roll Eyes
4  For Sale and Wanted / Parts Wanted / Tailgate catch wedges on: July 25, 2016, 11:24:36 PM
Hey, Chasing a set of the plastic/nylon wedges and springs? for the catch mech. I never had any. Are they available to buy new anywhere? If not could they be made? Has anyone done this?  If not does anyone have any for sale. Pic attached for reference


thanks
Miikael
5  Technical Board / General Technical / Tailgate questions on: July 25, 2016, 11:04:13 PM
Hey guys. Hopefully someone can help me out. I have quite a few questions regarding some info for the panelvan/wagon tailgates. I have tried to get as much info off this and the fb/ek sites but couldn't find it.
I have had the lower part of my upper tailgate remade and a new skin made for the lower tailgate. Everything has been made as per originals but I noticed a few possible problems and am getting it fixed but I need some more detailed info. I have a rare spares lower tailgate seal.

I have read that the seals on the tailgate are poor but what have wagon/van owners done to fix the bad sealing issues? 

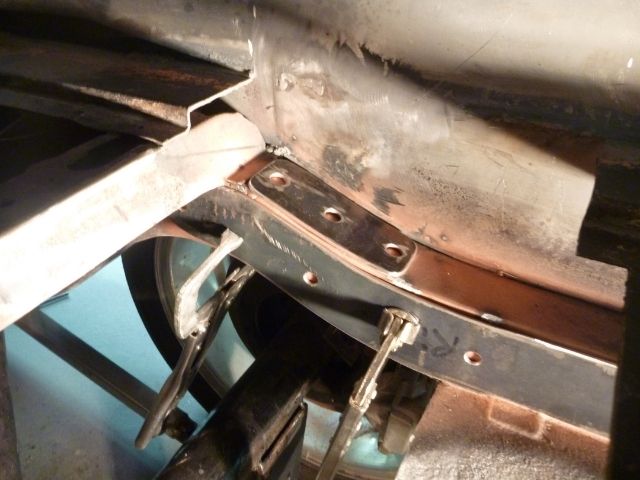
What are the holes at each end of the seal for? Is it just to let the rubber flex/squish a bit more?

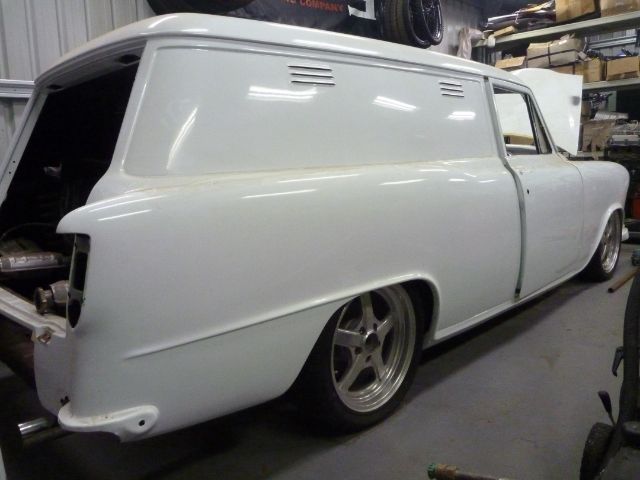
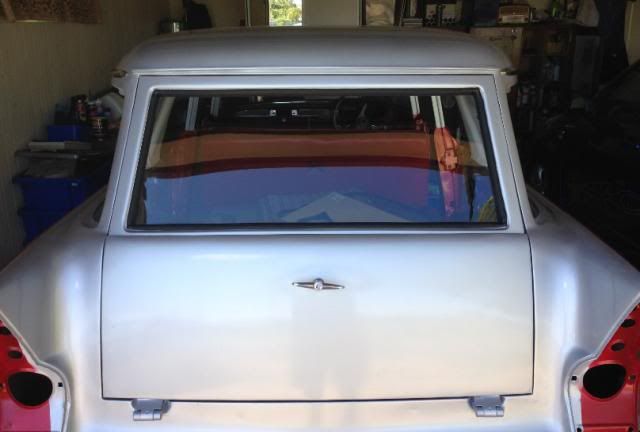
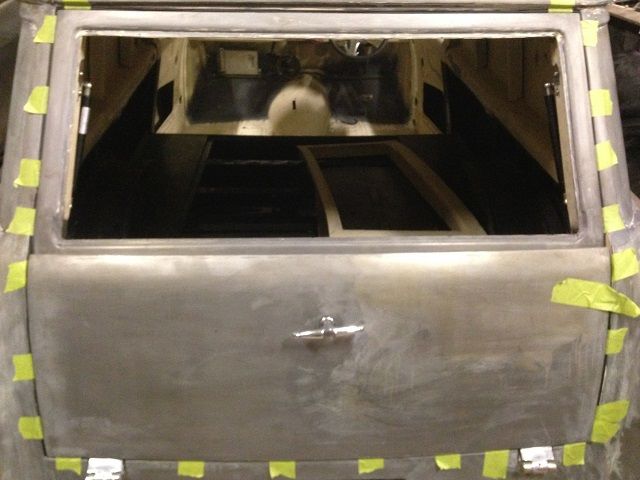
Looking at the photos it looks like the lower tailgate sits with an even margin showing to the bottom of the upper tailgate. Attached is a pic of an example found on here and how mine sits. The lower part of my upper tailgate is an even measurement all the way along but because its tilted forward on the body opening the centre rolls up and makes it a little higher . Hard to explain but you should be able to make it out in the pics. Is this normal and just hard to see in posted pics?


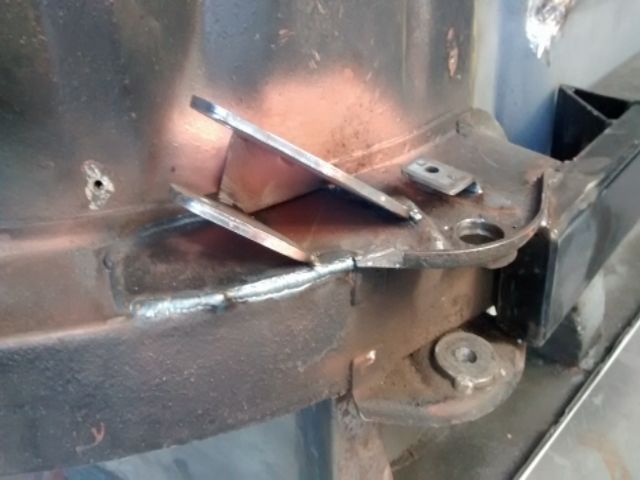
If anyone has a lower tailgate handy could they please get a measurement off the top edge of the tailgate to the top of the seal holding lip. Does it stay parallel to the top. Mine has been welded on so it dips in the centre so the seal isnt sitting parallel to the top edge of the tailgate. Think this needs to get fixed.


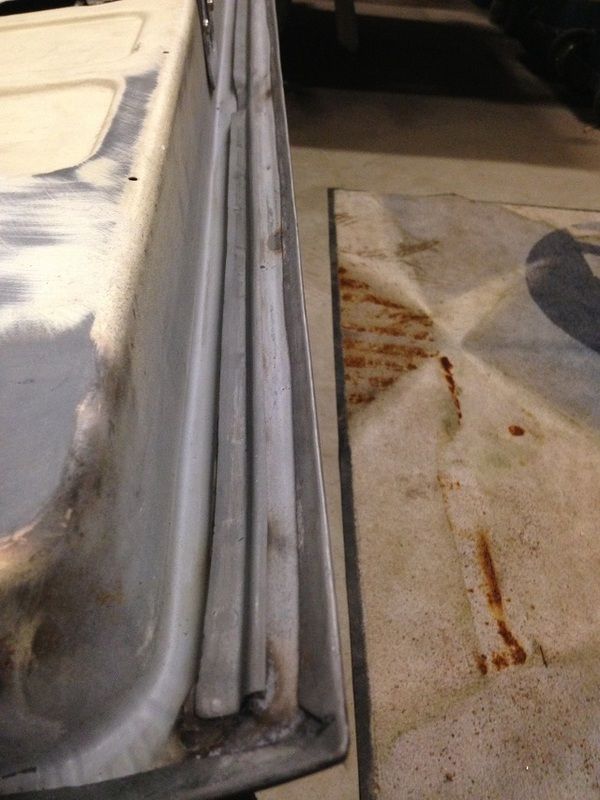
Both tailgates are curved left to right.Should the upper tailgate and the steel seal holder/groove on the lower tailgate follow the same curve/shape. When I don't have the rubber installed and close the lower tailgate over the upper the top edge of the lower tailgate has an even gap to the upper. However the seal holder/groove is touching on the ends and theres a 8 mm gap in the centre. Is this why they leak?
My local rare spares shop said they saw a wagon that had daylight in the centre so maybe they"re all like that?

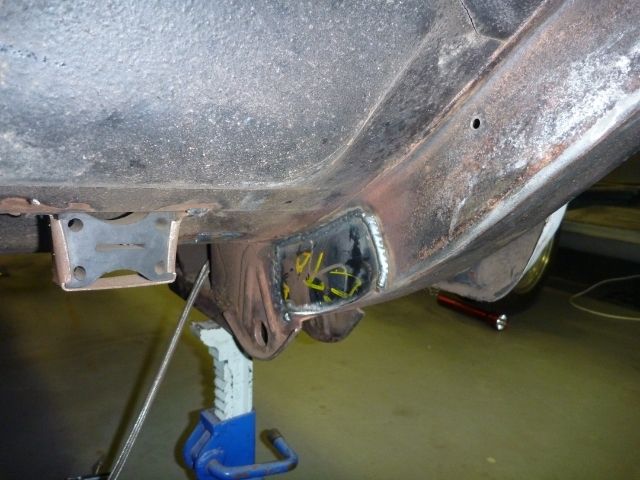
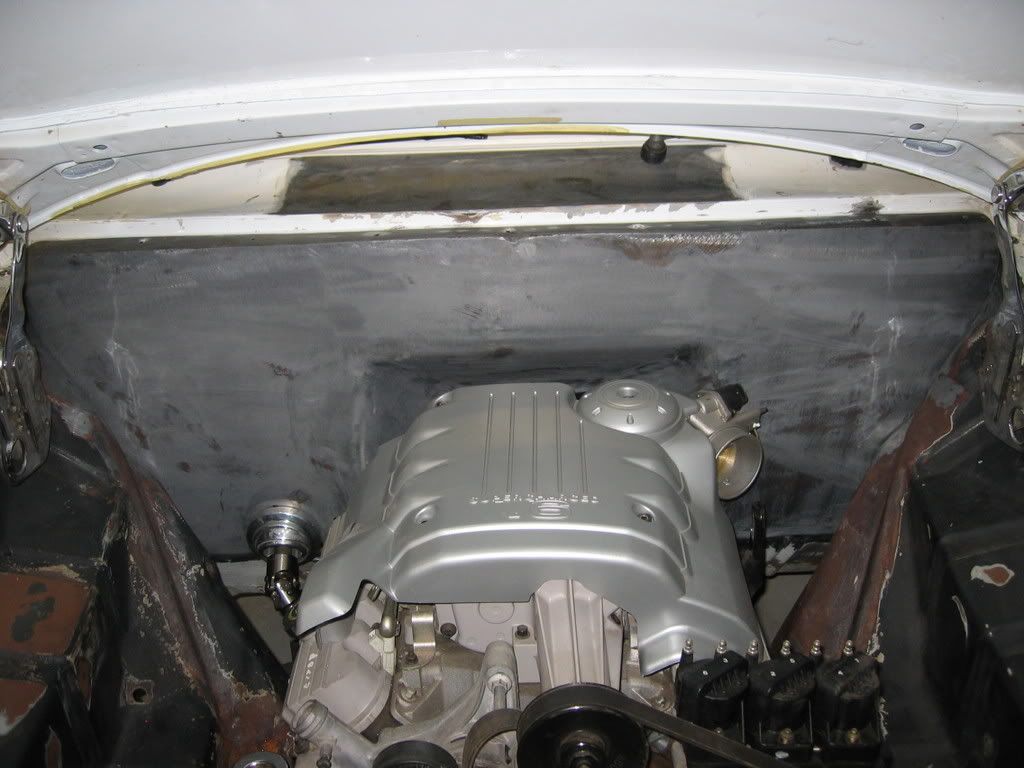
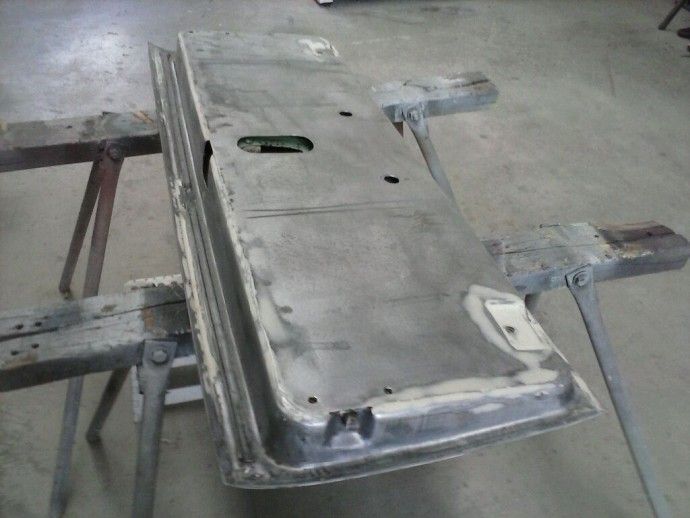
Theres also a recess/relief in the centre of the backside of the tailgate which relieves the pressure on the seal so this doesn't help things either.You can see this area clearly in this pic. Was thinking maybe putting a rubber behing the seal in this area to make it tighter when closed?


Sorry for the long post but hopefully someone can shed some more light on this with info/ pics, thanks again.

Miikael
6  Galleries / Project Cars - FEs and FCs Under Construction / Re: FC Van on: June 25, 2015, 01:44:29 AM
The radiator was sitting up too high as I wanted the top of the tank to be flush with the new radiator support panel. As the radiator was too tall the only way to get it down was to notch a small section for the lower tank to sit into. Once that was done I had some ali bent up mm perfect to keep everything flush and smooth.  Another mate welded them to the radiator and job done. The front end was sandblasted and 2pac primed ready for the next stage.


7  Galleries / Project Cars - FEs and FCs Under Construction / Re: FC Van on: June 25, 2015, 01:15:56 AM
The fab shop that made my radiator also fit new radiator side panels to suit. I was never happy with the way that he set it up so out with the grinder.The radiator was made a little too big so it was quite a job making it all fit nicely.  I started by positioning the radiator where I wanted it and making a new weld in radiator support. Once i had that in position I had to modify the bonnet catch panel to wrap around it. I cut the rear hump out of the original and had my mate bend me up a new piece to weld in.   Next I removed the radiator side panels. It was fully welded to the inner guard so that was a nightmare getting those out !   After making some cardboard templates and transferring to steel I made sure it was all centered and welded them in flush with the back of the radiator support.


8  Galleries / Project Cars - FEs and FCs Under Construction / Re: FC Van on: June 25, 2015, 12:16:06 AM
The firewall was replaced on the van quite a few years ago and the guy was also meant to fabricate matching inner fenders. Well it all went south with that guy and I didn't even know if I'd see my van again. Its been on the to do list ever since and I was going to pay someone to roll some new panels but decided to tackle it myself. I dont have the skills or tools to wheel/bend some new panels so I decided to smooth out the existing shape.  I measured all the pressings and got a mate to cut some strips to weld in. That was a slow process keeping the strips level and working them into the internal and external radiuses. Also taking my time to let it cool and not let it get too hot. It was a huge job, one that I kept putting off, but am pretty happy with the result.


No turning back now!


9  Galleries / Project Cars - FEs and FCs Under Construction / Re: FC Van on: June 24, 2015, 11:40:03 PM
Next job was to replace the diff hump and steel around the fuel tank. The sheetmetal that supports the fuel tank was fixed up poorly by someone previously and as I am going to be running a space saver tire I decided to move the fuel tank mounting up. I went level with the bottom of the chassis to get the tank up as high as possible for clearance and to get it out of sight so it didnt look like a drop tank. I made a frame to support the tank and it made it easier to fix the surrounding sheetmetal, including the new diff hump. I lost some pics so there isnt a close up of the new diff hump but you can see it on the pic of the underside shot on the rotisserie.. I also moved the tank to the left just a little to give more exhaust to tank clearance.


10  Galleries / Project Cars - FEs and FCs Under Construction / Re: FC Van on: June 24, 2015, 10:44:30 PM
Hey Marc, and I'm in envy cause you got a van on the road. haha.
11  Galleries / Project Cars - FEs and FCs Under Construction / Re: FC Ute on: June 24, 2015, 10:37:32 PM
Sweet!
12  Galleries / Project Cars - FEs and FCs Under Construction / FC Van on: June 24, 2015, 03:09:11 AM
Hey all. Its been years since I put any progress updates/pics of my van up and thought it was about time. Its been a long road and quite a few times I've almost pulled the pin, but I've been working pretty hard on it again the last year and have made some good progress. Over the next week I'll post some updates.
 
Heres the van back on its feet after a fitting a 4 link and airbags all round.


I started the fitment of the triangulated 4 link by cutting out the diff hump and tacking in some tubes to get some measurements off of.


 reinforcement plates to the front upper bar mounts


front mounts tacked in


shock mount crossmember reinforcement plates ready for welding in


reinforcing plates welded in and shock mount crossmember and shock tabs tacked in


lower shock mounts tacked in . I machined up the shock spacers to get it exactly where needed for clearance


all set-up and ready for a test run .  I did plan on running the shocks off the same mount as the lower 4 link bars on an inward angle but it didnt leave me enough room for running the exhaust over the diff. So I ran the diff shock mounts inboard a little so theres a clear path for the exhaust to run through on the right hand side of the tank.


to get the airbags in the front I decided to bite the bullet and order a Southern Chassis Works front end. I ordered a rear mounted rack the same as I had set-up on the old HR front end but the rack is positioned much closer to the crossmember. I tried to modify the sump as much as I could to make it work but there just wasnt going to be enough oil volume so I had to get a front mounted rack.
13  Technical Board / General Technical / Re: fc van seam seal rubber? on: January 14, 2015, 10:41:40 AM
Hey Ken thanks for the info. I tried clark rubber for a suitable replacement and found a couple that look like they'll work.  You don't remember what type of windscreen rubber it was that you used?

Miikael
14  Technical Board / General Technical / fc van seam seal rubber? on: January 12, 2015, 05:13:59 PM
Hey. Wondering if someone can help me. My vans on a rotisserie and is going to get sandblasted soon. I noticed a seam seal at the rear of the car. Its located behind the wheel arches and wraps to the back of the car next to spare wheel door. It seals a gap of around 10-15 mm between the outer skin of car and the panel van elevated floor.  It is made of rubber and riveted to the chassis.  It looks original? Before I cut it out what can I replace it with. Rares reckoned they didn't make anything for it. Do I just use a mastic gun type seam sealer or is there a suitable replacement out there?     Thanks
Miikael
15  Technical Board / Modification Help / Re: HR Diff and front end in FE ? on: July 05, 2008, 02:17:01 AM
Sorry to tack onto this thread but no one mentioned something I was interested in. I can't remember which staybilizer bar to use when running the HR front end in an FC. I had one purchased ages ago but it seems to be the wrong one and I can't tell which one I have been supplied. Also which length/model staybilizer bar ends (join with rubbers the staybilizer bar to lower a-arm) are required for this set-up.

thanks

Miikael
16  Galleries / Members' FEs and FCs / Re: fcvan on: March 20, 2007, 11:25:09 AM
Hey thanks guys.    Rob the mini tubs were only put up to the chassis rail as you said.  I mainly wanted new tubs for appearance and as I said before the old ones were badly dented and I didn't want to bog em up .
I had the leaf sprins off at one stage and lowered the car over the diff/wheels till it bottomed out on the chassis.  The tyres had heaps of clearance.  They're only 17" x 7" with a 235x40 tyre.  The wheels and diff were made to suit the car at around the same time so they fit well and the track was kept the same.   Good luck with the fat tyres.
17  Galleries / Members' FEs and FCs / Re: fcvan on: March 12, 2007, 12:15:42 PM
hey guys.  thanks for the comments.  It's been a long slog but I am starting to see light at the end of the tunnel. 9 years since I purchased it so hopefully on the 10th year its done.  Wishful thinking, probably  haha
FCCOOL59. I haven't had to put fluid in there yet but that was a concern that i had when we planned it out.  I bleed brakes on pushbikes every day using a syringe with some tubing attached. so I figured that would work with the van aswell.  Have to wait and see.  As for the room. The commodore booster is huge.  Before the old firewall was cut out it seemed like it would just fit in there. If you use another model booster in there that's smaller in diameter that will make it a whole lot easier.
18  Galleries / Members' FEs and FCs / Re: fcvan on: March 12, 2007, 04:45:46 AM
the mini tubs came up alright.  beats the dented up ones i had anyway.


dash shot.  I've tried to use the original dash/colomn mount but I think that the wheel sits a touch high.  I think a small colomn drop is on the cards.


rear of firewall with extra bracing and mounting points for all the stuff we've crammed in there.

under dash brakes.  The pedal box we spent hours going through a truck wrecking yard to find the most suitable. Then the Commodore booster and master cylinder was fitted to the box and braced to the firewall. It just fit in there. The master cylinder is abit to the right of the ash tray so i can still fill it with fluid when it comes time to bleeding her up.


electric heater with a fabricated cover which the duct tubing can attach to and run up to the windscreen demister.  I hope there's enough room.  haha    I had a water heater with a billet control panel to use but this way I don't have to have heater hoses.  Apparently I should still be able to use the control for the electric heater.


under dash wipers.  We looked at using aftermarket, mini, cable wipers but the commodore unit ended up working ok.  The arms needed a fair bit of working to get them to clear the heater unit .


This ended up putting the left hand wiper into another spot. The old spot was filled.


With all the new parts under the dash there wasn't really any room for the cowl vent linkages.  I decided to get it filled


Thats all the shots I have for now. As i get more work done I'll keep you posted. Hope you all like it.

Miikael


19  Galleries / Members' FEs and FCs / Re: fcvan on: March 12, 2007, 04:26:29 AM
Flat firewall and supercharged v6,  pretty stoked how that turned out.

closer shot of the steering colomn mount


modified bonnet hinges.  springs removed. I'm either going to use some gas struts or some kind of prop to keep the bonnet open?


the join on the front chassis rails is now removed.  It was stitch welded along the entire seam and then a new plate welded over the top.  It looks smooth as well as giving more clearance to the oil filter and the headers.


close up of the firewall recess
20  Galleries / Members' FEs and FCs / Re: fcvan on: March 12, 2007, 04:19:14 AM
More pics


Pages: [1] 2 3 ... 5
Powered by MySQL Powered by PHP Powered by SMF 1.1.21 | SMF © 2015, Simple Machines Valid XHTML 1.0! Valid CSS!
Page created in 0.055 seconds with 17 queries.