FE-FC Holden Discussion Forum
April 26, 2024, 11:33:25 AM *
Welcome, Guest. Please login or register.

Login with username, password and session length
News: The FE-FC Holden Car Club of NSW are proud to host the 19th FE-FC Holden Nationals. Check out the announcement video for more.
 
   Home   Help Search Calendar Login Register  
Pages: [1] 2 3 4   Go Down
  Add bookmark  |  Print  
Author Topic: Crumpsnr FC Standard Sedan  (Read 45612 times)
Crumpsnr
Senior Member
****
Offline Offline

Model: FC
Posts: 286

Shellharbour NSW


View Profile
« on: May 01, 2013, 11:02:50 PM »
0

Hi all, thought I'd better post something substantial after all the help (and laughs) I've had from other posts. I have an FC Standard Sedan, purchased 18 years ago, and stored for 13 of that. I've had it in my current garage for 5 years, and that's gone so quick it hasn't been funny. Hopefully things will speed up now. I bought it from a friend when he needed to sell off all his assets in a hurry. He'd bought it as a modified vehicle 12 months prior and not touched it. It's been very badly modified but not to the point of being beyond help. It had a 186, Trimatic, HR front, EH column and EH rear. I've swapped the EH for an HR rear end and will be putting in an Aussie 4 speed, along with mod cons such as air, power windows and central locking. I suspect it's been pranged front left corner as it had FE guards and grille and the firewall is pretty badly split in quite a few spots. I had it for 15 years before I checked closely enough to see it's really an FC. It'll be getting put back to FC metal and grille, but at least I've had a foot in both camps Smiley Body will be kept stock, with white steel wheels and no hubcaps for an old stocky look.
I thought I'd show some pics of the wiper setup (poached with many thanks to Brett). I wanted a clean look without the baseplate but didn't want to modify the firewall. I found a section of 12mm polyethylene chopping board did the job. No doubt someone with a waterjet cutter could knock up something pretty similar and much neater. (Yeah, FCRB26, you'll be hearing from me for some future jobs!) Wires feed through the firewall behind the motor. I used the original Commodore arm, but welded the end of the EK arm to it and changed the angle of attack to clear the firewall. Sweep and synchronisation are perfect. Will be interesting to see how they go with a strong airflow over them but at least in the garage they're spot on. The original oval opening will be filled and just the mounting , central shaft and wiring openings will be left. Although I can only just flex the firewall if I try hard, I'll still be putting a bracing plate behind to compensate for the relatively small fixing area. The last shot is looking straight up the firewall to show the clearance achieved by using the mounting block.
Many thanks to all who post such great info, and to RET for the info on posting photos. Hope I got it right. Regards, Martyn.
[/URL]
[/URL]
[/URL]
[/URL]
[/URL]
[/URL]
[/URL]
[/URL]
Logged
NES304
Guru
*****
Offline Offline

Model: FC
Posts: 2874


Yes Dear


nes304
View Profile
« Reply #1 on: May 02, 2013, 07:29:35 AM »
0

Hope the motor is not noisy against the fire wall...
Logged

Crumpsnr
Senior Member
****
Offline Offline

Model: FC
Posts: 286

Shellharbour NSW


View Profile
« Reply #2 on: May 02, 2013, 09:39:45 AM »
0

Hi NES304, good point. The photo doesn't show it well but there's a gap between the round housing and the firewall. In addition I'll be putting a rubber gasket betweem the mounting block and the firewall. Even now without that and without any firewall insulation it's pretty quiet.
Logged
Crumpsnr
Senior Member
****
Offline Offline

Model: FC
Posts: 286

Shellharbour NSW


View Profile
« Reply #3 on: May 02, 2013, 12:31:59 PM »
0

PS The bog on the firewall is not my doing!
Logged
Crumpsnr
Senior Member
****
Offline Offline

Model: FC
Posts: 286

Shellharbour NSW


View Profile
« Reply #4 on: May 10, 2013, 12:12:01 AM »
0

Hi all, thought I'd add a bit more info and show some of the issues I've discovered with this car.
First off, plate details:
This one is:
Body - FC215 3968 S
Trim - 194 640
Paint - 252 2081
Insert -
Top -

I don't believe the subframe is from this car. Stamped 8-9239-9 or S

An FC Special I used to own and took off the road to rebuild was stolen, but I'd removed the firewall plate.
Details are:
Body - FC225 20461 S
Trim - 277 629
Paint - 253 0700
Insert - 256 7770

I think I still have the front subframe in storage and will provide the number later if I do.

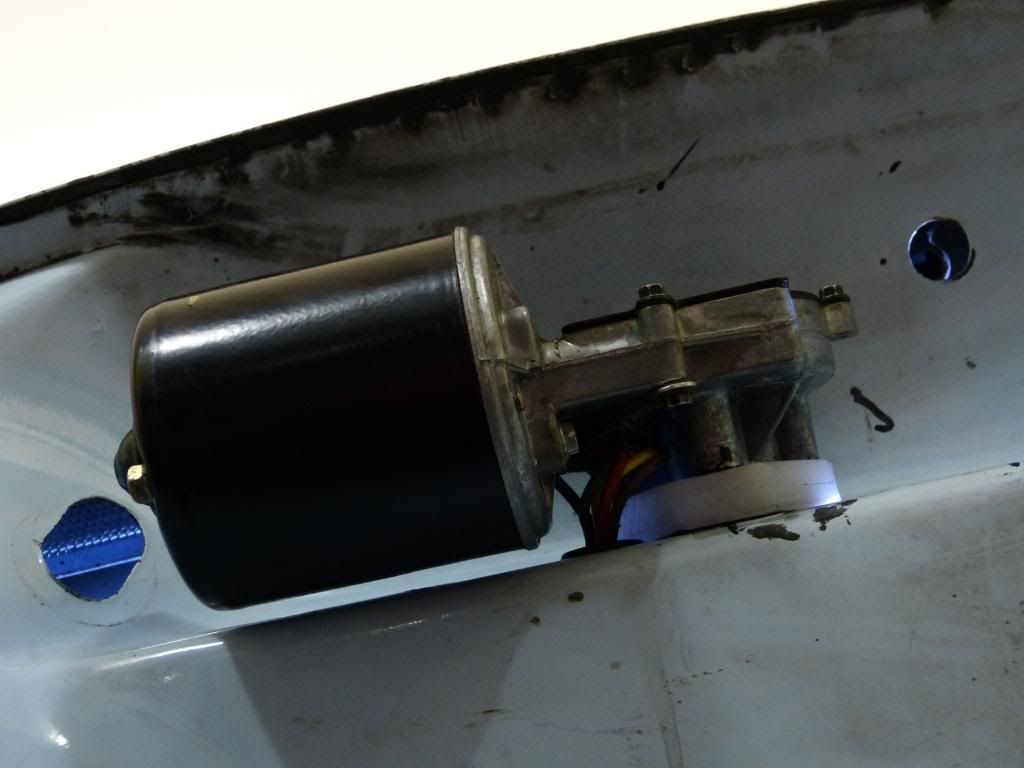
A bit more on my wiper setup first:
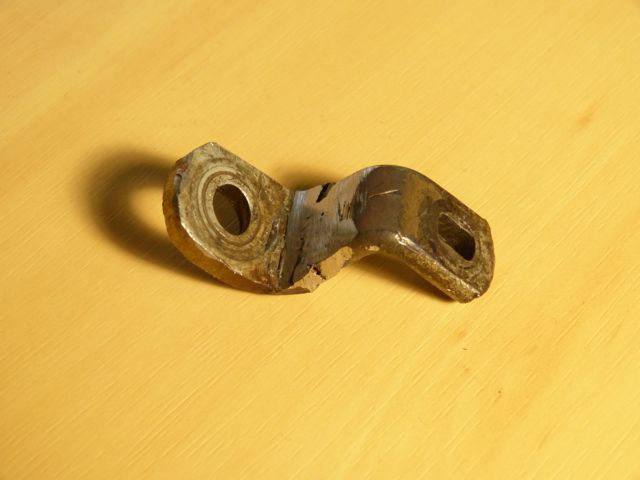
Modified wiper motor arm, incorporating the Commodore mounting base and the end of an EK arm. Not finished off yet as I did enough of a weld that it wouldn't break in testing but not so solid it'd be a prob to cut and bend if required.


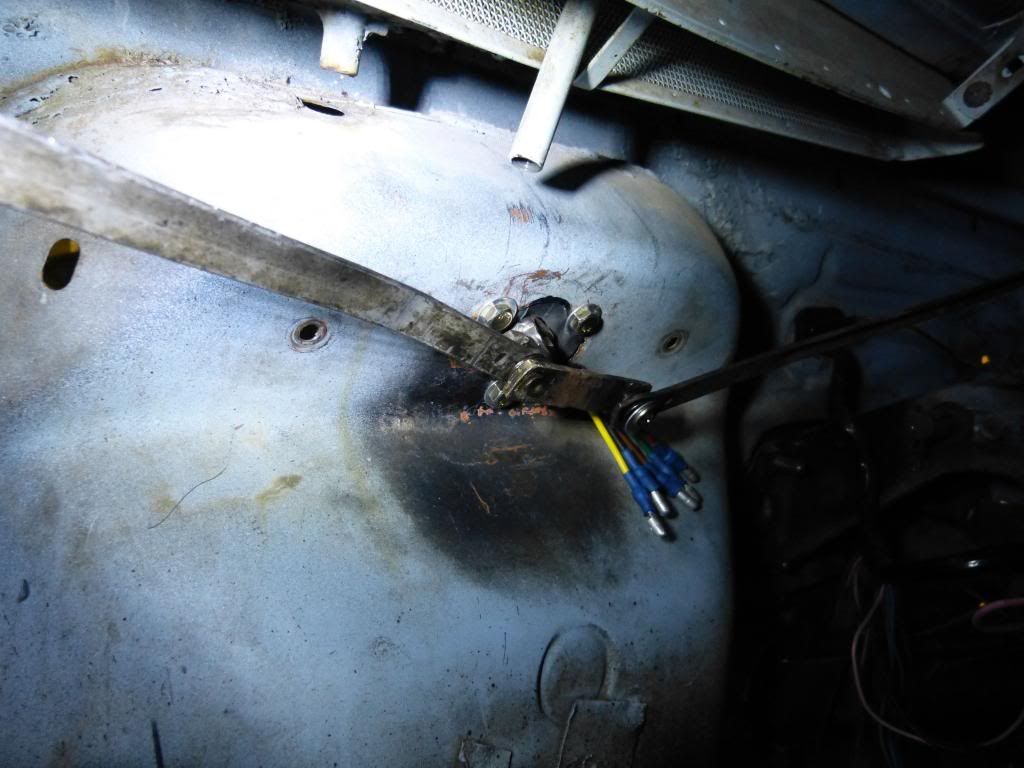
Wiper setup with different bolts and washers and a rubber insulating gasket between the mounting plate and the firewall.
 

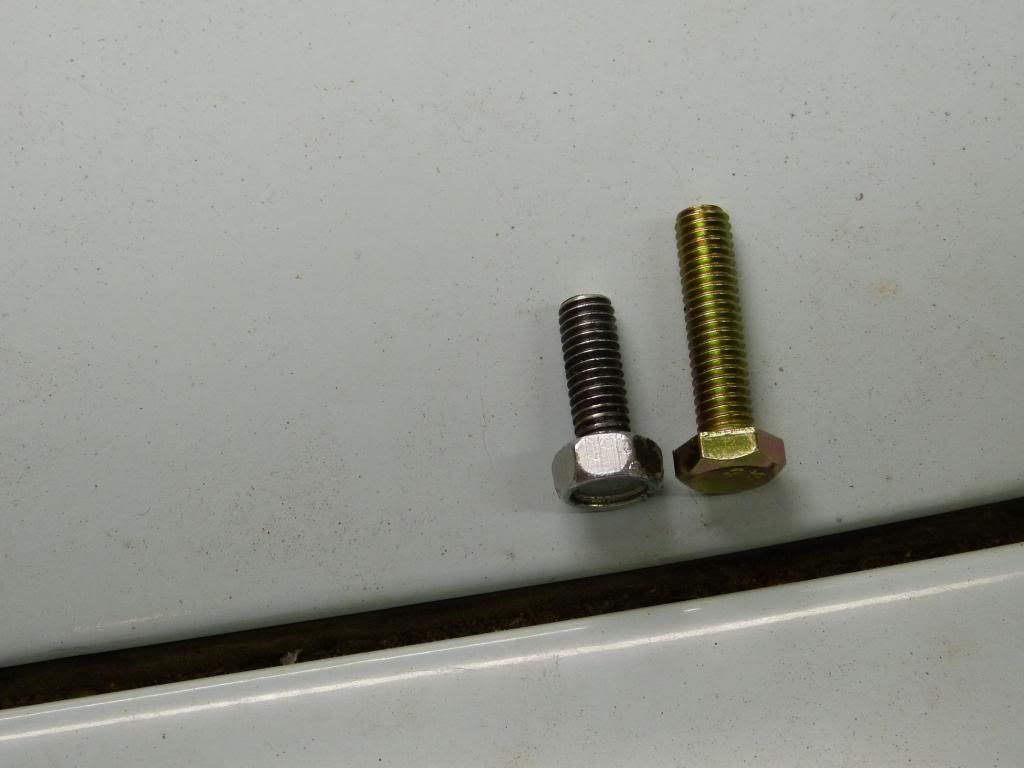
The bolts I'm now using, being longer and having a smaller head, which will allow better clearance once I put a stiffening plate inside the firewall. They're also longer to compensate for the thickness of the mounting block. Shown with the original.
s

This is a better shot up the firewall showing the clearance with the mounting block.


Now for some of the interesting things I've discovered.

Don't think these were a Nasco accessory. Would like to know how they got in the car.


Couldn't work out why the left outer subframe leg was springing back towards the centre of the car when I undid it. It was thanks to a poor rust repair that pretty well eliminated the taper at end of the inner sill, so the subframe leg was pulled outwards to compensate. Fortunately this is the only rust in the car (that I know of).


The mess that's been made of the transmission tunnel and the original mounting points for the member that went under the gearbox.

Removing the radiator was harder than it needed to be. The supports were mounted in front of the radiator support panel, so it couldn't just be undone and lifted out without removing the bonnet lock support plate. The radiator support panels were also butchered to make it fit.
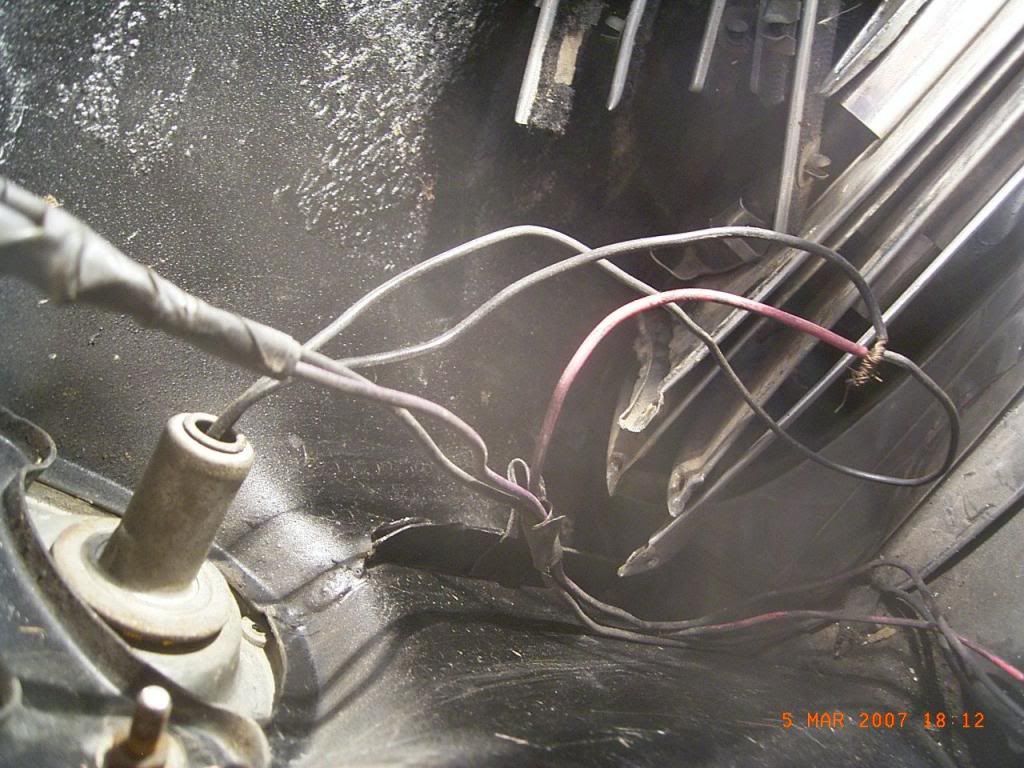

Tail light wiring.


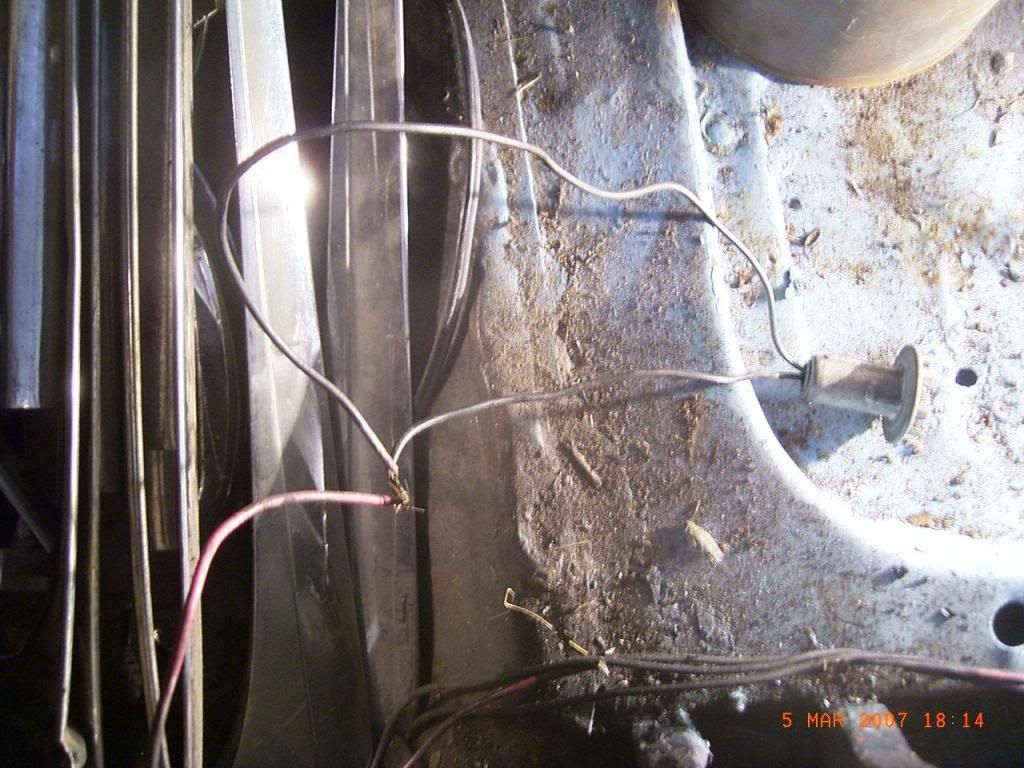
Number plate light wiring.


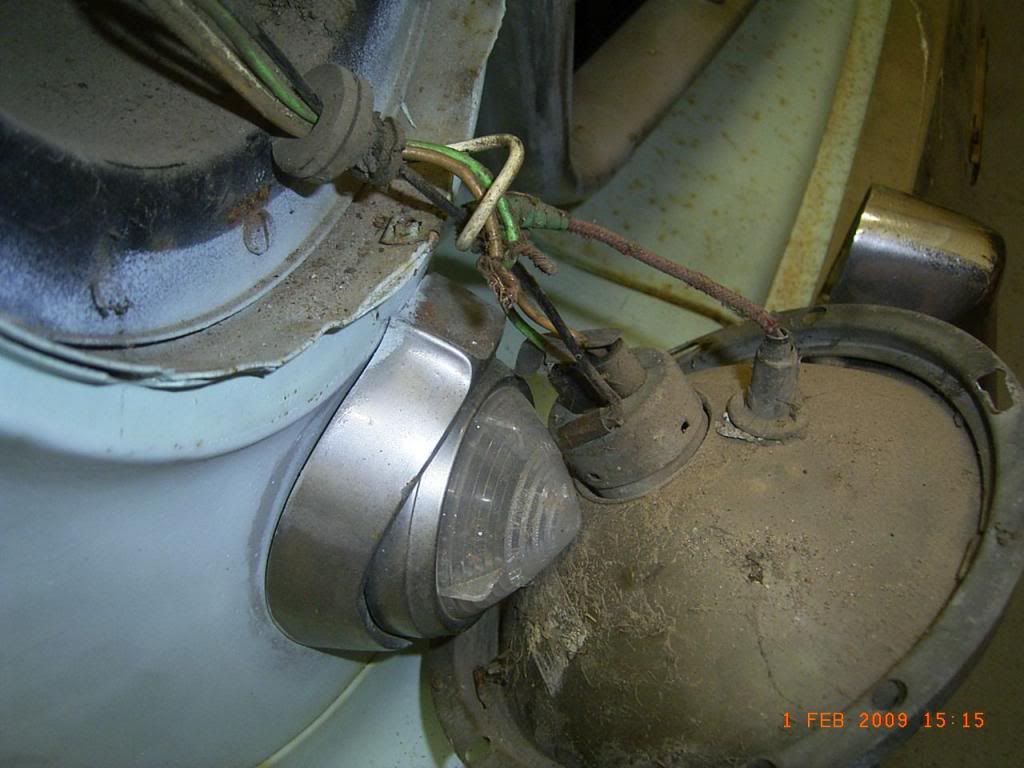
Showstopper - Headlight wiring.


Over and out till next time,
Martyn
Logged
FCV08
Senior Member
****
Offline Offline

Model: FC
Posts: 692


FE FC Club of QLD


View Profile
« Reply #5 on: May 12, 2013, 11:01:45 PM »
0

Martyn

Great update.
Wiring looks af treat.
With the wiper motor mount I made a base plate and block, similar to the one in the photo.
I made it out if steel and spot welded both together and mounted it as per the original setup.
No flex problems at all.
Each build has its own hidden gems.
Keep up the good work and keep them updates coming

Cheers
Craig D
Logged
Crumpsnr
Senior Member
****
Offline Offline

Model: FC
Posts: 286

Shellharbour NSW


View Profile
« Reply #6 on: May 13, 2013, 12:37:04 AM »
0

Thanks for the kind feedback Craig.
I picked up a rotisserie last week so will start soon on the front inner sill, trans tunnel and will also replace both outer members under the front floor where they meet the sills. Not for rust reasons, but they've been badly bashed over the years, mostly I guess from being dropped on the top of small bottle jacks. The spare wheel well had also been cut out and a flat plate welded in. I'm considering putting the original back in. It came with the car. It was rust free so don't really know why it was removed other than for appearance. Will also weld up the two holes in each pillar that had been drilled to fit seat belts and will fit plates with nuts. Already had engineer check and provide minimum plate dimensions. It might seem funny having started with the wipers but I wanted to sort them before the glass came out, and because of all the jobs I have to do, it was the one that I had the most worries about, wondering how well I could get them sweeping and working together. As it turned out, they're great. Again, many thanks to Brett for the idea and  the tip on the brand of switch to get. Will post some pics of other cars I've built in the Members' Cars thread. Will show an FJ ute, FC Special sedan and FE ute. Martyn out.
Logged
NES304
Guru
*****
Offline Offline

Model: FC
Posts: 2874


Yes Dear


nes304
View Profile
« Reply #7 on: May 13, 2013, 07:10:02 AM »
0

That's how I'm doing my wiring  Tongue
Logged

Crumpsnr
Senior Member
****
Offline Offline

Model: FC
Posts: 286

Shellharbour NSW


View Profile
« Reply #8 on: June 05, 2013, 09:23:26 PM »
0

Not much of an update but the subframe is now off and all items have been removed from the firewall. I can now appreciate how rough it is. Can't wait to get stuck in and fix it!


Bit of massaging required.


Quite a bit of filler next to the handbrake, not promising.


Few repairs needed here too.


Handbrake as it came out of the car. Looks like someone had the idea for Brett's hazard light location at least 14 years ago  Smiley
Logged
fe350chev
Guru
*****
Offline Offline

Model: FE and FC
Posts: 2601


View Profile
« Reply #9 on: June 05, 2013, 09:41:14 PM »
0

What are the subframe legs like? Did the last guy have the subframe off or is it original fitment.
Logged

Deano

Current Rides: 1958 "Black and White Taxi" FC special Sedan, 1957 FE special Sedan, BA Futura,  2015 VF Commodore, 1956 Austin Tipper Truck
brett_f
Senior Member
****
Offline Offline

Model: FC
Posts: 557

I love YaBB 1G - SP1!


View Profile
« Reply #10 on: June 05, 2013, 09:46:10 PM »
0

The hole in the handbrake may have been for a kill switch. No hazard lights in the early days. Keep up the good work. 
Brett
Logged
Crumpsnr
Senior Member
****
Offline Offline

Model: FC
Posts: 286

Shellharbour NSW


View Profile
« Reply #11 on: June 05, 2013, 09:55:17 PM »
0

Hi Deano,
The subframe isn't original. It's in great condition and the legs are fine. None of the front sheet metal is original either. I believe it's had an almighty front end prang at some stage. Some of the splits in the horizontal firewall seam I believe are from the motor hitting. The only issue with the replacement subframe is that the radiator support panels have been cut about to fit a larger radiator, but I have spares that I can graft in depending on what size radiator I fit. The replacement subframe was put in with bolts that are well undersize so I now have slightly out of round holes on the body mounts.

Brett, that's not a bad location for a kill switch so I'd say your guess would be right.  Smiley
Martyn
Logged
FC Dave
Full Member
***
Offline Offline

Model: FC
Posts: 220


View Profile
« Reply #12 on: June 05, 2013, 10:08:21 PM »
0

Hey there, I am on the coast a bit, we will have to catch up soon, Dave. PS good to see more projects.
Logged
pedro
qld-club
Guru
*****
Offline Offline

Model: FC
Posts: 1683


If you haven't grown up by 50, you don't have to.


View Profile
« Reply #13 on: June 06, 2013, 10:22:14 AM »
0

Looks like those panel beating hammers are going to get a good workout Martyn Wink.
   Pedro
Logged

I love animals - they taste great

F4+
Crumpsnr
Senior Member
****
Offline Offline

Model: FC
Posts: 286

Shellharbour NSW


View Profile
« Reply #14 on: June 08, 2013, 08:30:49 PM »
0

Hi all, a bit of an update. I'm going to put the car on a rotisserie but the firewall needs some work first. Today I finished making a trolley that gives me good access around the firewall and also allows me to wheel the car out of the way for more garage space.


Logged
Old_Mt_Isa_Boy
qld-club
Senior Member
****
Offline Offline

Model: FC
Posts: 953


My Ute


View Profile
« Reply #15 on: June 08, 2013, 08:34:18 PM »
0

Very clever.

Regards

Wayne b
Logged
fe350chev
Guru
*****
Offline Offline

Model: FE and FC
Posts: 2601


View Profile
« Reply #16 on: June 08, 2013, 11:49:40 PM »
0

U could almost adapt that for when u put the subframe back.
Logged

Deano

Current Rides: 1958 "Black and White Taxi" FC special Sedan, 1957 FE special Sedan, BA Futura,  2015 VF Commodore, 1956 Austin Tipper Truck
Crumpsnr
Senior Member
****
Offline Offline

Model: FC
Posts: 286

Shellharbour NSW


View Profile
« Reply #17 on: June 09, 2013, 12:06:40 AM »
0

I hadn't thought that far ahead, but that's a great idea. I'll do it.  Smiley
Logged
fe350chev
Guru
*****
Offline Offline

Model: FE and FC
Posts: 2601


View Profile
« Reply #18 on: June 09, 2013, 12:13:09 AM »
0

Make a little swivel and a flat piece to mount a jack and make up scizzor arms 
Logged

Deano

Current Rides: 1958 "Black and White Taxi" FC special Sedan, 1957 FE special Sedan, BA Futura,  2015 VF Commodore, 1956 Austin Tipper Truck
Crumpsnr
Senior Member
****
Offline Offline

Model: FC
Posts: 286

Shellharbour NSW


View Profile
« Reply #19 on: June 09, 2013, 12:33:14 AM »
0

Hi mate, thanks for the comments but I can't quite picture what you're suggesting. The castors are all swivel castors. One on each end has a brake. I'd try to keep the design as simple as possible. Maybe a cradle for the channel that runs under the footwells out to the inner sills. Make it right and it wouldn't even need to bolt on. The sub-floor channel would just sit down into it and stay in place. This would also put the load closer to the ends of the main bar running across under the car.
Logged
Pages: [1] 2 3 4   Go Up
  Add bookmark  |  Print  

Share this topic...
In a forum (BBCode) 
In a site/blog (HTML)

 
Jump to:  

Powered by MySQL Powered by PHP Powered by SMF 1.1.21 | SMF © 2015, Simple Machines Valid XHTML 1.0! Valid CSS!
Page created in 0.046 seconds with 19 queries.