Crumpsnr
Senior Member
   
 Offline Offline
Model: FC
Posts: 286
Shellharbour NSW

|
 |
« Reply #40 on: March 14, 2014, 06:45:30 PM » |
0
|
Hi Penners, handy to know, thanks for that.
Hi Haydn. To be honest the gauges are so dirty I've never looked at them! I've only had the truck running a couple of times and I've been more interested in motor noises than what's happening on the dash. Next time it's running I'll have a look and let you know. It's something I hadn't thought about. Re alternator V generator, you're absolutely right, but I just want to get it on the road as quickly as I can without too many mods right now (hence my change of heart on lowering it for now). It's not stored at my place, so I want to get it registered and get it home, then I can start to play with it. Whatever happens, the body will be kept as is, except for a wash and some minor rust repairs. Regards, Martyn
|
|
|
|
|
 Logged
|
|
|
|
|
FC Dave
|
 |
« Reply #41 on: March 14, 2014, 10:27:24 PM » |
0
|
My Genny on the Inter run neg when charging now it is 12v neg earth.
|
|
|
|
|
 Logged
|
|
|
|
|
hsv-001
|
 |
« Reply #42 on: March 15, 2014, 08:19:29 AM » |
0
|
Originally they were positive to chassis . Haydn
|
|
|
|
|
 Logged
|
|
|
|
|
mickrat
|
 |
« Reply #43 on: March 15, 2014, 10:04:01 PM » |
0
|
To check the correct polarity. Check the wiring connections on the coil negative side of the coil to the distributor. Look for marking on the coil indicates negative to earth. Positive side of the coil to the distributor indicates positive earth. To change polarity to negative earth. Momentary flash a live power to the field terminal the small one on the generator. Change the two wires over on the coil. And if it is fitted with a amp meter swap the wiring over on the terminals. Or the amp meter will read in the opposite direction.
|
|
|
|
|
 Logged
|
1957 fe special sedan (rusty one ) 1958 business sedan ( good one )
.
|
|
|
Crumpsnr
Senior Member
   
 Offline Offline
Model: FC
Posts: 286
Shellharbour NSW

|
 |
« Reply #44 on: March 18, 2014, 10:49:25 PM » |
0
|
Hi Mickrat, thanks for the info. Wish I'd heard from you before I took the genny to an auto electrician! He checked it over and the regulator as well, so it wasn't a total wasted exercise.
I'll hopefully set up the seat this weekend. Unbolted the front clip last weekend but won't lift it off until I have room at home to work on it. Not much to show in the way of photos yet but once there's something interesting to show I'll stick up some more.
I've been cleaning rust off parts using electrolysis the last couple of days. Wow, how easy and great results. Will put up some photos soon.
Call on the brains trust - What's a good method of flushing out and then sealing a fuel tank that's full of crud? Steam clean and POR15? Any other suggestions?
Regards, Martyn
|
|
|
|
|
 Logged
|
|
|
|
Crumpsnr
Senior Member
   
 Offline Offline
Model: FC
Posts: 286
Shellharbour NSW

|
 |
« Reply #45 on: March 20, 2014, 08:10:00 PM » |
0
|
Hi all, these photos are of a couple of exhaust hangers that I'll be using on the truck, kindly provided by FCDave. Thought I'd show the effect of rust removal using electrolysis. Both hangers were identical in finish before i gave one the treatment. Bucket of water + mix in some laundry soda (not baking soda), using a slot car 12v transformer, hook negative to the workpiece to be cleaned, positive to a sacrificial piece of mild steel, drop both in the water without them touching and give it some time. This bracket was in overnight. I did a couple of scrubdowns during the process to get rid of paint remnants that had gone very soft and just needed a light brushing to be removed. Once the piece is done the rust is gone but it has a very fine black powder covering. An hour or so in a bath of vinegar softens that and then a light scrub with a fine wire brush and it's done. Get WD40 on straight away if it's a part that won't be painted as surface corrosion begins immediately. If it's a part to be painted I'd suggest primer or sealer immediately. Regards, Martyn 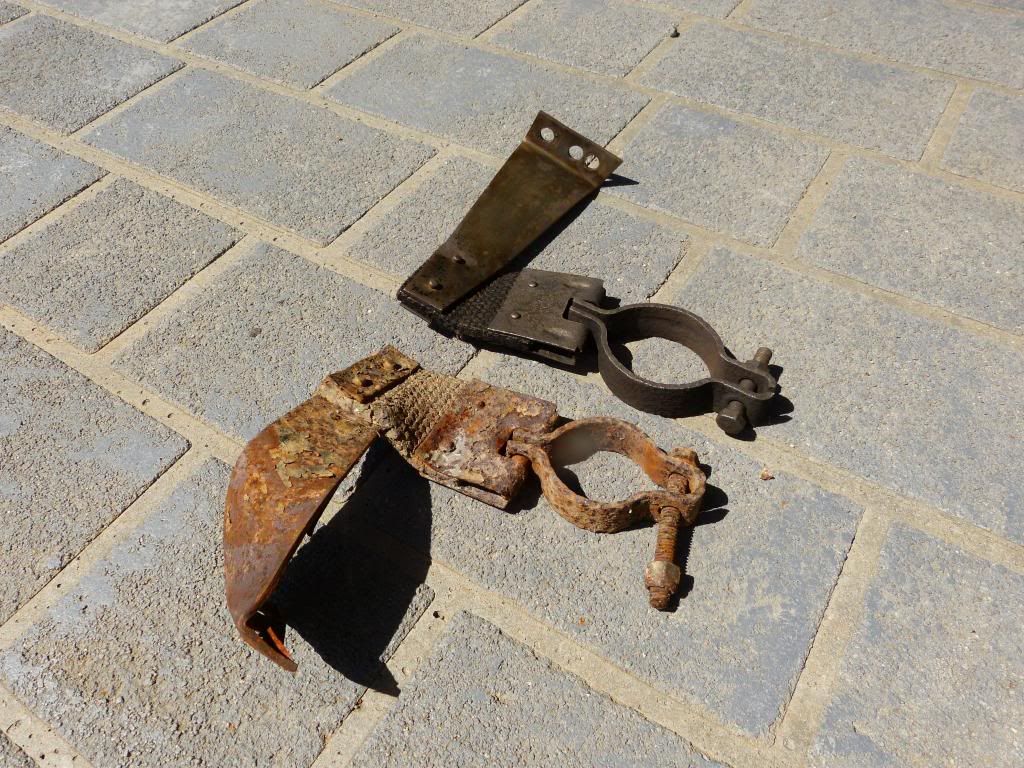 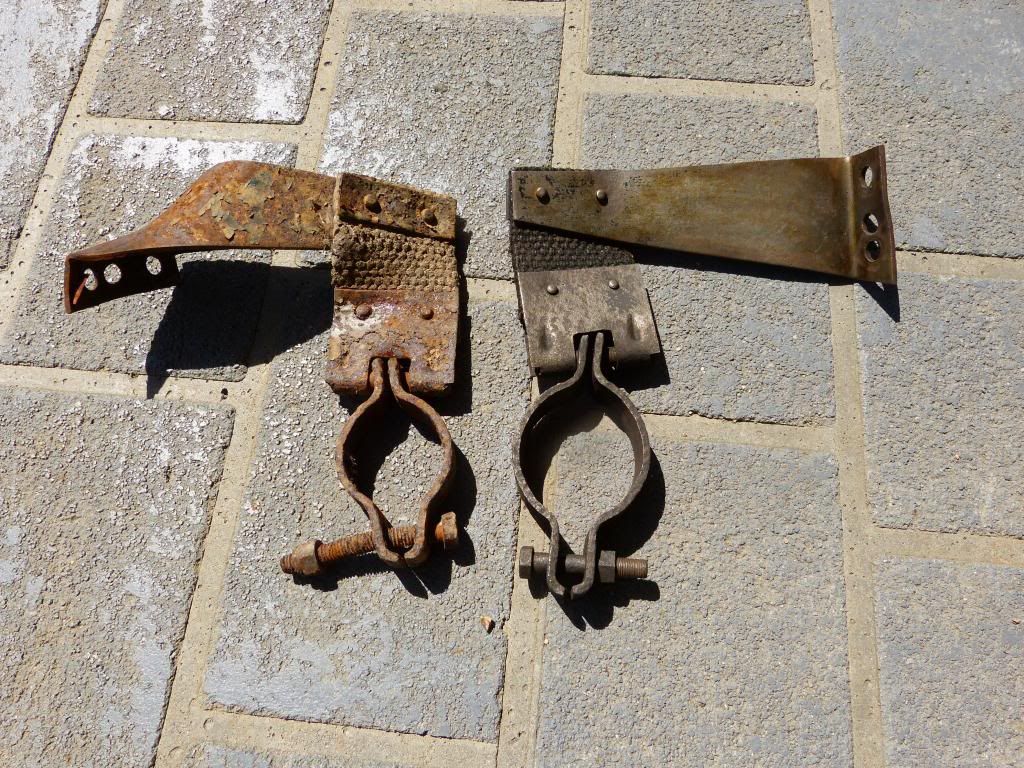 |
|
|
|
|
 Logged
|
|
|
|
|
hsv-001
|
 |
« Reply #46 on: March 21, 2014, 07:56:24 AM » |
0
|
I don't have the temperament for it . I just grab an angle grinder with a wire wheel . I sometimes pay for it though as I've had the grinder [and some nasty scars] in some strange places . I'll give it a try down the track on my three window project . Cheers Haydn
|
|
|
|
|
 Logged
|
|
|
|
Crumpsnr
Senior Member
   
 Offline Offline
Model: FC
Posts: 286
Shellharbour NSW

|
 |
« Reply #47 on: April 11, 2014, 11:39:16 PM » |
0
|
Hi all, Making progress. Fitted up the Mitsubishi seat, and it fits well. It lifts up nicely and the back cushion folds forward too. Picked up a VL Commodore V8 radiator for it today, which will also cover the V8 conversion further down the line. 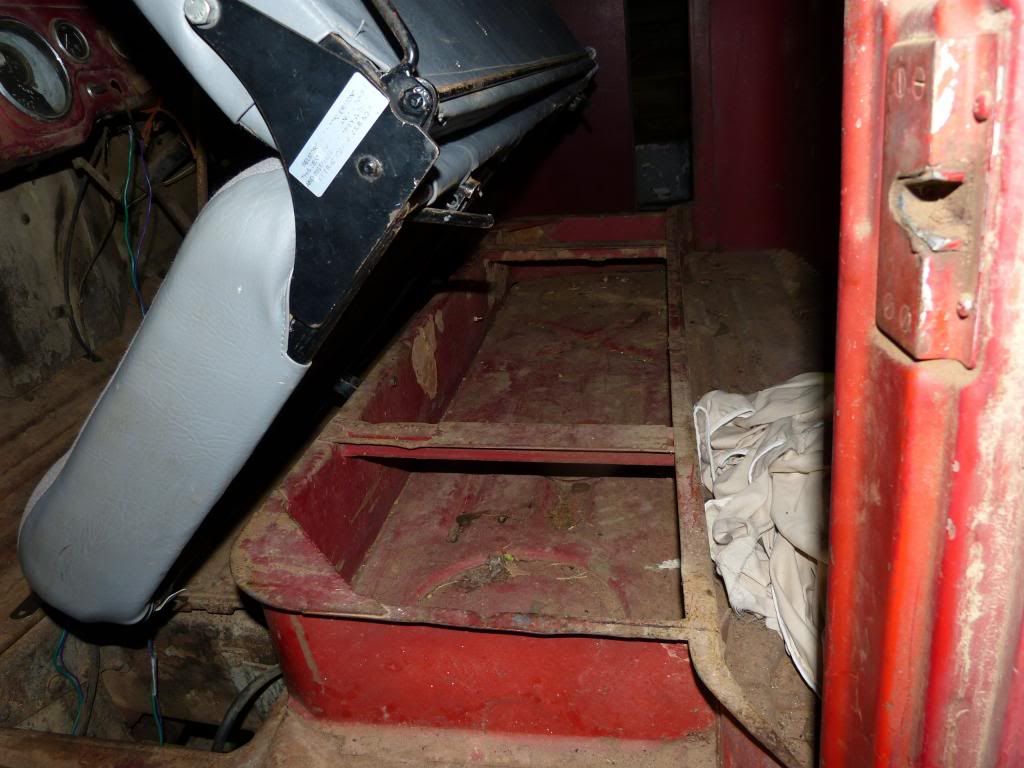 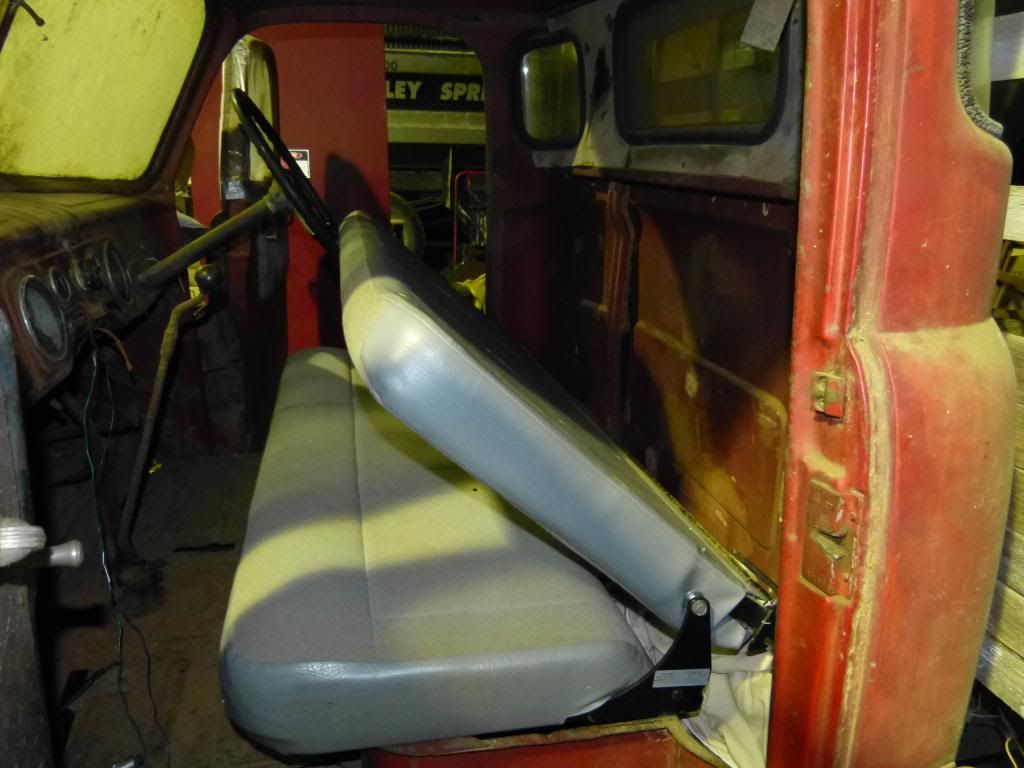 Still hasn't had a wash yet. 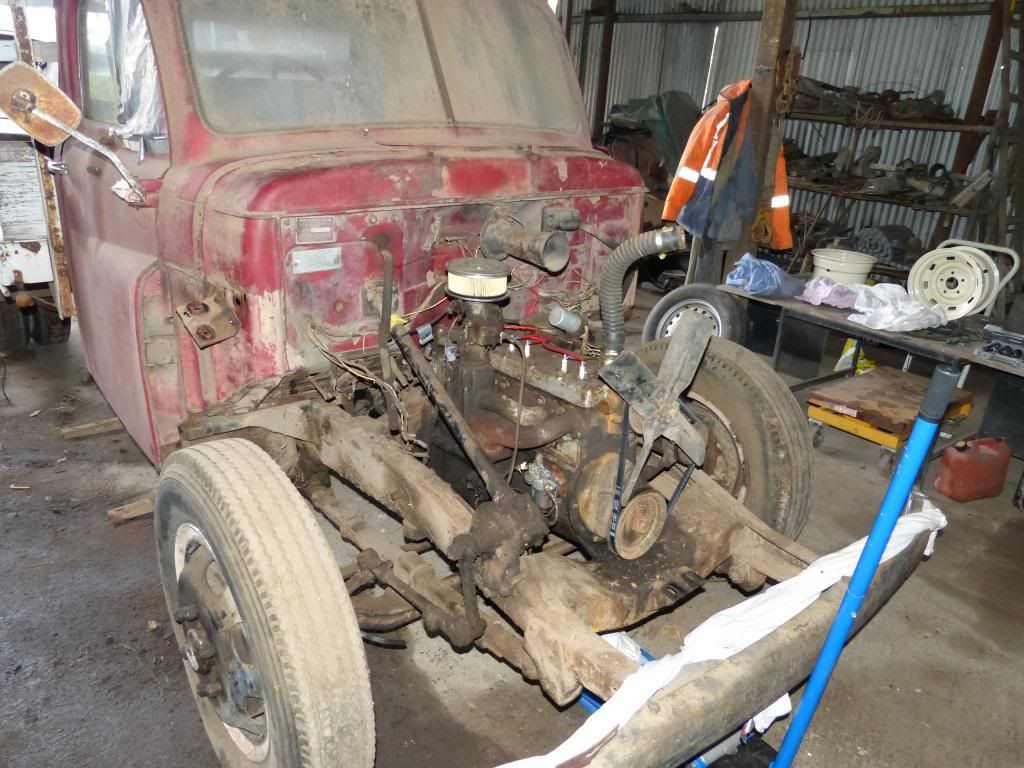 Front clip is off for rust repairs, plus gives me a chance to sort the headlight wiring and fit up the front parkers/blinkers. One thing to watch out for, bought some fancy schmancy what was sold to me as LED combined parkers/blinkers at the Clarendon swap meet a month or so ago, put them on the shelf till I was ready to use them. Pulled them apart the other night and bugger me if there's not a twin element incandescent bulb inside, not LED. Still, they'll do the job but not happy at being caught out. 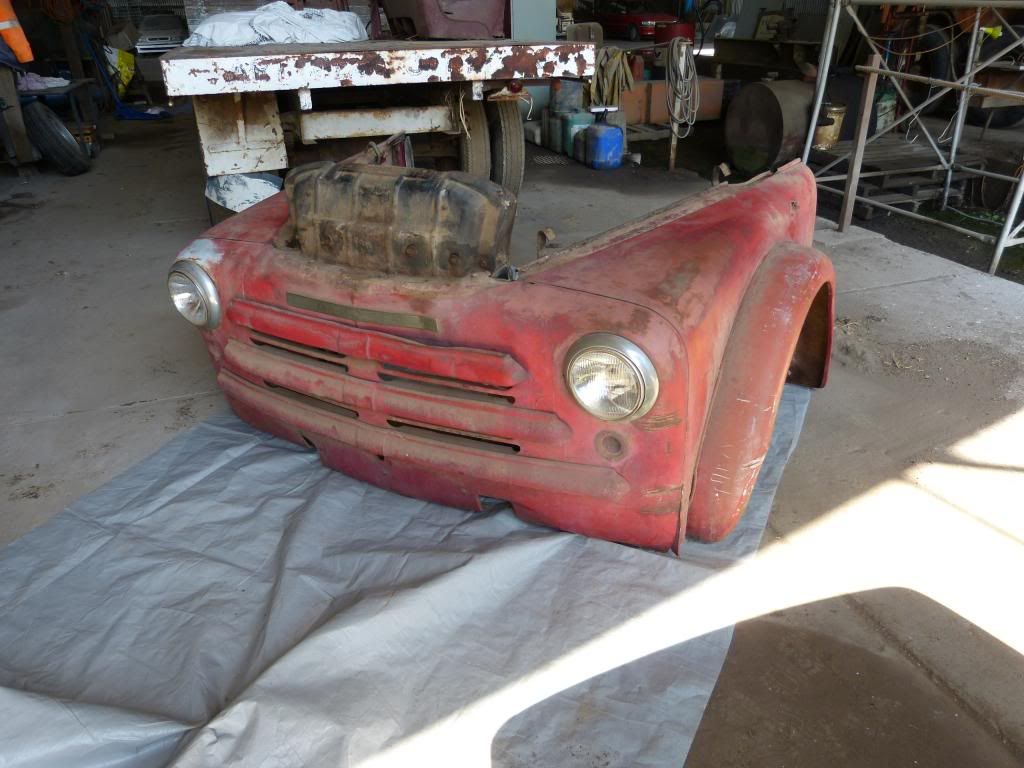 Also, found out something tonight. I've always gone through this routine of exporting files from my photo library, then dragging to Photobucket. Found out by accident that I can drag straight from iPhoto into Photobucket without exporting. Probably I'm the only person that didn't know that, but just in case, thought I'd put it out there  Stay dry (not easy on the East Coast at the moment). Martyn |
|
|
|
|
 Logged
|
|
|
|
|
hsv-001
|
 |
« Reply #48 on: April 12, 2014, 09:05:56 AM » |
0
|
The seat looks good . Have you thought about H4 headlights [they already have the park lights in them ,this is good because if you blow a headlight it still lights up] .I like this because you don't get pinched, then I would use those magnified amber LED lights you can buy on ebay under the original lenses .I'm just thinking out loud .Keep the posts coming .Haydn
|
|
|
|
|
 Logged
|
|
|
|
Crumpsnr
Senior Member
   
 Offline Offline
Model: FC
Posts: 286
Shellharbour NSW

|
 |
« Reply #49 on: November 21, 2014, 11:09:42 PM » |
0
|
Hi all, long time no post. Work on the truck is going well, although way slower than I'd like. Might have to start a new thread, for Crump Snr's third project. FCDave put me onto a "parts" truck that had the badges I was looking for. Turns out it's good enough to be a rebuild in its own right, so it's getting the treatment in the future. It's also the 108 model I wanted originally. It's now in storage until I get some time. Meanwhile the FC sits waiting some more work! Pics attached for info. I've been told I'll be sleeping in the next project I bring home. That's OK because it's gonna be an FC wagon!  Will try to post more often in future! Martyn 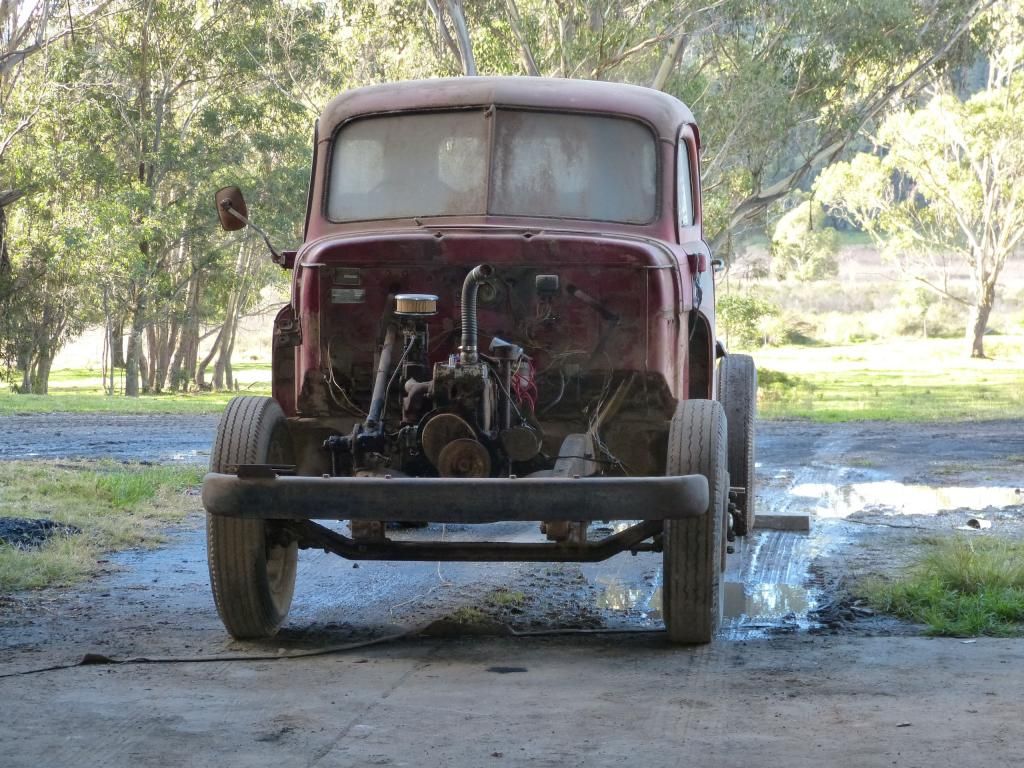 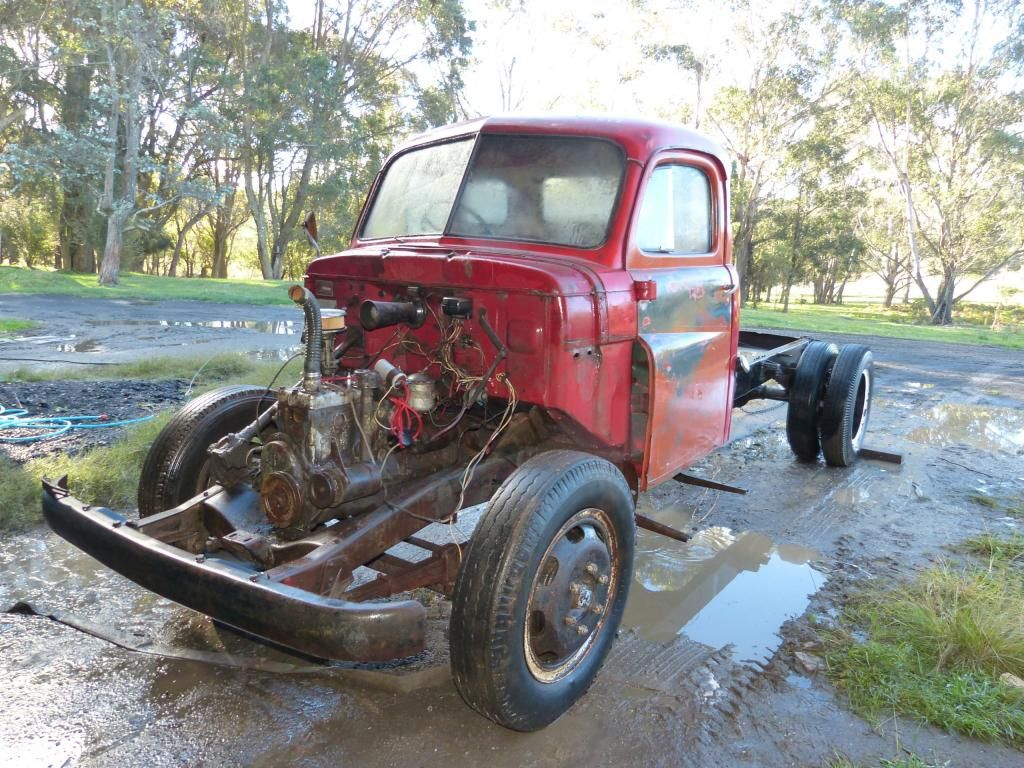 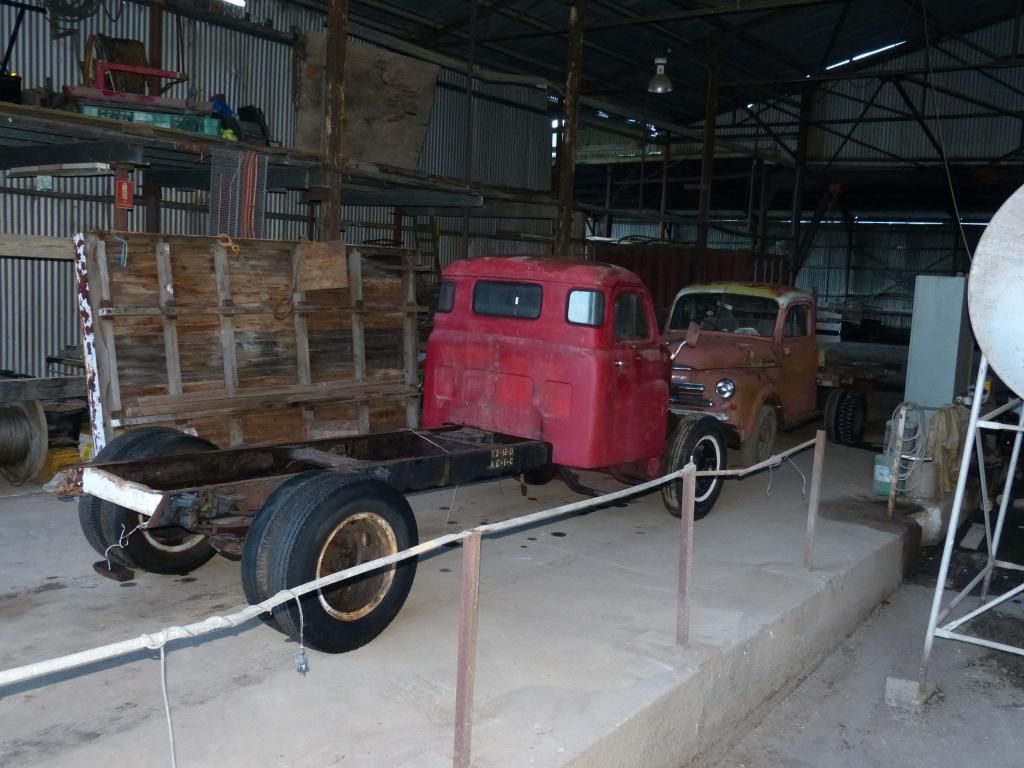 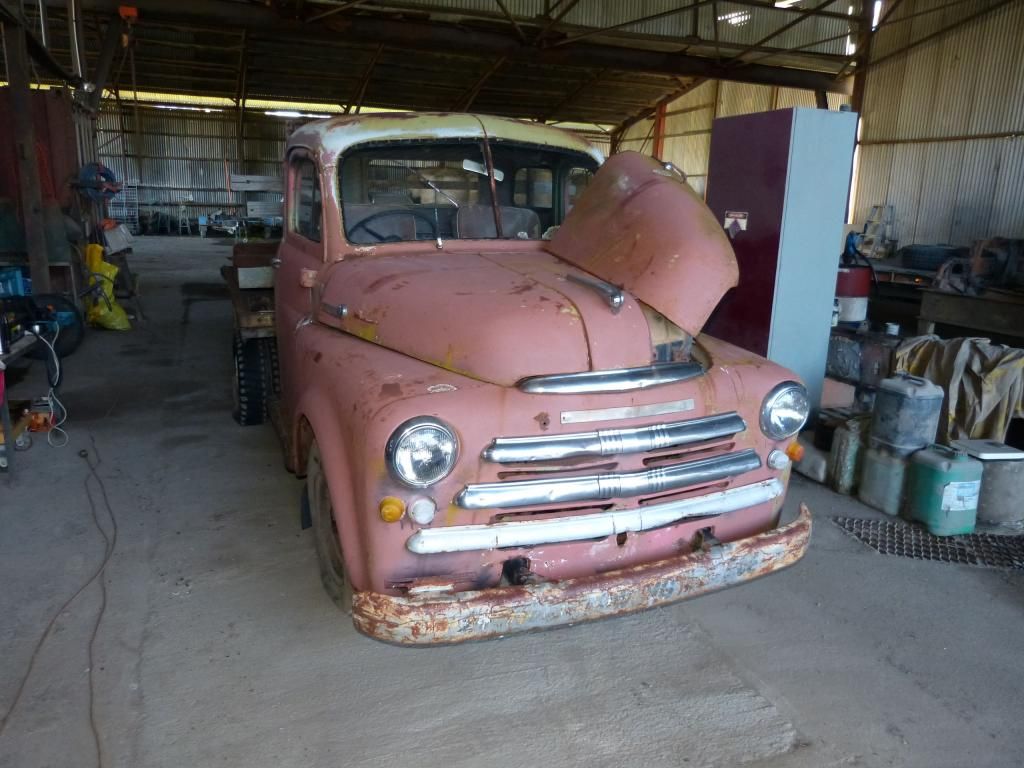 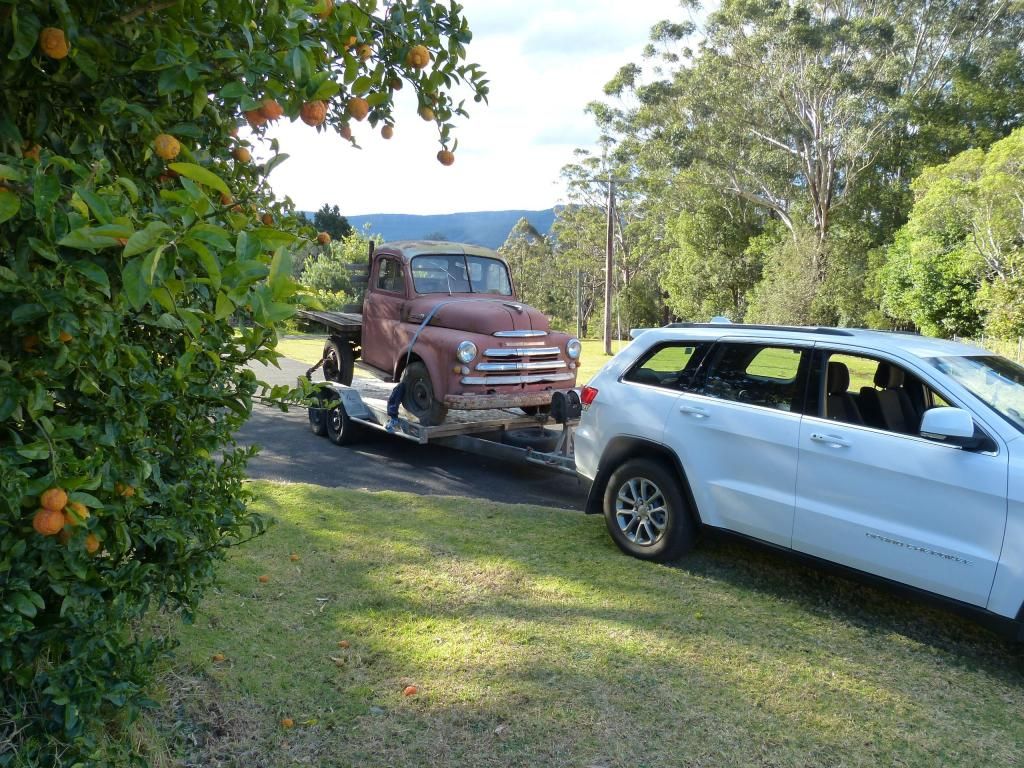 |
|
|
|
|
 Logged
|
|
|
|
|
NES304
|
 |
« Reply #50 on: November 21, 2014, 11:13:53 PM » |
0
|
You bought a Jeep!?
|
|
|
|
|
 Logged
|
|
|
|
Crumpsnr
Senior Member
   
 Offline Offline
Model: FC
Posts: 286
Shellharbour NSW

|
 |
« Reply #51 on: November 21, 2014, 11:23:15 PM » |
0
|
If I had a dollar for every time I've heard that!!  However, very happy with it, and now I can pull a trailer I don't need to try to carry the FC on the back of the truck either! Although it's still a setup I'd like to get working in the future. For now just happy to get the truck registered as standard. |
|
|
|
|
 Logged
|
|
|
|
|
NES304
|
 |
« Reply #52 on: November 22, 2014, 12:13:24 AM » |
0
|
If I had a dollar for every time I've heard that!!  I know the feeling!!! Here's mine  |
|
|
|
|
 Logged
|
|
|
|
Crumpsnr
Senior Member
   
 Offline Offline
Model: FC
Posts: 286
Shellharbour NSW

|
 |
« Reply #53 on: November 22, 2014, 07:36:37 AM » |
0
|
Niiiiice!  |
|
|
|
|
 Logged
|
|
|
|
|
hsv-001
|
 |
« Reply #54 on: November 22, 2014, 09:44:01 AM » |
0
|
You can get messed up trying to use LED's for indicators . Hard to get the flasher unit to work . Apparently I needed 2x50w 3.5 OHM resistors .What are OHMs ,thought it was the way that friends from West LA greet each other . Cheers Haydn
|
|
|
|
|
 Logged
|
|
|
|
Ol_Girl_58
tas-club
Senior Member
   
 Offline Offline
Model: FC
Posts: 945
getting there...

|
 |
« Reply #55 on: November 22, 2014, 06:42:42 PM » |
0
|
Nice! Is that an SRT, NES? And Martyn, another project? Good luck sweet talking the wife  |
|
|
|
|
 Logged
|
|
|
|
|
fe350chev
|
 |
« Reply #56 on: November 22, 2014, 06:59:05 PM » |
0
|
|
|
|
|
|
 Logged
|
Deano
Current Rides: 1958 "Black and White Taxi" FC special Sedan, 1957 FE special Sedan, BA Futura, 2015 VF Commodore, 1956 Austin Tipper Truck
|
|
|
Professor Grey
Junior Member
 
 Offline Offline
Model: FC
Posts: 98

|
 |
« Reply #57 on: November 23, 2014, 10:45:16 AM » |
0
|
You can get messed up trying to use LED's for indicators . Hard to get the flasher unit to work . Apparently I needed 2x50w 3.5 OHM resistors .What are OHMs ,thought it was the way that friends from West LA greet each other . Cheers Haydn
Hi Haydn, Most standard flasher cans won't operate unless the current flow is above a set level and most flick very fast if only one bulb is ok. This is so the driver is aware if there is a problem with bulbs, etc. You probably already knew this. The LED lamp has a very high resistance, (i.e. high ohms) compared with a standard lamp, and draws very low current (amps), so the flasher can thinks one or two bulbs are blown. The resistor is connected as if it is another bulb or two in the system, and draws enough current to trick the flasher can into thinking all bulbs are ok, but has the drawback that the driver won't know when he has a bulb problem unless he gets out of the car to have a look. Some (not all) electronic flashers don't need the resistor, and are a direct plug-in. These guys have them. http://www.brightlightautoparts.com/NEW_LED_LIGHT_ACCESSORIES.htmlIf you need a hand, email me. Always willing. Cheers, Prof. |
|
|
|
|
 Logged
|
You don't get this old by accident.
|
|
|
|
NES304
|
 |
« Reply #58 on: November 23, 2014, 12:17:13 PM » |
0
|
Nice!
Is that an SRT, NES?
Nope, didnt have the spare 20k for that engine. It's a diesel "BLACKHAWK" only limited run of these and very sought after. It has a blackout pack i.e. all the chrome badging etc is now black (except round the windows) and has swade/leather interior. Those 20's are standard! The black Blackhawk looks good to but I think its better in white. Dealers can't sell enough of this particular variant. I get a lot of questions about it too!   |
|
|
|
|
 Logged
|
|
|
|
|
hsv-001
|
 |
« Reply #59 on: November 23, 2014, 01:22:46 PM » |
0
|
Will the smaller truck fit on the tray of the larger . It would be an awesome display .Haydn
|
|
|
|
|
 Logged
|
|
|
|
|


