|
Fast_Eddie
|
 |
« on: November 12, 2004, 01:13:40 AM » |
-1
|
How it all began. January 2004. After an extensive search for an original rust free Station Sedan, I followed up an ad placed on this forum. The vehicle was located in Canberra, had been unregistered since 1986, and had been in the one family from new. A deal was struck, and a good mate of mine collected it. He couldn't resist stopping for this photograph. 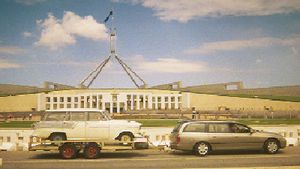 |
|
|
|
« Last Edit: April 18, 2008, 08:00:57 PM by customFC »
|
 Logged
|
|
|
|
|
Fast_Eddie
|
|
« Reply #1 on: November 12, 2004, 01:26:22 AM » |
-1
|
|
|
|
|
|
Logged
|
|
|
|
|
Fast_Eddie
|
|
« Reply #2 on: November 12, 2004, 01:36:15 AM » |
-1
|
Initially, the car was going to undergo a quick tidy up, including the engine bay and underside, as well as a respray of external surfaces. Interior was to remain in the car. The turning point came, however, when it was decided that sandblasting the underside of the car was a better option than spending a week under the car with a wire brush on an angle grinder. So, off came the front sheetmetal and running gear excluding the diff, and after much negotiation, the sandblaster agreed to get on his back underneath the car, with it lifted at a 45 degree angle. This is the result. A squeaky clean subframe and underside. 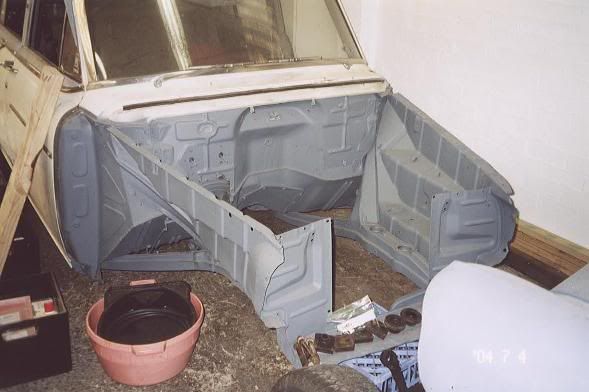 |
|
|
|
« Last Edit: November 19, 2004, 12:38:34 AM by Fast_Eddie »
|
Logged
|
|
|
|
|
Fast_Eddie
|
|
« Reply #3 on: November 12, 2004, 02:33:24 AM » |
-1
|
The sandblasting revealed very little rust. The passenger side front floor pan and crossmember were the worst effected, as well a minor spots at the base of the A pillars and rear dog leg. I started on some repairs, which, as shall be revealed later, weren't really up to scratch.  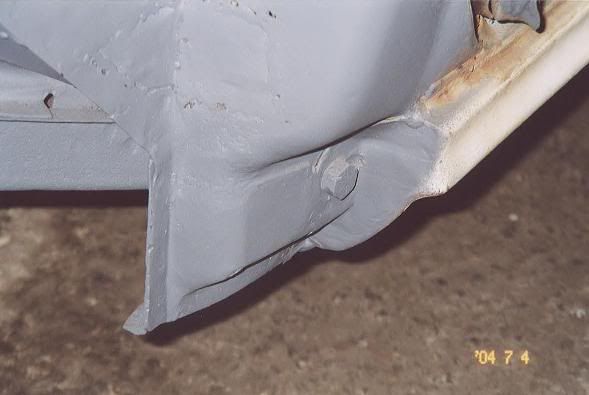 |
|
|
|
« Last Edit: November 19, 2004, 12:39:29 AM by Fast_Eddie »
|
Logged
|
|
|
|
|
Fast_Eddie
|
|
« Reply #4 on: November 12, 2004, 03:11:24 AM » |
-1
|
At this point I decided I needed to get some professional help (for the car, not my disorder). I'd owned the car for 9 months, and had only achieved two fairly ordinary repairs.
While I started stripping the car of panels, Adam started repairing them.
|
|
|
|
« Last Edit: November 12, 2004, 04:55:13 AM by Fast_Eddie »
|
Logged
|
|
|
|
|
FC0058
|
|
« Reply #5 on: November 12, 2004, 03:15:31 AM » |
0
|
Fast_Eddie
I look forward to seeing the rest of the photos to date. I remember way back to those first photos of the car posted on the forum.
The photos you put on here the other day will have boosted a few people to pull their fingers out. As we all know it is only a little over 4 months until we all start the long drive to Jindabyne.
|
|
|
|
|
Logged
|
Forgiveness is easier than permission.
|
|
|
|
Emu
|
|
« Reply #6 on: November 12, 2004, 05:02:31 AM » |
0
|
Hey Eddie,
Excellent post.
The original colours look similar to Hilda's. Is it Volcanic Grey over India Ivory? Are you going back to those colours or am I jumping ahead in the story here?
Looking forward to the full story.
Emu
|
|
|
|
|
Logged
|
|
|
|
|
Fast_Eddie
|
|
« Reply #7 on: November 12, 2004, 05:32:48 AM » |
-1
|
Emu,
It's actually granite grey over india ivory. I came very close to recreating an exact replica of my grandfather's wagon, (the root of the madness), which is india ivory over volcanic grey, but at the last minute decided to keep the ivory as the primary colour, as you see in the "before" photograph.
|
|
|
|
|
Logged
|
|
|
|
HAD 708
Senior Member

 Offline Offline
Model: FE
Posts: 638
Holdens and the Mighty Woodsmen truly magnificent

|
|
« Reply #8 on: November 12, 2004, 08:35:59 PM » |
0
|
Eddie
Nice wagon are you keeping it original? it will be great to see it at Jindabyne. Keep up the good work!!!
Brett
|
|
|
|
|
Logged
|
Brett Gillard
|
|
|
|
Fast_Eddie
|
|
« Reply #9 on: November 13, 2004, 12:30:52 AM » |
-1
|
Jim,
I don't like it when you put it like that. 4 months! So little time, so much to do.
Brett,
As original as they get. I debated long and hard over seat belts, but in the end decided to fit them. That shall be the only deviation.
(Apart from panel beating correct gaps, painting metal under sound deadener, seam sealing chassis members, preventing overspray.....you know....all the stuff Holden didn't quite manage in 1959)
|
|
|
|
« Last Edit: November 13, 2004, 03:57:01 AM by Fast_Eddie »
|
Logged
|
|
|
|
|
Fast_Eddie
|
|
« Reply #10 on: November 13, 2004, 12:35:05 AM » |
-1
|
When Adam commenced helping with the car, it simply started with repairing a couple of guards and the bonnet. 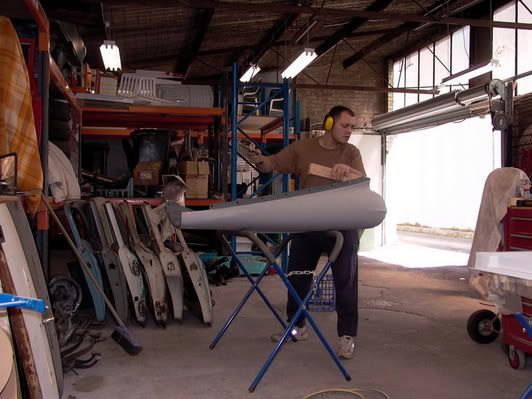 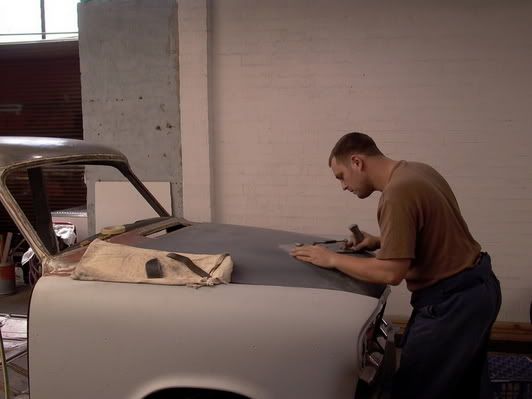 |
|
|
|
|
Logged
|
|
|
|
|
Fast_Eddie
|
|
« Reply #11 on: November 13, 2004, 12:38:54 AM » |
-1
|
As time rolled on, all the panels were removed from the car, stripped to bare metal by either blasting or paint stripping, and then etched, spray primered, rubbed back etc, ready for top coat. The following shot shows an assortment of "work in progress"  ...a very untidy shed and a ute hiding in the corner. |
|
|
|
|
Logged
|
|
|
|
|
Fast_Eddie
|
|
« Reply #12 on: November 13, 2004, 12:48:30 AM » |
-1
|
We paid considerable attention to achieving consistent and equal panel gaps. This involved installing and removing the front sheetmetal many times, and some local reshaping of corners, folds, edges and the like. You discover pretty quickly how these cars were put together in the factory, what parts were painted on the car, and what were installed after. You also realise, with a sense of foreboding, how bloody difficult it is going to be to get the guards and grill to come together for the final assembly, without scratching the paint. 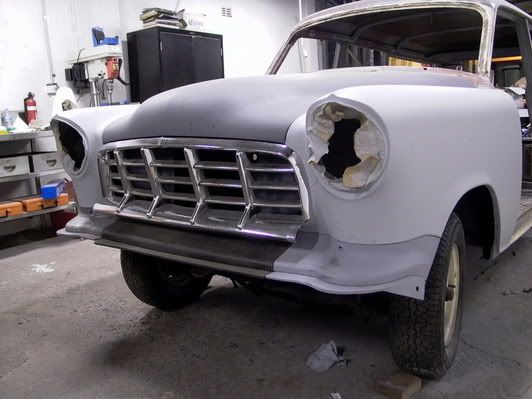 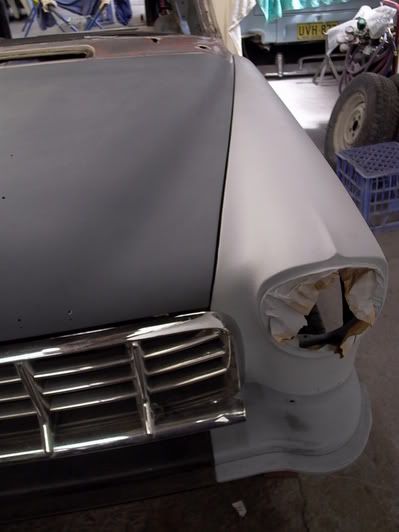 |
|
|
|
|
Logged
|
|
|
|
|
Fast_Eddie
|
|
« Reply #13 on: November 13, 2004, 01:04:00 AM » |
-1
|
Both guards are original, with no repair sections welded in, other than a filled aerial hole.
I searched for ever for a pair of mint guards. In the end, one came from my original car, the other a bargain on Ebay. Ironic as I paid considerbly more for other sets that turned out to be not quite as good, once blasted.
The choosen pair still required a fair bit of panel beating however, and like all the panels, were file finished. During the filing process, we were amazed to find most of the dents were reverse, ie proud of the surface, due to stones being thrown up from the front wheels, inside the guards.
We also took the time to ensure that the captive nuts at the trailing edge of the guard where intact and had good thread. Missing ones were replaced. Likewise with the headlight rim attachment. It's timely to check all these details at this point, rather than when you are offering up a freshly painted guard to a freshly painted body, and you find your nuts are missing!
If you are looking for good guards, check out the parts for sale section, as I have a number for sale that have been blasted and primed, and even have repair panels. When you add up the cost of the guard, the blasting and etching, and the cost of new repair panels, you will see that "they represent excellent buying at this price, ladies and gentlemen..."
|
|
|
|
|
Logged
|
|
|
|
|
Fast_Eddie
|
|
« Reply #14 on: November 13, 2004, 03:54:29 AM » |
-1
|
After repairing and filing the panels were painted with a single pack etch primer. 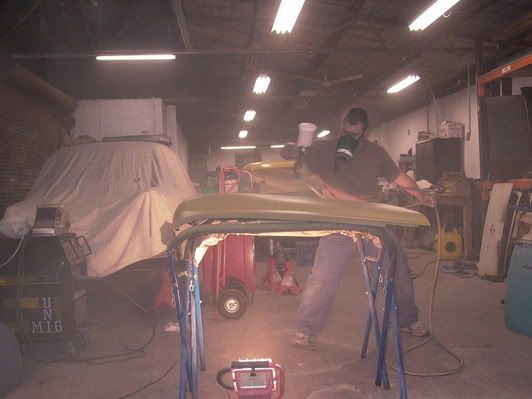 Initially, the roof caused quite a bit of constenation as the hoodlining was perfect, and I was reluctant to remove it. However, there were a couple of dents in the roof (we guessed from the ropes that had been used to tie down a tarp the car was stored under for a few years prior to me purchasing it) which needed repair. In the end, we carefully removed the hoodlining, and repaired the roof properly. Filing, heat shrinking and all. Not an ounce of filler went near it..... 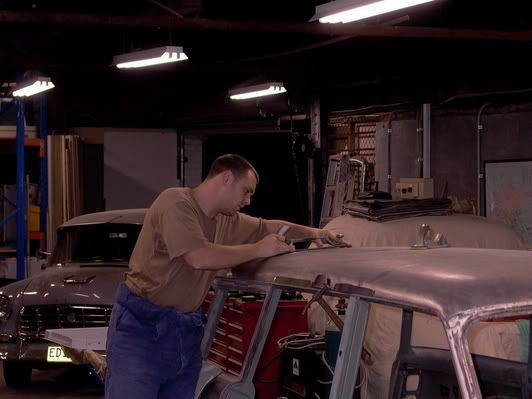 It was etch primed as well. 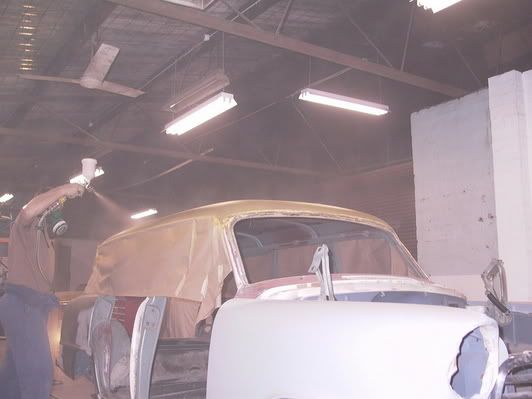 |
|
|
|
|
Logged
|
|
|
|
|
Fast_Eddie
|
|
« Reply #15 on: November 14, 2004, 06:17:01 AM » |
-1
|
This is how/why I was inspired to build a grey and white FC Holden Station Wagon. The following shots are of my grandfather's wagon which served my mother's family from 1962 - 1977. 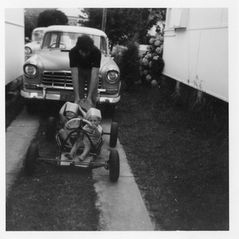 I'm the test pilot holding onto my crash helmet. Must be about 1973. A much earlier shot of the same car, in its original livery, around 1964. 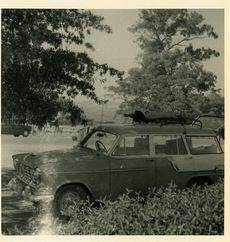 On a family trip to Noosa 1964. My grandfather and uncle. Pacific Highway still looks the same, however I wear my socks a little lower than grandpa did. 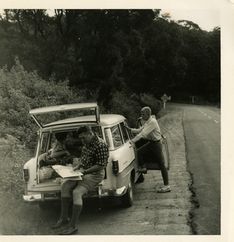 I was given the wagon in 1991, however upon inspection, 30 years at Dee Why rendered it past saving. I built a sedan instead, utilising all the running gear, and painted it the same colours. The wagon body was cut up (fell apart!) and tipped. The sedan being built 1992. 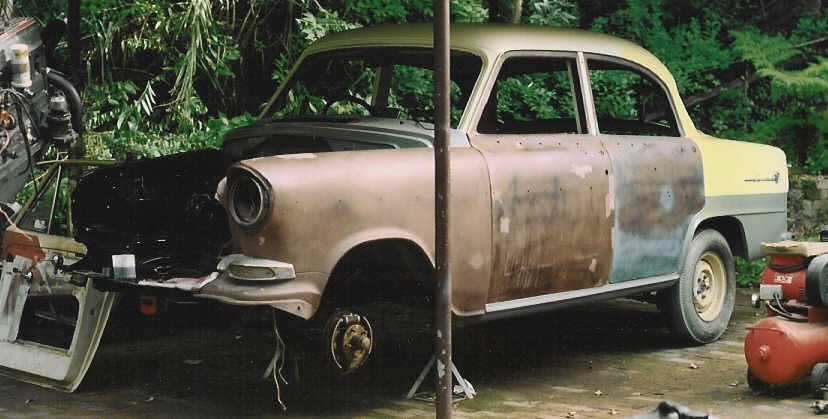 Wedding car with two other club cars 1995  Around 1998 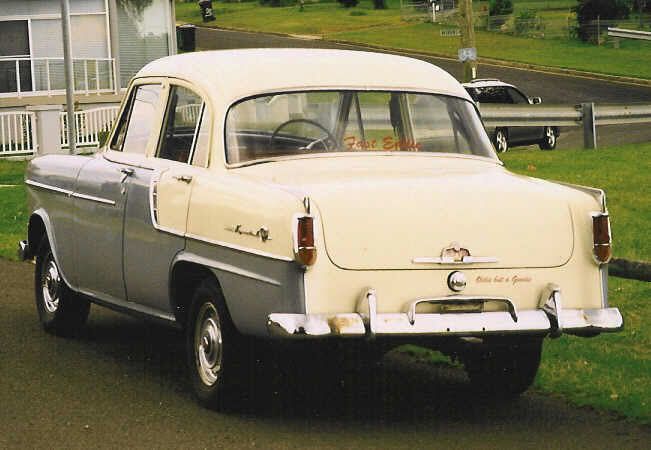  This car is now undergoing a V8 conversion....  |
|
|
|
« Last Edit: November 19, 2004, 12:42:24 AM by Fast_Eddie »
|
Logged
|
|
|
|
HAD 708
Senior Member
Offline
Model: FE
Posts: 638
Holdens and the Mighty Woodsmen truly magnificent
|
|
« Reply #16 on: November 14, 2004, 09:44:07 PM » |
0
|
Ed
Keep the pics coming as it is very informative and they are great to look at you are doing are show winner with that one!!! Great effort.
Brett
|
|
|
|
|
Logged
|
Brett Gillard
|
|
|
Spinner
nsw-club
Senior Member
Offline
Posts: 647
Whitewalls - more than 'just' a way of life.
|
|
« Reply #17 on: November 15, 2004, 12:51:29 PM » |
0
|
Ed,
Interesting story. Gives me some pointers for my wagon (long way off yet).
Interesting that you're keeping the original 'livery', although having been done again, this message might help the judges at the Nationals.
Cheers
Spinner
|
|
|
|
|
Logged
|
(0414) 49-6706. d5461 on Ebay.
|
|
|
|
Fast_Eddie
|
|
« Reply #18 on: November 15, 2004, 08:16:45 PM » |
-1
|
Spinner, With you permission, I think I shall reprint that message, perhaps as a sticker for a quarter window. It captures the essence of what I'm trying to achieve in a most succinct and original way.  |
|
|
|
|
Logged
|
|
|
|
|
Fast_Eddie
|
|
« Reply #19 on: November 16, 2004, 12:21:08 AM » |
-1
|
Back to the project... As the project progressed, the majority of the body, namely the 1/4 panels and roof were paint stripped using a 3M paint stripper. This appears to work better than the hardware store products, and is available at automotive paint supply shops. The process is a long, messy, and potential painful (when you get the stripper on bare skin), and as many have found before, the red oxide primer applied by Holden ends up being removed by thinners and scouring pads. At this stage, the scope of the project was expanding day by day. We decided that to effectively remove the paint from the door shut areas, the dash, pillars and cant rails, another trip to the sandblaster was the best thing to do. When the body returned, it was mounted on the rotisserie. Here I am mounting the front bracket to the firewall. It was originally made for an EK ute, so adaptor plates were made to pick up the FC bonnet hinge captive nuts. You can also see the result of the sandblasting to the windscreen surround and the plenum. This time it wasn't etched at the blasters, as we planned to deoxidine straight away. 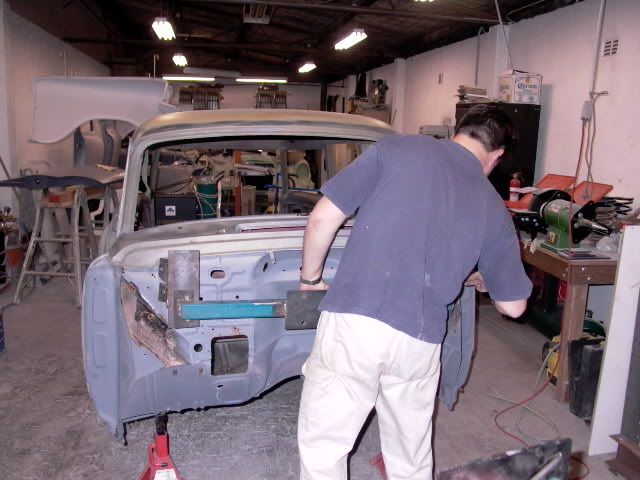 Fortunately an EK ute and a FC wagon are the same at the back, so the bracket bolted straight up. At this stage we had to use a hole saw to cut into the inner rail to replace the captive nuts as they were threaded and/or missing. Worthwhile, as the rear bumper will bolt on properly now. Oh yeah, and the body won't fall off the rotisserie.. 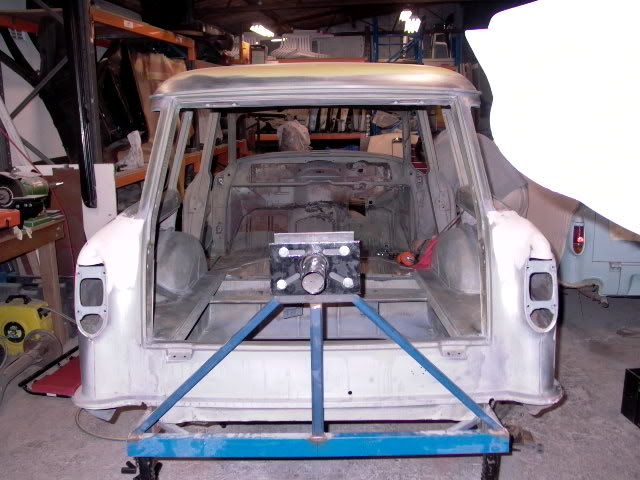 |
|
|
|
|
Logged
|
|
|
|
|


