|
Fast_Eddie
|
 |
« Reply #20 on: November 16, 2004, 12:28:19 AM » |
-1
|
The rotisserie was made by Chuck (Charles) using two engine stands as a starting point. As you can see they have been extensively modified. 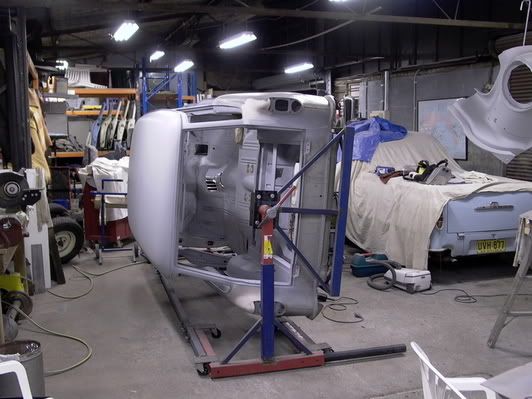 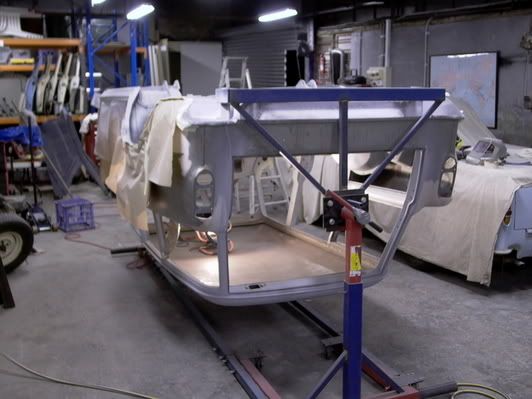 A very useful device! |
|
|
|
|
 Logged
|
|
|
|
|
Fast_Eddie
|
|
« Reply #21 on: November 16, 2004, 01:16:58 AM » |
-1
|
As I mentioned, I was reluctant to remove the headlining, however upon taking it out, we found quite an ugly situation underneath. It would appear that Holden, in their infinite wisdom, applied the sound deadening material direct to bare metal, not only on the floors, but to the inside of the roof as well. Although when the hood lining came out, the sound deadening looked in reasonable condition, the condition of the metal underneath was a different story. So much so, that the hood bows were drilled out and removed so that the roof could be properly treated. 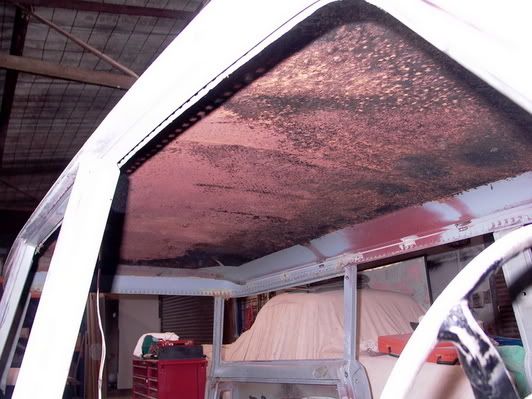 The sandblaster didn't want to touch it due to the risk of damaging such a large unsupported panel. So it was carefully sanded with the DA so as not to build up too much heat, and then treated with deoxidine. 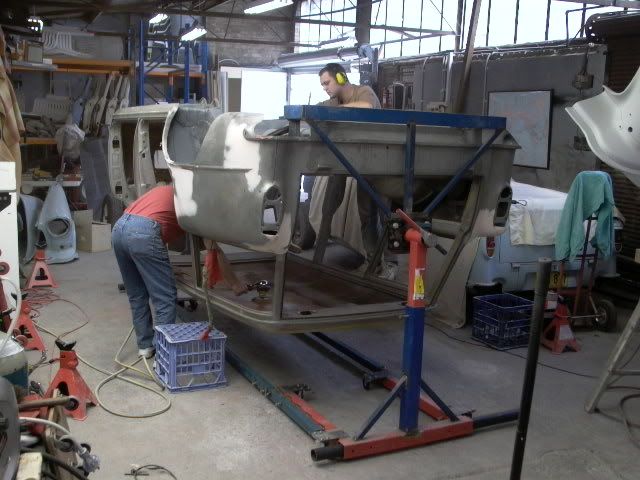 This is the result after rust removal (The marks are from dust). The whole panel shall be painted prior to reinstalling the braces, sound deadening and hoodlining.  |
|
|
|
« Last Edit: November 19, 2004, 12:45:40 AM by Fast_Eddie »
|
Logged
|
|
|
|
|
Fast_Eddie
|
|
« Reply #22 on: November 16, 2004, 01:35:41 AM » |
-1
|
As I mentioned, the second visit to the sandblasters was primarily for the door jambs etc. We also did the floor. 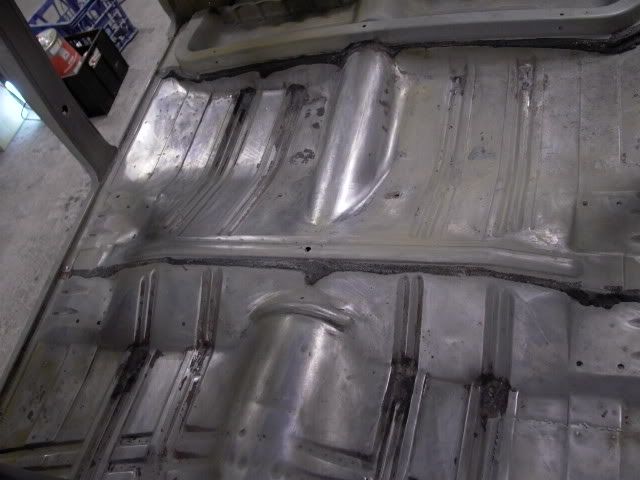 Pretty clean, however the shortcomings of my earlier repair became apparent. It can be seen in the bottom right hand corner of the above photograph. 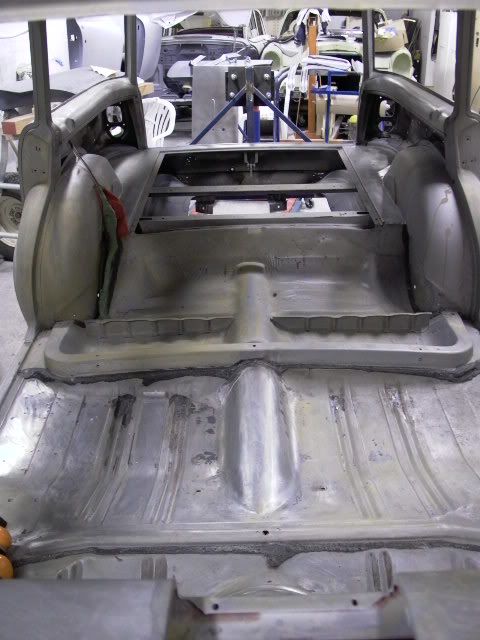 |
|
|
|
|
Logged
|
|
|
|
|
Fast_Eddie
|
|
« Reply #23 on: November 18, 2004, 11:13:39 PM » |
-1
|
The decision was made to remove the floor panel that I had previously welded in, to clean up the surrounding metal a little better, and then replace the panel in such a way that the repair would become undetectable. 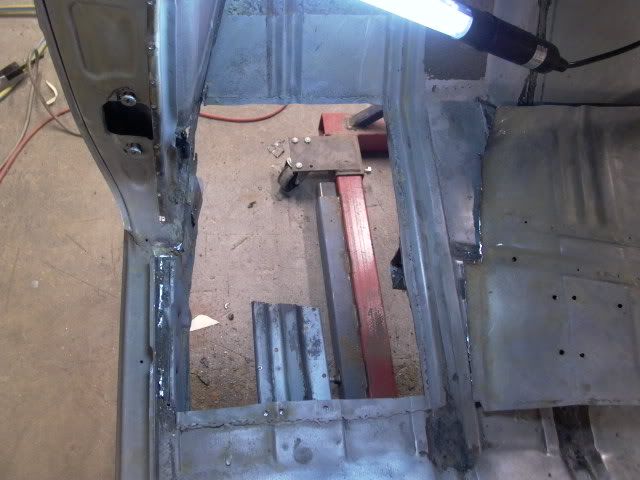 I was away at the time, however, Adam was still able to make some constructive comments about my previous work. 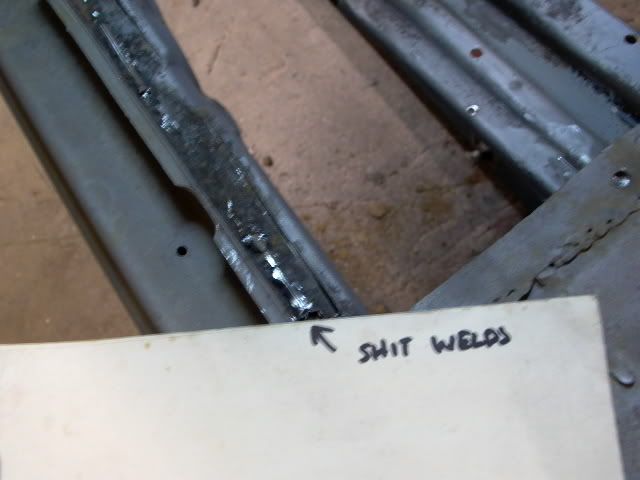 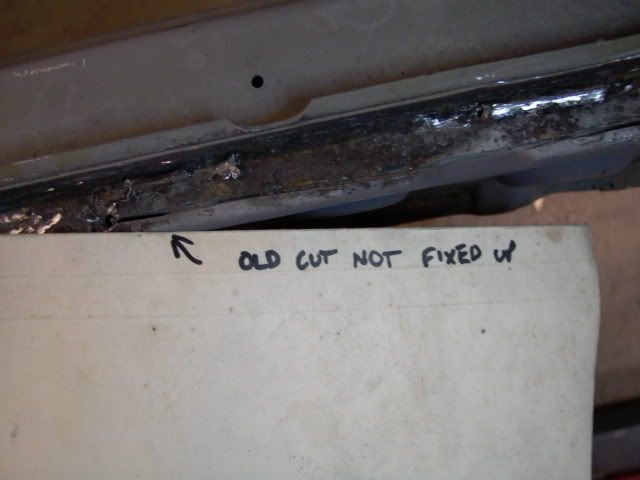 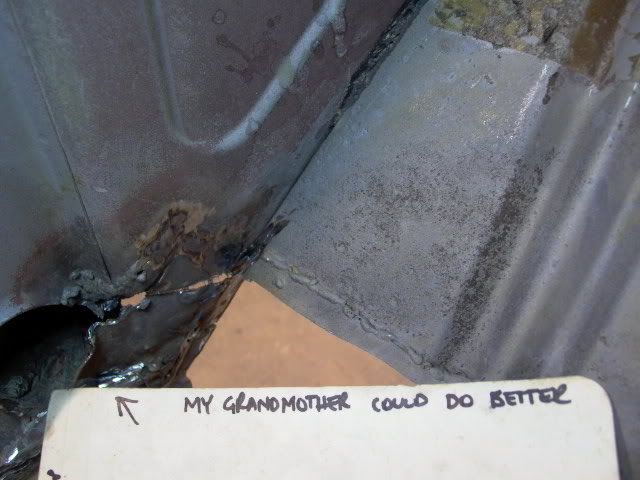 I think the following photo contains the best piece of advice 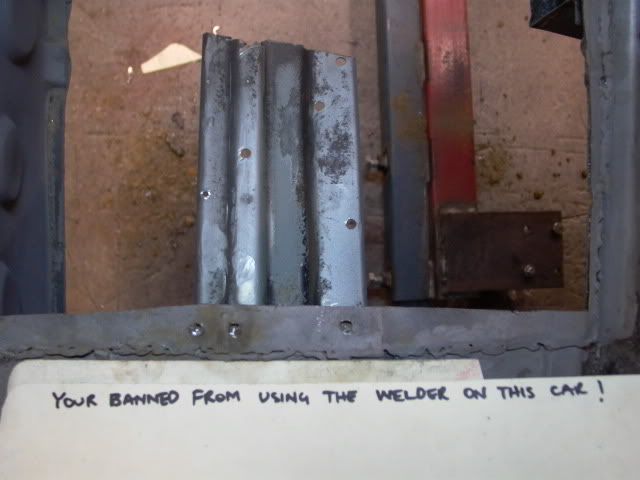 I had little to add, other than pointing out Adam's grammatical shortfallings. "Your banned", which should be "You're banned"  |
|
|
|
« Last Edit: November 19, 2004, 12:36:14 AM by Fast_Eddie »
|
Logged
|
|
|
|
|
Fast_Eddie
|
|
« Reply #24 on: November 19, 2004, 06:05:50 AM » |
-1
|
|
|
|
|
« Last Edit: December 20, 2004, 09:29:01 AM by Fast_Eddie »
|
Logged
|
|
|
|
|
Fast_Eddie
|
|
« Reply #25 on: December 20, 2004, 07:03:22 AM » |
-1
|
It's been a while since I've had a chance to update the project... So here is the last couple of month's work. Guards were treated with stone guard and then painted. 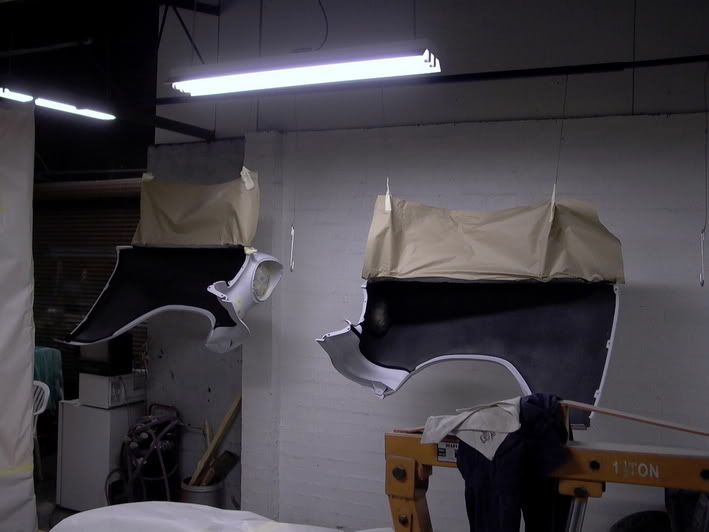  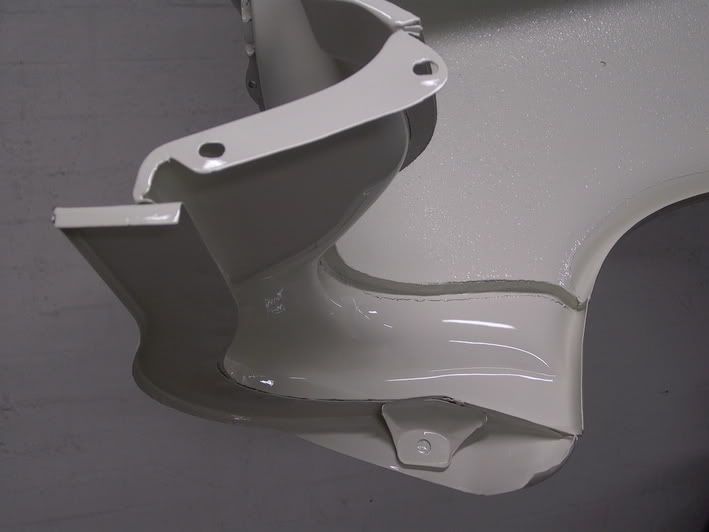 |
|
|
|
|
Logged
|
|
|
|
57bus
Junior Member

 Offline Offline
Posts: 49
In Need Of Another Project

|
|
« Reply #26 on: December 20, 2004, 07:48:32 AM » |
0
|
This is amazing keep up the good work, I will be refering back to this when I get mine.
Cheers
Dave
|
|
|
|
|
Logged
|
|
|
|
|
Fast_Eddie
|
|
« Reply #27 on: December 20, 2004, 07:51:08 AM » |
-1
|
Inside of the bonnet 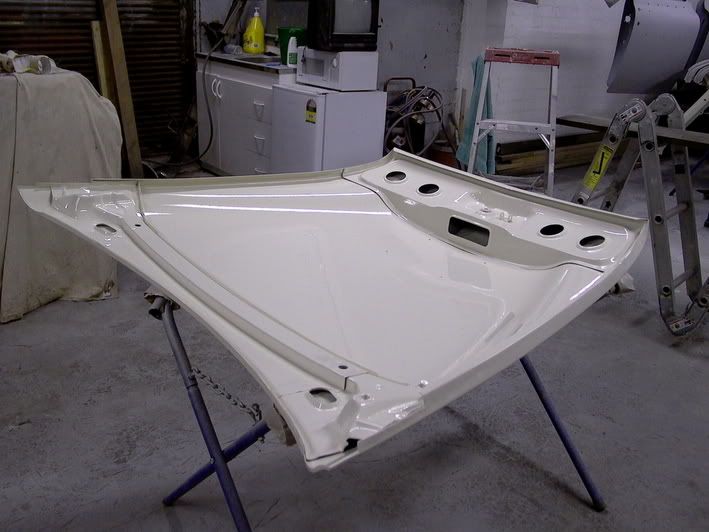 Firewall 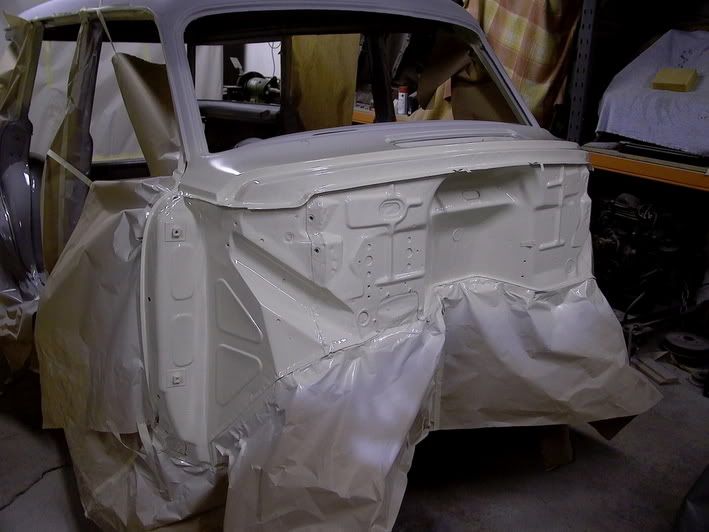 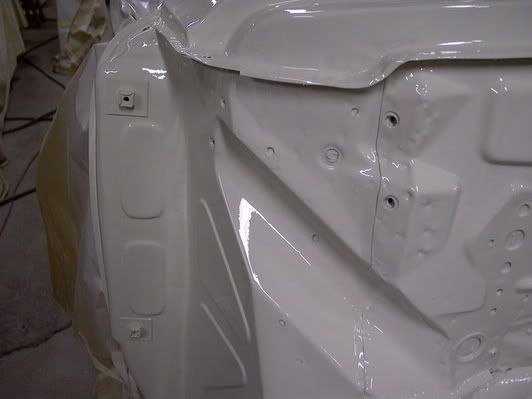 |
|
|
|
|
Logged
|
|
|
|
|
Fast_Eddie
|
|
« Reply #28 on: December 20, 2004, 07:55:37 AM » |
-1
|
The subframe has been repaired, prepared... 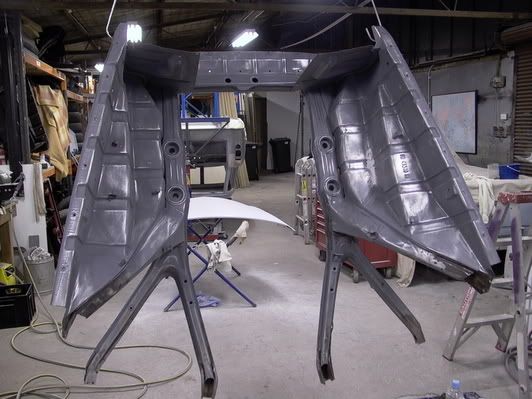 ... and painted. I have chosen to paint the subframe body colour to match the low mileage sedan I have, which has a factory painted body colour subframe, instead of the usual black. 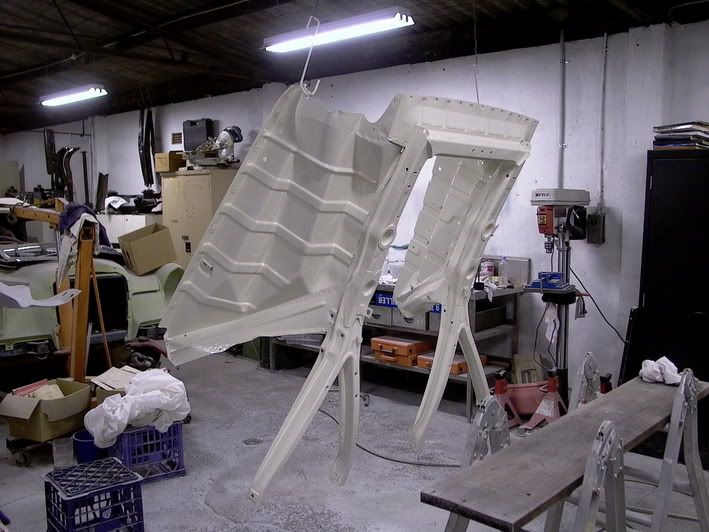 |
|
|
|
|
Logged
|
|
|
|
|
Fast_Eddie
|
|
« Reply #29 on: December 20, 2004, 08:04:07 AM » |
-1
|
This photograph represents the turning point of the project. Beginning to put it all back together. 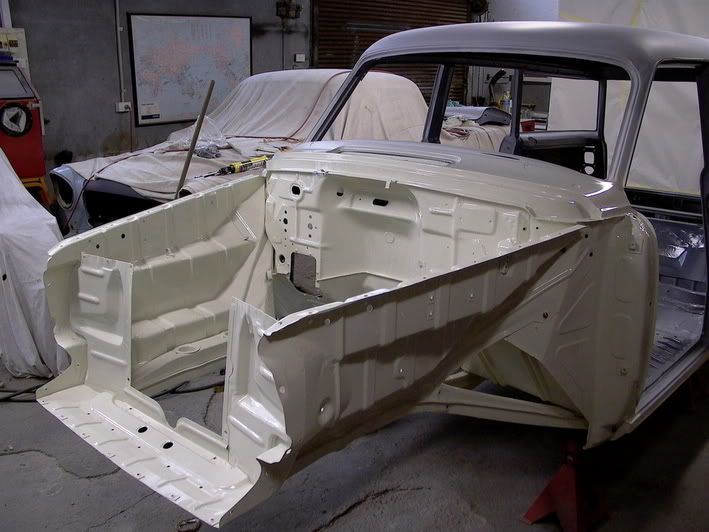 Note no scratches! My blood sweat and tears have also been cleaned off the fresh paintwork. It took four hours to install. (Don't attempt this by yourself at home, boys and girls!) 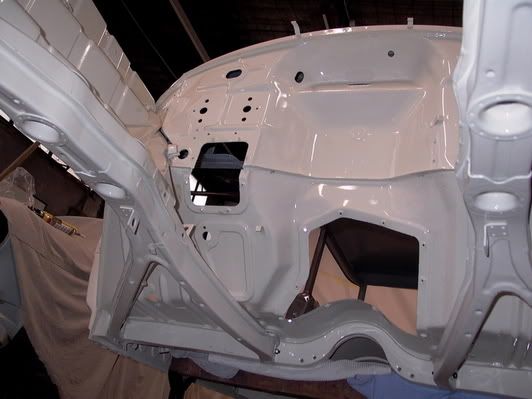 |
|
|
|
|
Logged
|
|
|
|
|
Fast_Eddie
|
|
« Reply #30 on: December 20, 2004, 08:08:09 AM » |
-1
|
I rebuilt the front end, after having the main components powdercoated in a satin black finish. The crossmember was actually a NOS item I picked up on ebay, which had upper and lower inner pivots already fitted. Here it is being lifted into position. 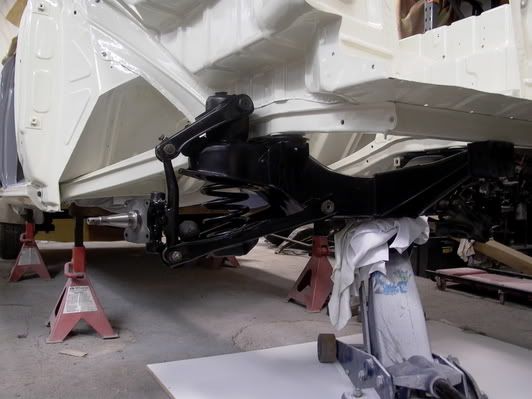 |
|
|
|
|
Logged
|
|
|
|
|
4hammers
|
|
« Reply #31 on: December 20, 2004, 09:34:46 AM » |
0
|
VERY, VERY impressive. I am inspired to do something with my car. It has been to long in the "Gunna" department.
I am looking forward to the end result of all your efforts.
Rob J
|
|
|
|
|
Logged
|
WTB..FE FC Commercial...Stock plz
|
|
|
|
Fast_Eddie
|
|
« Reply #32 on: December 20, 2004, 09:40:14 AM » |
-1
|
Thanks for the comment, Dave & Rob. Half the fun of something like this is sharing it with "like minded" people. I deliberated for some time as to whether I would install seat belts or not. The car isn't intended as a daily driver, but in the end, I decided it was worthwhile to put safety first. I have never been a fan of the bolt through the B pillar seat belt mounting, so Adam came up with a heavy duty solution. It involved opening up the pillar by drilling out the spot welds and folding back the inner plate. 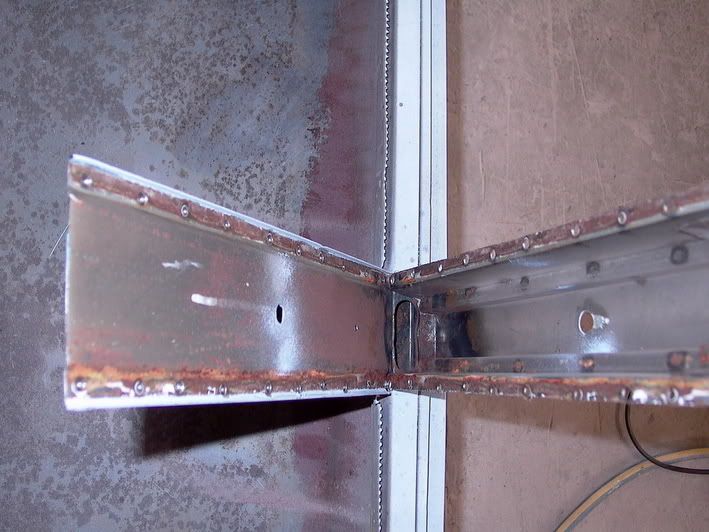 Making up some internal braces out of cut down RHS. 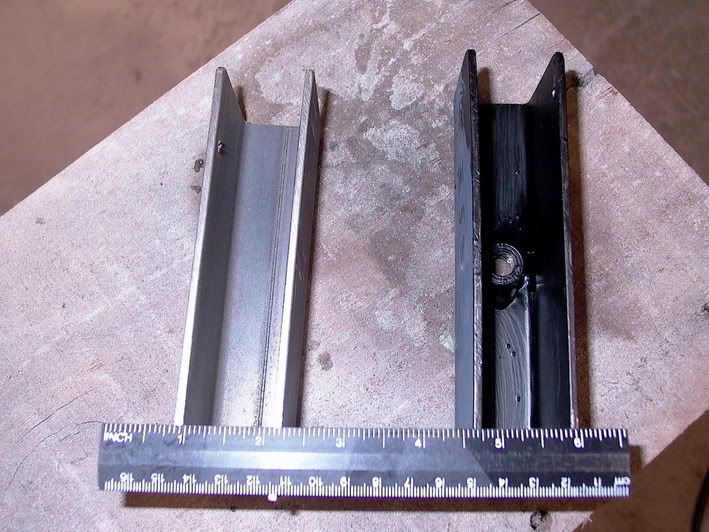 And then welding them into the pillar. Note that Adam had to fold back each side of the pillar as well to enable the tip of the mig close enough to weld the C channel in properly. 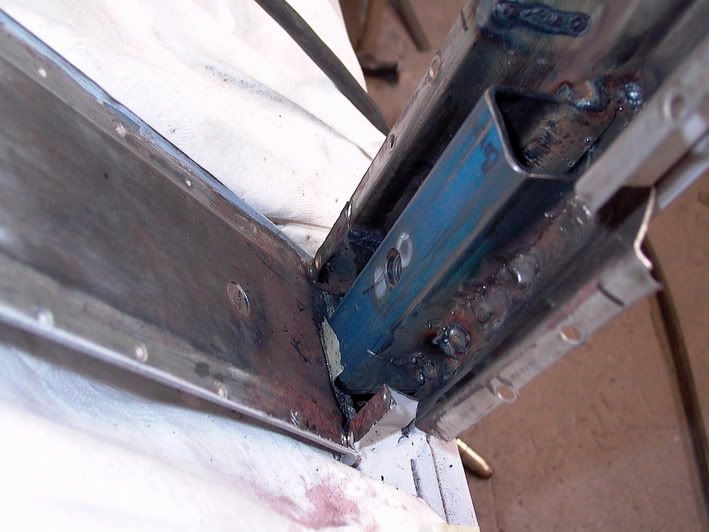 To make it neater on the underside, we welded in the plates with captive nuts to the underside of the floor. They were shaped to follow the contours of the floor pans. 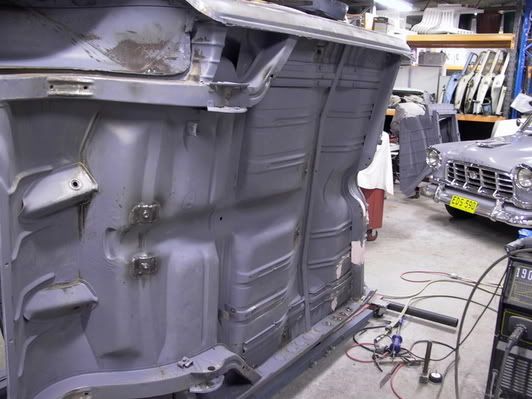 After completing the seat bolt mountings, the floor was prepared for primer and paint. 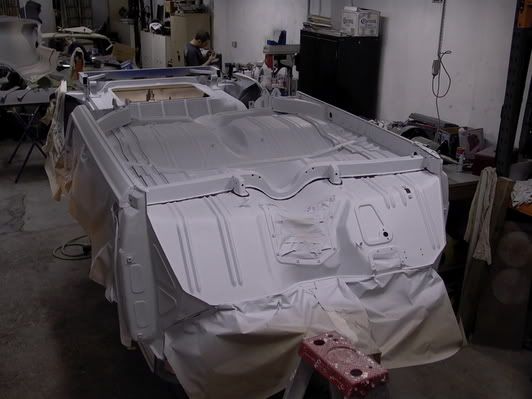 I decided to paint the whole underside of the car in the body colour. I'm looking forward to many hours of cleaning bugs and tar off the India Ivory floor. 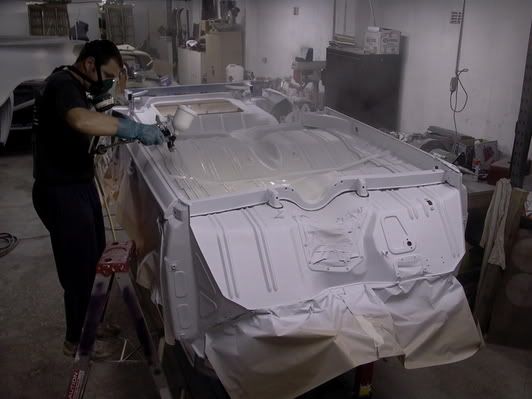 |
|
|
|
« Last Edit: December 20, 2004, 10:10:29 AM by Fast_Eddie »
|
Logged
|
|
|
|
oldgmh
Junior Member
Offline
Posts: 92
I love YaBB 1G - SP1!
|
|
« Reply #33 on: December 20, 2004, 09:45:05 AM » |
0
|
What an excellent job. I wish I had the skills and patience to carry out such work.
On the other hand - Do you want to sell it when you're finished?? As if!!
Well Done.
Earlee
|
|
|
|
|
Logged
|
|
|
|
|
Fast_Eddie
|
|
« Reply #34 on: December 20, 2004, 10:01:58 AM » |
0
|
Thanks Earlee.
I actually don't have the skills or patience either.
Adam, who is a trade qualified panel beater spray painter, has been doing all the panel and paint work.
I've got the good job - putting it all back together.
Regards
Edward
|
|
|
|
|
Logged
|
|
|
|
|
Fast_Eddie
|
|
« Reply #35 on: December 20, 2004, 10:05:07 AM » |
0
|
|
|
|
|
|
Logged
|
|
|
|
|
Fast_Eddie
|
|
« Reply #36 on: December 20, 2004, 10:17:12 AM » |
0
|
The whole inside of the car was painted to match the door shut and frame colour. After much deliberation, soul searching, review of countless colour chips and charts, a choice was made... 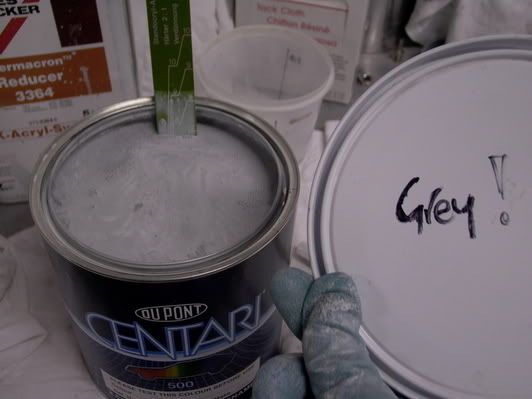 Other than the dash, the whole interior of the car, including floor pans and roof was painted in this most traditional, popular, and dare I say, appropriate colour - Granite Grey. 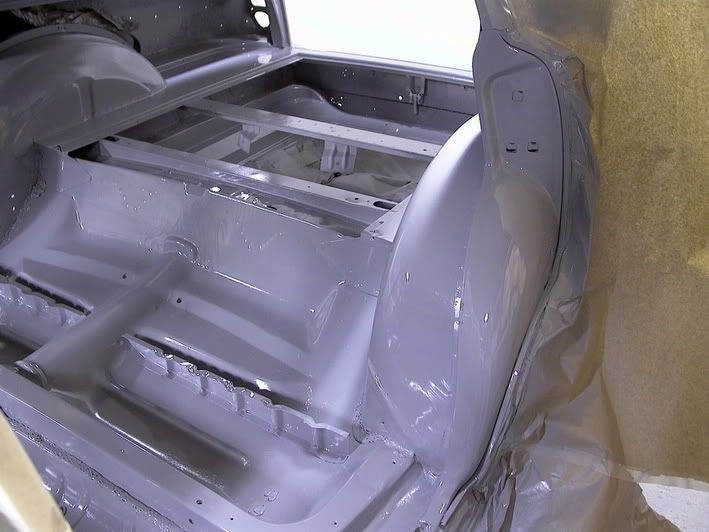 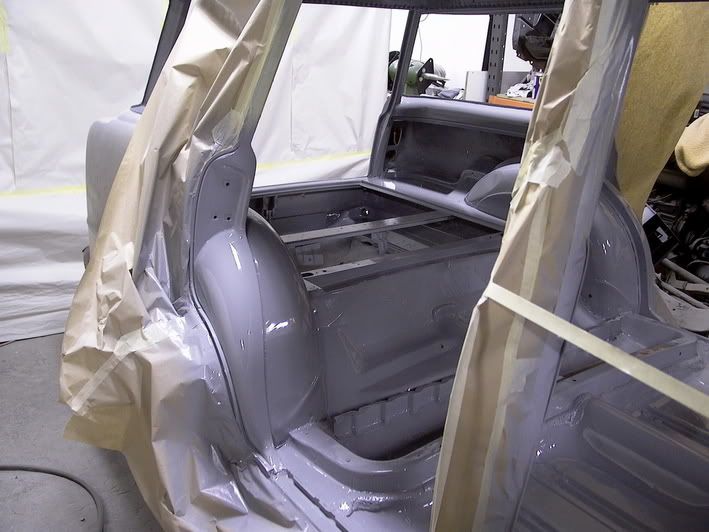 |
|
|
|
|
Logged
|
|
|
|
57bus
Junior Member
Offline
Posts: 49
In Need Of Another Project
|
|
« Reply #37 on: December 20, 2004, 11:26:29 AM » |
0
|
Great idea with the seat belt retainers, I did sort of the same thing with my kombi, nothing spoils a car more than seeing a galv bolt in the B pillar.
Cant wait till I get one, itching to get back in the shed.
Great to see that you are not taking any short cuts, it will pay off in the long run.
Cheers
Dave
|
|
|
|
|
Logged
|
|
|
|
|
Fast_Eddie
|
|
« Reply #38 on: December 20, 2004, 10:56:38 PM » |
0
|
Here are some photographs of the underside, after repairs and painting, but prior to installation of the subframe. 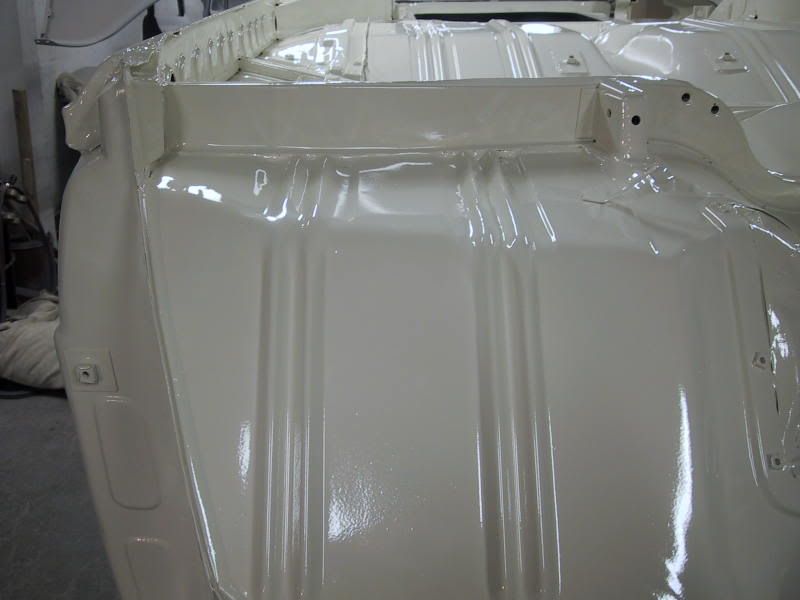 A hole saw was used to provide access to the sill panels for cleaning and treatment. These shall not be welded up, instead sealed with a grommet and sealer to enable periodic fish oiling. 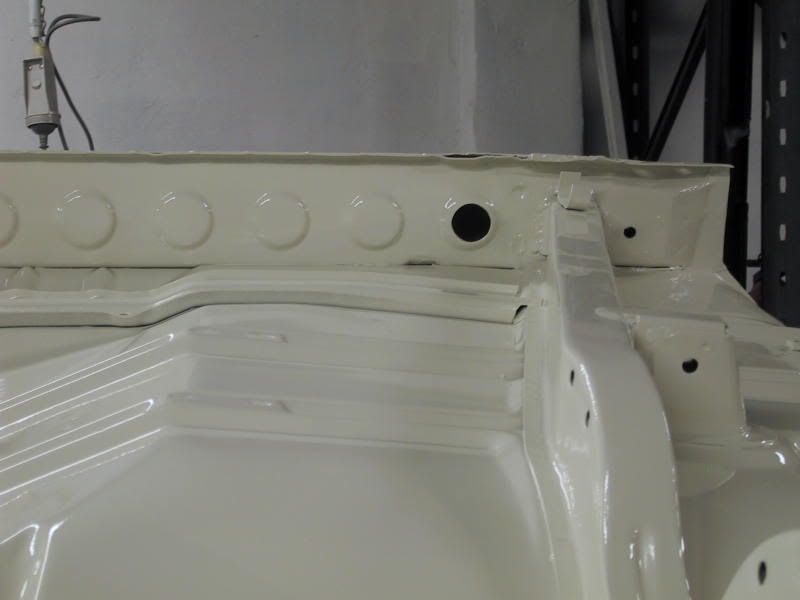 The seat belt plates and captive nuts are reasonably neat. 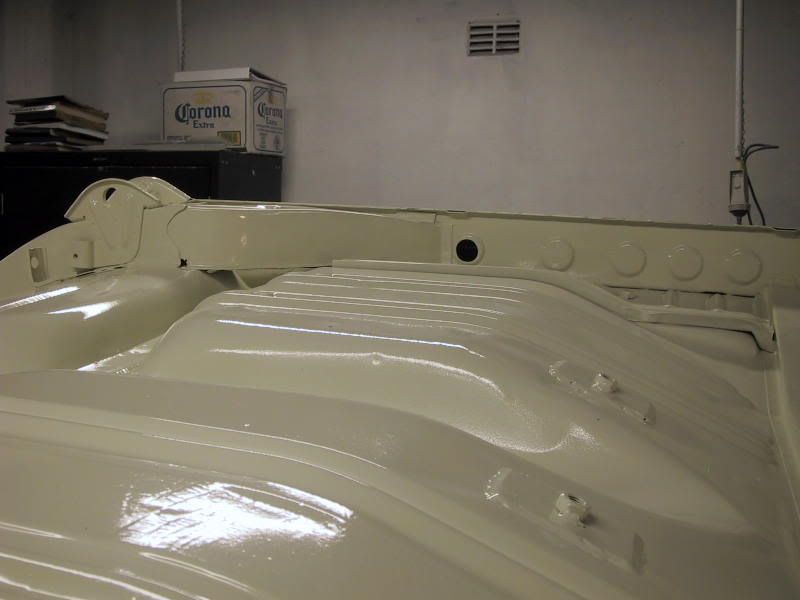 The finish is "wet-on-wet" meaning that the primer was not rubbed back prior to the application of the top coat. Thus, there is significantly more peel visible in the paint that would be acceptable on the topside panels. 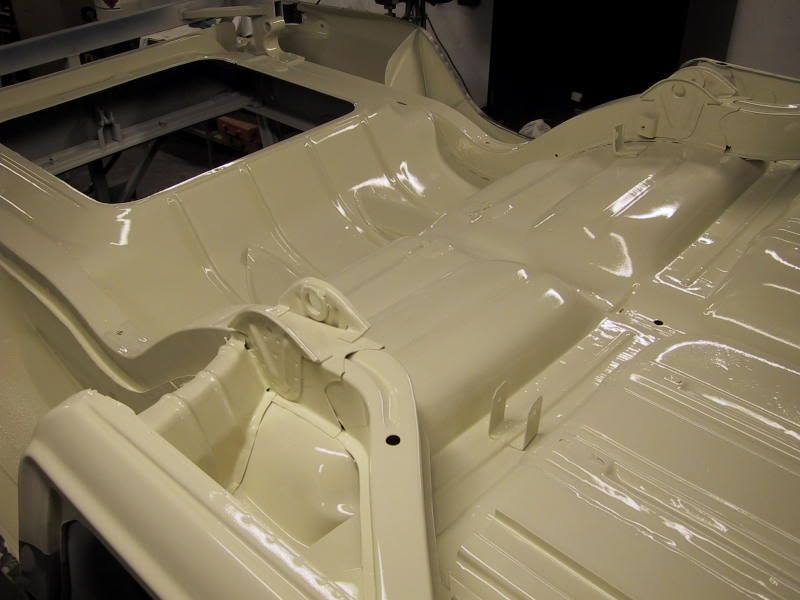 |
|
|
|
« Last Edit: December 20, 2004, 11:00:20 PM by Fast_Eddie »
|
Logged
|
|
|
|
|
ACE
|
|
« Reply #39 on: December 21, 2004, 10:35:58 AM » |
0
|
|
|
|
|
|
Logged
|
|
|
|
|


