Brad
Senior Member

 Offline Offline
Model: FC
Posts: 308
My FC Van in 1986 and I still have It

|
 |
« on: June 21, 2006, 11:07:17 AM » |
0
|
|
|
|
|
|
 Logged
|
Id rather have a full bottle in front of me than a full frontal labotomy
|
|
|
customFC
Moderator
Guru
 Offline
Model: FC
Posts: 5904
Ask me about microwaving cats for fun or profit.
|
|
« Reply #1 on: June 21, 2006, 11:32:53 AM » |
0
|
Hey Brad
Looks like a nice clean van as a starting point.
Should turn out to be a very tidy car.
Keep us updated.
Regards
Alex
|
|
|
|
|
Logged
|
|
|
|
Brad
Senior Member
Offline
Model: FC
Posts: 308
My FC Van in 1986 and I still have It
|
|
« Reply #2 on: June 21, 2006, 12:04:54 PM » |
0
|
This was the sarting point circa May 1986 Drove It home on trade plates. 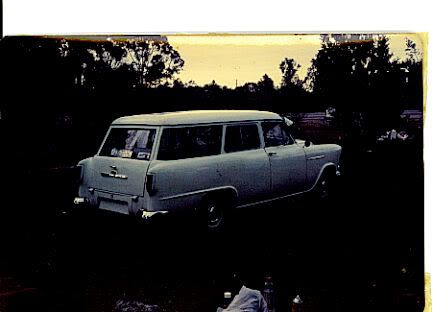 This Is my third start on It, Maybe I'll finish It,....Maybe. |
|
|
|
|
Logged
|
Id rather have a full bottle in front of me than a full frontal labotomy
|
|
|
steamman
Senior Member
Offline
Model: other Holden
Posts: 283
Woodend Victoria
|
|
« Reply #3 on: June 21, 2006, 10:36:23 PM » |
0
|
Keep at it brad the result will be rewarding.
Cheers
Deano.
|
|
|
|
|
Logged
|
FE and FC"S rule.
|
|
|
|
minifcvan
Guest
|
|
« Reply #4 on: June 22, 2006, 01:38:28 AM » |
0
|
nice looking start again.. ive started mine twice now lol.. there can NEVER be too many fe/fc/fb/ek vans on the road cheers mark  |
|
|
|
|
Logged
|
|
|
|
Brad
Senior Member
Offline
Model: FC
Posts: 308
My FC Van in 1986 and I still have It
|
|
« Reply #5 on: July 01, 2006, 07:59:17 AM » |
0
|
Heres a more recent pic I am sandblasting the firewall and dash inside and out, and have found small amount of rust on the front of R/H sill and middle of the subframe where the gearbox mount bolts go. I also found rust in the front frame(GMH Manual talk). And apart from half a dozen ,small [ didn't eat a hole through it ] rust spots that's all folks. 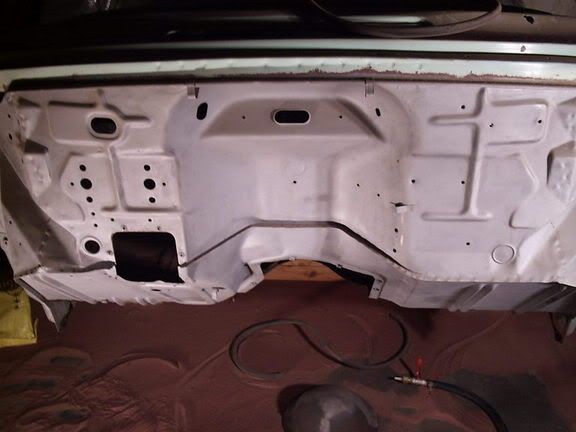 I am trying out a product called POR 15 .Has anyone used this and can give me the pro's or con's about it? Thanks Brad. |
|
|
|
|
Logged
|
Id rather have a full bottle in front of me than a full frontal labotomy
|
|
|
|
fccool59
|
|
« Reply #6 on: July 01, 2006, 10:21:22 AM » |
0
|
try to use the por 15 as close to its instructions as you can, use the metal ready first wich you can buy from the por 15 dealer.
I bought the tie coat to go over the top wich seemed to suck in the 2k paint on top and the 2k over the tie coat never seemed to cure properly so personally I would use it more for inside sills and rails The surface needs to be clean or it will peel of in sheets, after using por 15 and 2k I dont think it has a lot of bonding advantage over 2k if any but I guess 10 years will give a better idea.
A cheaper alternative but also hard to paint over and a little messier is killrust enamal.
Por 15 might also be good for the top of the floor but it needs to all be in bare metal with now flakey bits.
|
|
|
|
|
Logged
|
|
|
|
Brad
Senior Member
Offline
Model: FC
Posts: 308
My FC Van in 1986 and I still have It
|
|
« Reply #7 on: July 01, 2006, 11:37:57 AM » |
0
|
I am painting POR 15 directly on sandblasted surfaces and only on areas that wont be seen ( inner guards, behind dash panel,inside tailgate , inside doors , ect ) Outside (seen) areas will be sanded to bare metal or blasted and 2k etch primer applied . I want to preserve the car so it will last another 50 years( long after i'm gone)  . Removing windows  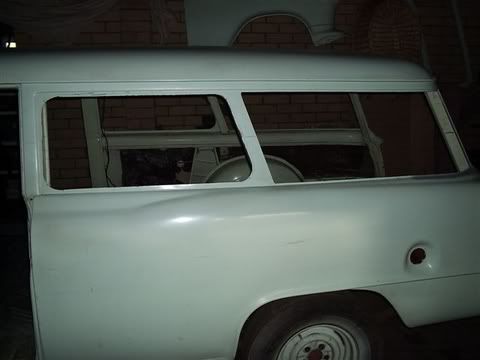 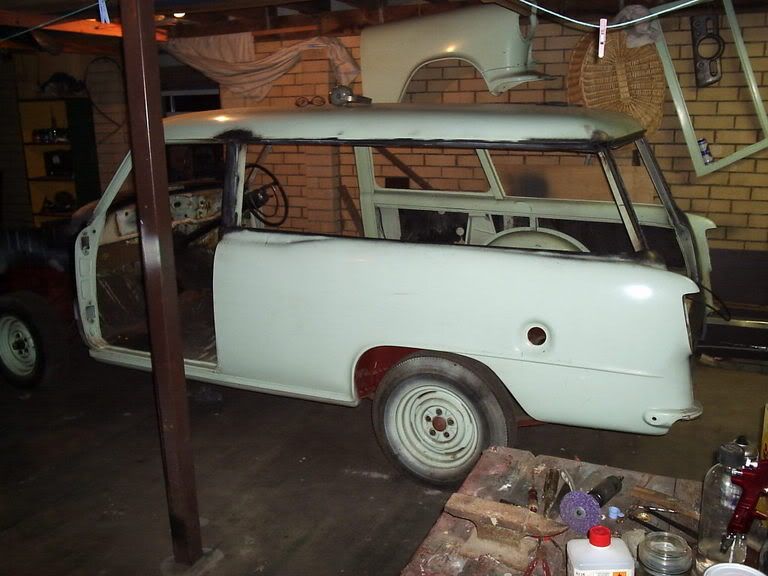  Average 3x spot welds to the inch  tat's a lot of drilling  Brad. |
|
|
|
|
Logged
|
Id rather have a full bottle in front of me than a full frontal labotomy
|
|
|
|
fccool59
|
|
« Reply #8 on: July 01, 2006, 09:00:10 PM » |
0
|
it should be ok on sandblasted metal, it doesnt stick to smooth metal, thats why it likes rusty or sandblasted surfaces.
|
|
|
|
|
Logged
|
|
|
|
Brad
Senior Member
Offline
Model: FC
Posts: 308
My FC Van in 1986 and I still have It
|
|
« Reply #9 on: July 01, 2006, 09:54:20 PM » |
0
|
I shrunk the third pic just a bit to much  so here it is again  Brad |
|
|
|
|
Logged
|
Id rather have a full bottle in front of me than a full frontal labotomy
|
|
|
Brad
Senior Member
Offline
Model: FC
Posts: 308
My FC Van in 1986 and I still have It
|
|
« Reply #10 on: July 04, 2006, 08:29:00 AM » |
0
|
Here's an update of what happened on the weekend if anyone's interested. 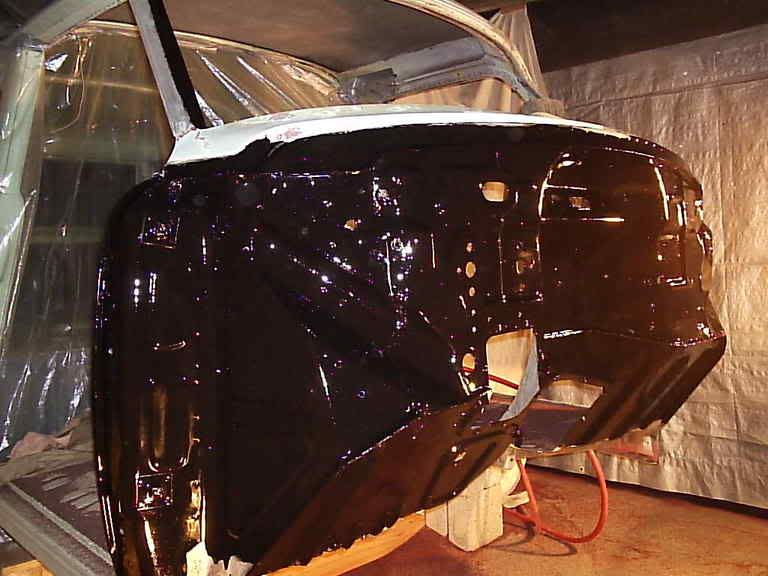 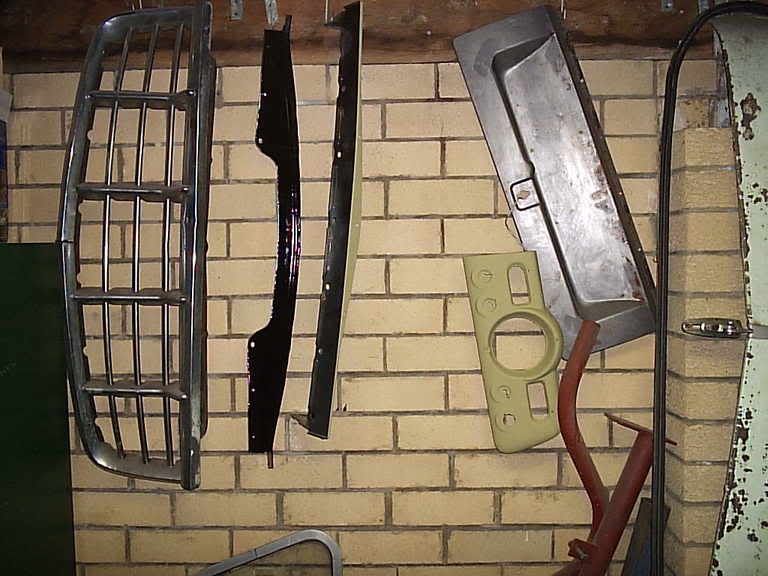 . I painted the outer fire wall with Por 15 by brush so as not to waste paint. Got to say I'm very impressed with the flow quality and finish just by brushing It on I hope it is as good as it claims to be , It would be a shame to go to all this trouble and then discover that the stuffs no good  . I also painted the outer surfaces of the dash and (front stone tray ?) if that's the right word. Por 15 under and 2k etch primer on the outside. I intend to do the whole car in this way. Also did some more sand blasting under dash and inside fire wall. Anyway I hope this motivates some one out there, as seeing all the other projects coming together on the site gets me motivated to finish mine . Maybe in time for the next nationals? Brad |
|
|
|
|
Logged
|
Id rather have a full bottle in front of me than a full frontal labotomy
|
|
|
|
fccool59
|
|
« Reply #11 on: July 04, 2006, 09:09:04 AM » |
0
|
One thing i noticed with por 15 was that the couple of spots I brushed dried glossy with no brush strokes, doesnt really mater if you spray it or brush it, still comes out the same.
Is that straight or did you add por 15 solvent?
|
|
|
|
|
Logged
|
|
|
|
|
Ed
|
|
« Reply #12 on: July 04, 2006, 10:30:50 PM » |
0
|
looks good Brad,
the POR15 over the blasted surface is definitely the way to go for optimum results.
as you probably already know (and for the benefit of others) the paint does not like sticking to shiny surfaces ie wire wheeled surfaces. it can and will peel off in large sheets if incorrectly applied.
like you, I used it on all surfaces and despite it adding alot of prep time I think it is a good thing... so far so good.
it sprays very well too, just thin it down with the solvent and use a larger fluid tip.
build is looking good
Cheers
Ed
|
|
|
|
|
Logged
|
in the shed
|
|
|
Brad
Senior Member
Offline
Model: FC
Posts: 308
My FC Van in 1986 and I still have It
|
|
« Reply #13 on: July 05, 2006, 06:10:32 AM » |
0
|
Hey fccool59.
I put the paint on straight out of the can, I do have some solvent here but the paint looks fairly thin as it comes.
Coverage seems to be ok as well with all parts painted so far and only a drop of about 25 mm in a one litre can.
Thanks for the encouragement .
Brad.
|
|
|
|
« Last Edit: July 05, 2006, 06:20:58 AM by BRAD »
|
Logged
|
Id rather have a full bottle in front of me than a full frontal labotomy
|
|
|
Brad
Senior Member
Offline
Model: FC
Posts: 308
My FC Van in 1986 and I still have It
|
|
« Reply #14 on: July 18, 2006, 09:35:56 AM » |
0
|
Hello all . Here's seven pics of the front end rust repair. I got sick of the sand blaster and deciced to do a bit on the front frame . The first pic is of the drivers side of the frame how it came back from the sand blasters , I put some 2 pak etch primer on it . 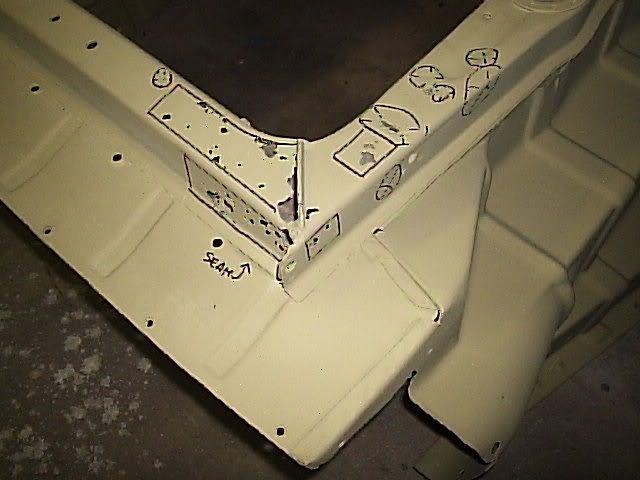 As you can see there was a lot of rust and inside was the begining of a mouse nest . I got hold of a front end section ,cut and repaired it ,then trial fitted it. 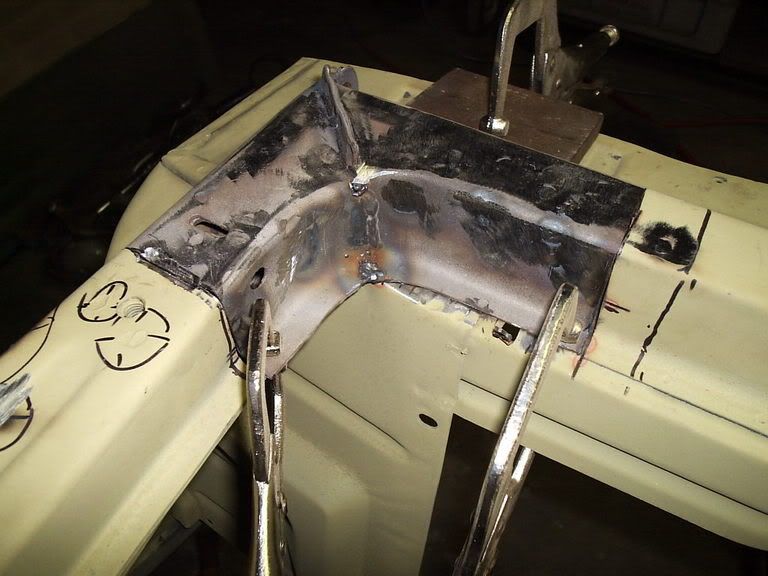 . After about two hours welding and grinding it finished up like this .  . That was the right hand side done ,now onto the left . This is what I had to start with, more rust than I had thought when I pulled it off. Some one had BOGGED UP THE SUBFRAME  . 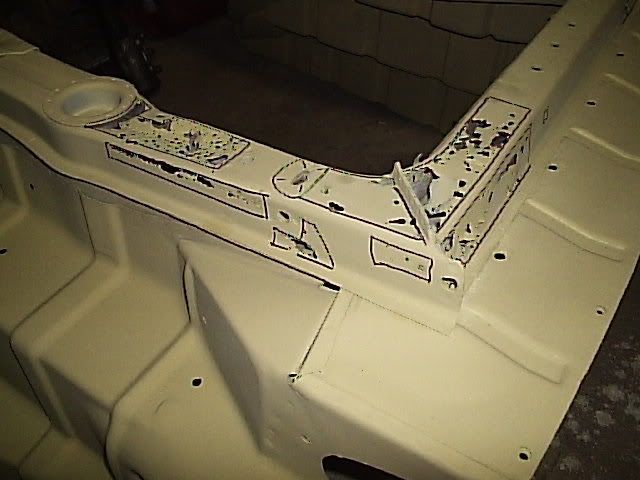 All I had to repair it was this paper thin peice of the aforementioned cut ,and after I plated it and welded the pitting I think it weigh's about 3 kilos . 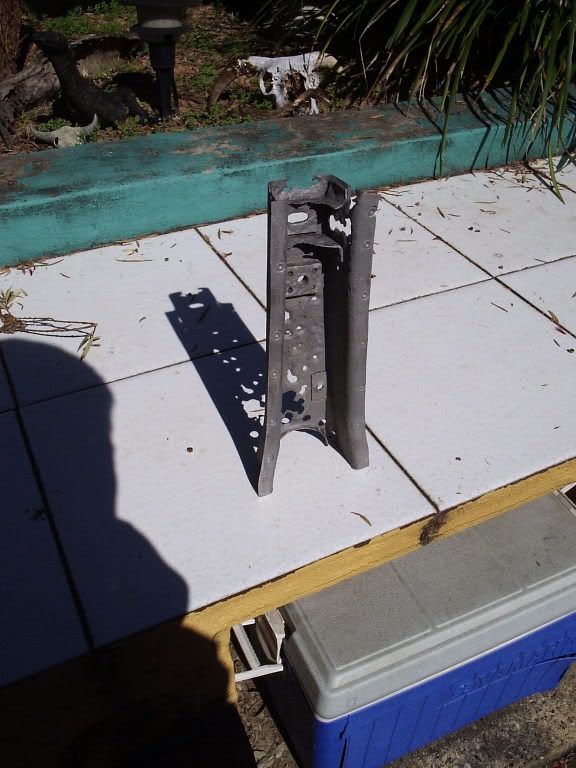 Anyway I chucked it in . 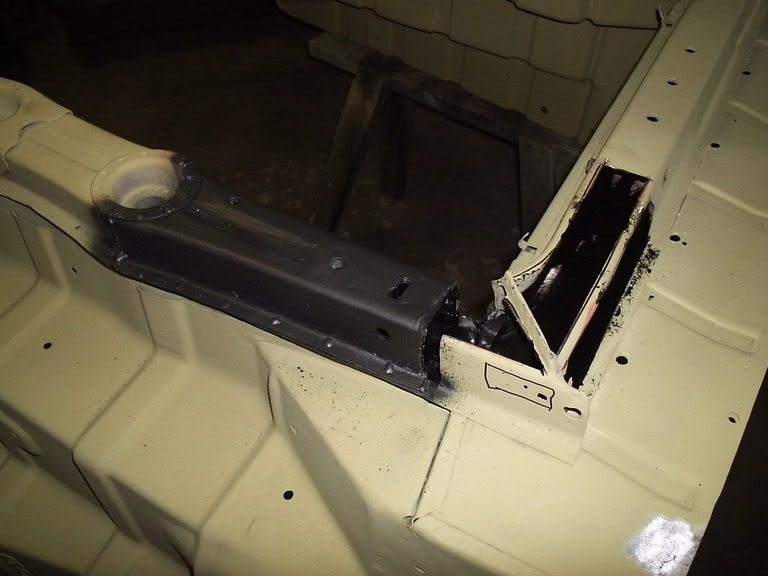 Then used some 2.5 mm plate that I had laying around to finish the job. 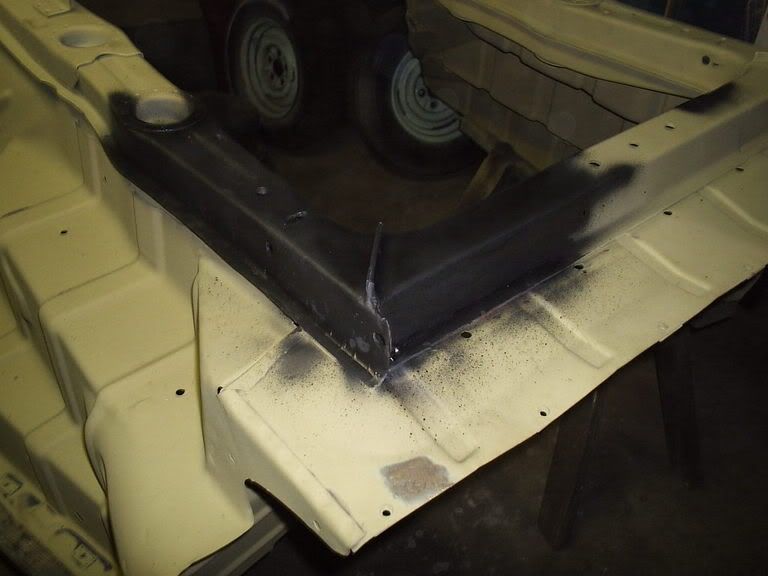 . The whole lot took about 14 hours. I'm gunna hose the inside of the frame with por 15 in the hope that it will NEVER rust again. I'v still got some small spot repairs to do on the frame but at least the bulk of the work is done on it. So now I'm of to have a few rums and give my back a rest. Brad. |
|
|
|
|
Logged
|
Id rather have a full bottle in front of me than a full frontal labotomy
|
|
|
|
collecta
|
|
« Reply #15 on: July 18, 2006, 12:15:00 PM » |
0
|
Great pictures and an excellent job Brad.
cheers
scott
Ps... it does motivate, going to have to get stuck into my van.
|
|
|
|
|
Logged
|
i collect old holdens coz they never die!
|
|
|
Brad
Senior Member
Offline
Model: FC
Posts: 308
My FC Van in 1986 and I still have It
|
|
« Reply #16 on: June 26, 2007, 07:52:43 AM » |
0
|
Well it's nearly been one year since the last post on this topic and my brother in law bagged me for not updating so here goes I have built a rottisery from two engine stands and a couple of old bent accrow props and mounted the van on them. 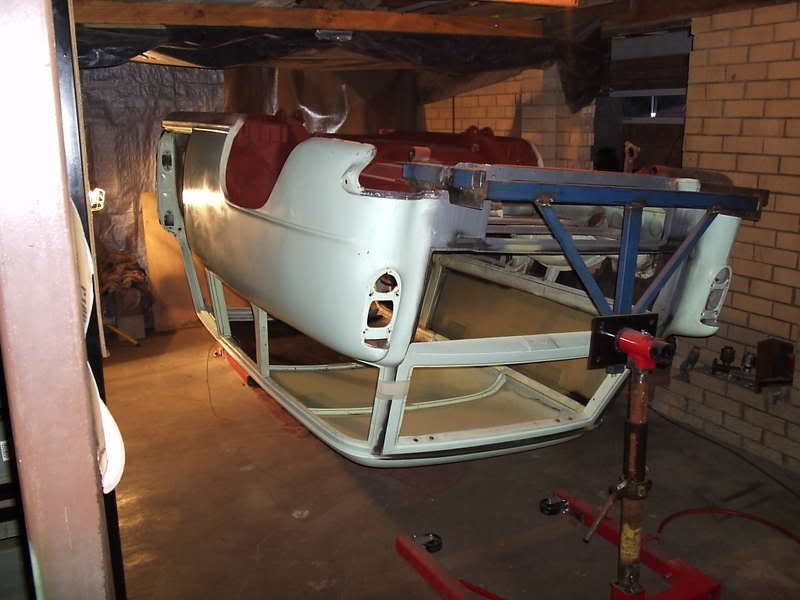 Then I sand blasted and sanded the inside of the roof and brush painted POR 15 on all the cleaned surface 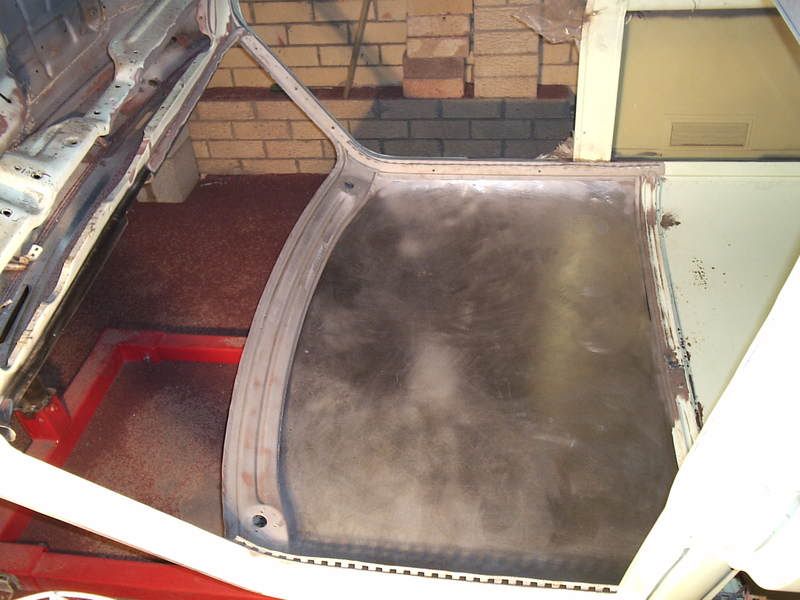 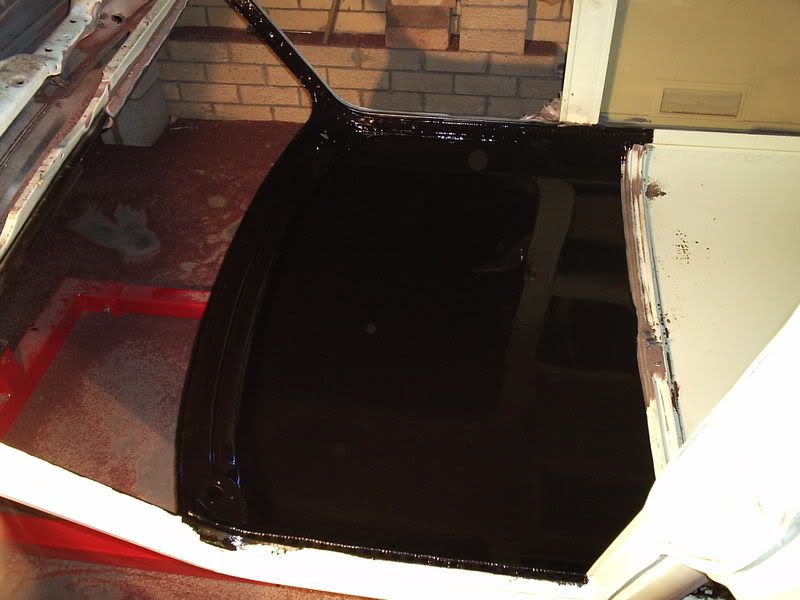 The next thing I needed to do was the rusty gearbox cross member. I drilled out all the spot welds and pulled it apart. Cleaned it up with the sand blaster and molasses bath and welded / ground back the rust pitting . I put It back together and welded up all the holes ( around 100 of them ) ground them off smooth and painted it. I figured it would take a couple of weeks . It took almost two months , after work and whenever on week ends. I still have to make the ends to fit to the inner sills but that won't take much time once there bent up. 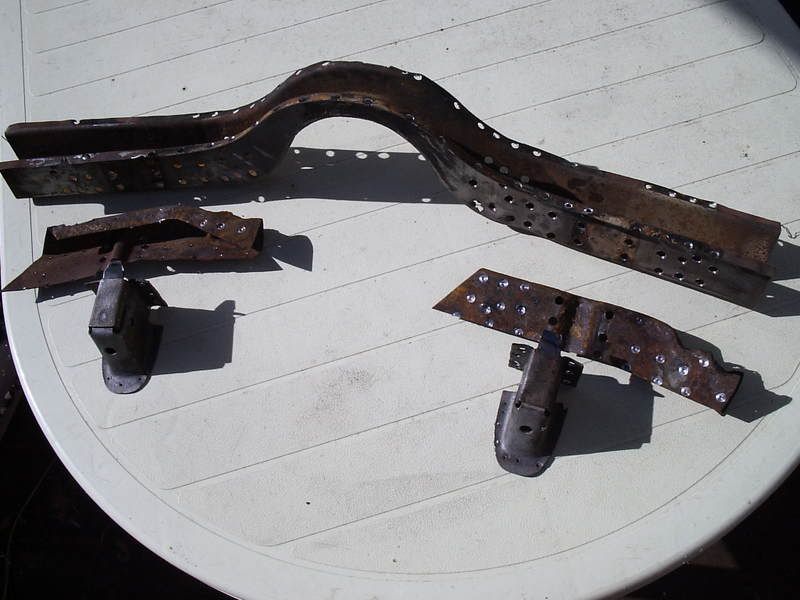 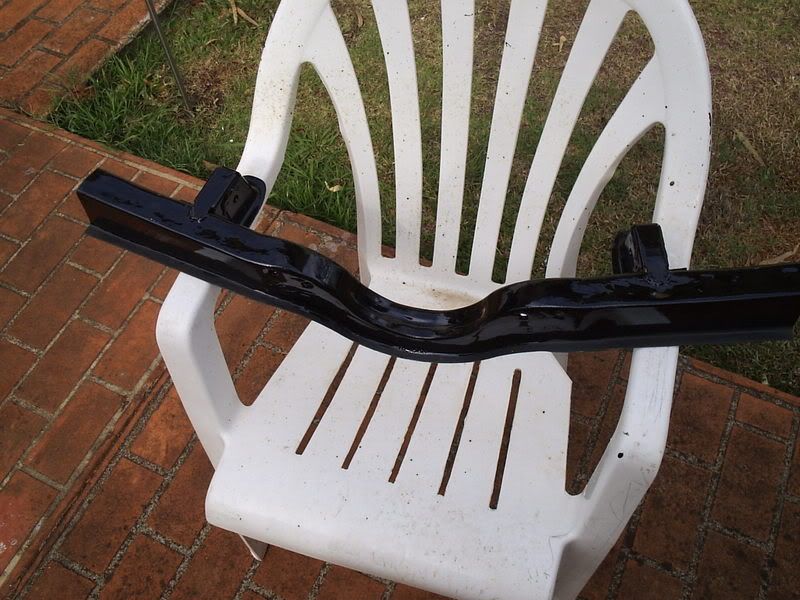 . Then I got into the spare wheel door . Lucky for me it's in good nick. I sent it away for an acid bath then I sandblasted / molasses bathed it. The molasses is great and if any of you have plenty of time on your hands I strongly recommend it . It's cheap and works a treat but takes time . About four to five weeks for each item. After it was cleaned I POR 15nd the inside and 2K the outer then HOSED fisholene throughout. It's going to be a bugger to clean before final painting but at least I know it won't rust in this millennium. 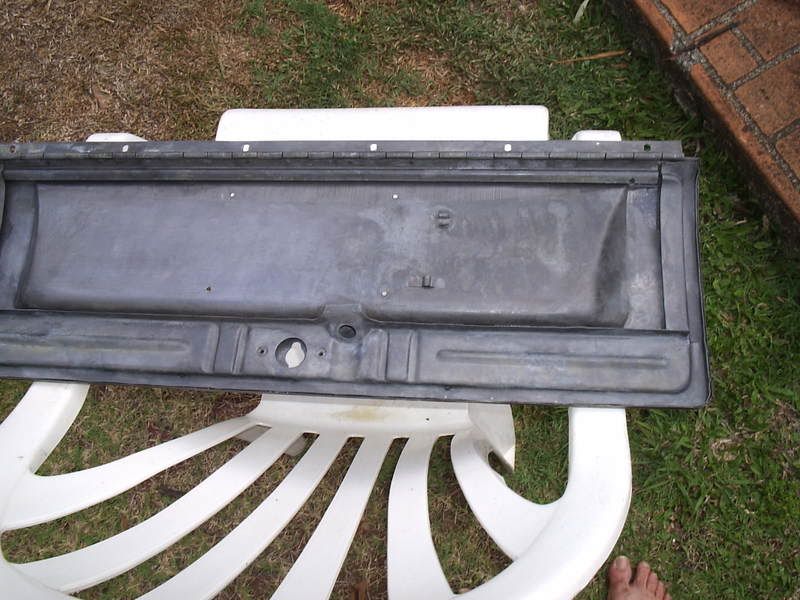 Straight from the molasses and sprayed with the hose. 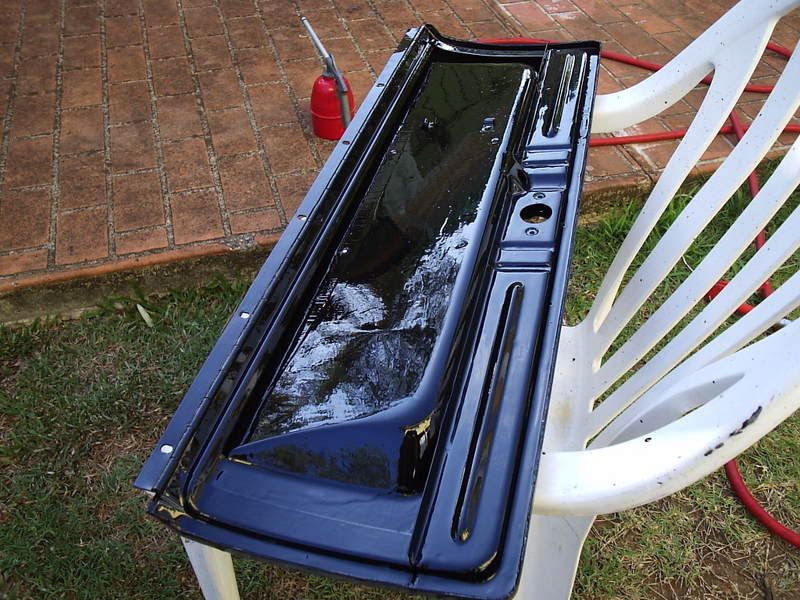 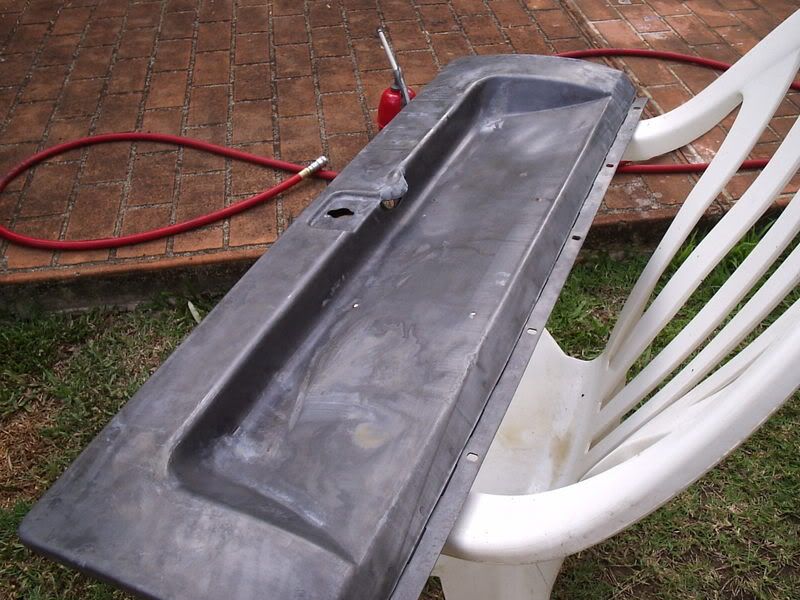 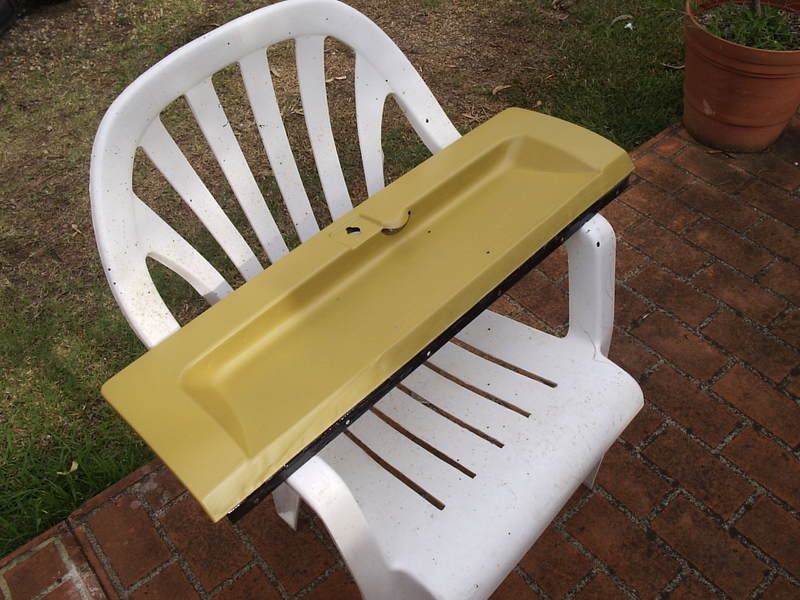 I have also sandblasted and Por 15 in behind the dash. Didn't find any rust or problens there. 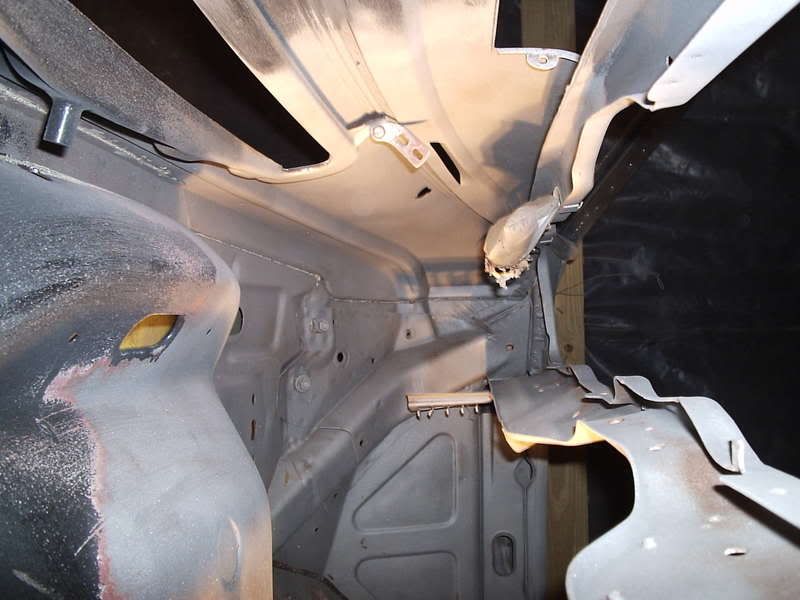 I paint striped then cleaned up / sandblasted the floor and the partition behind the seat. Did the POR 15 thing again. I realy hpoe this stuff works. 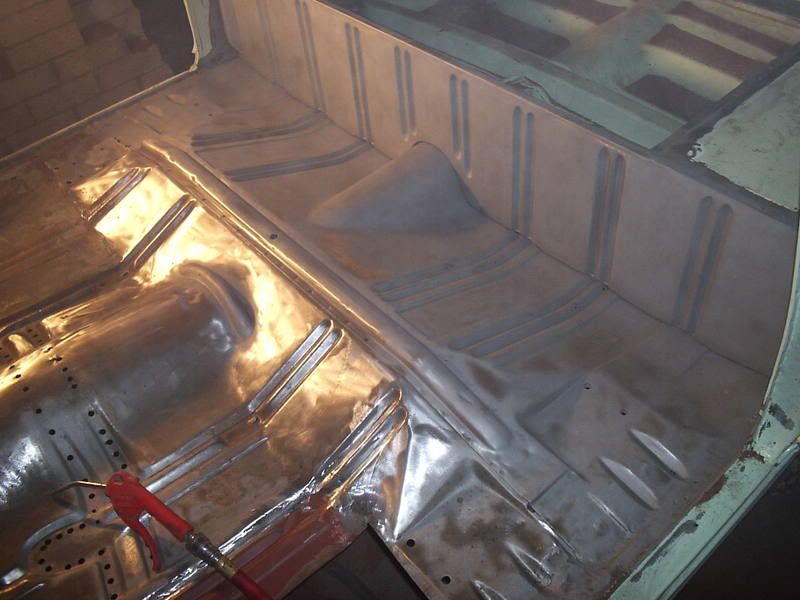 Great stuff if they all looked like that. 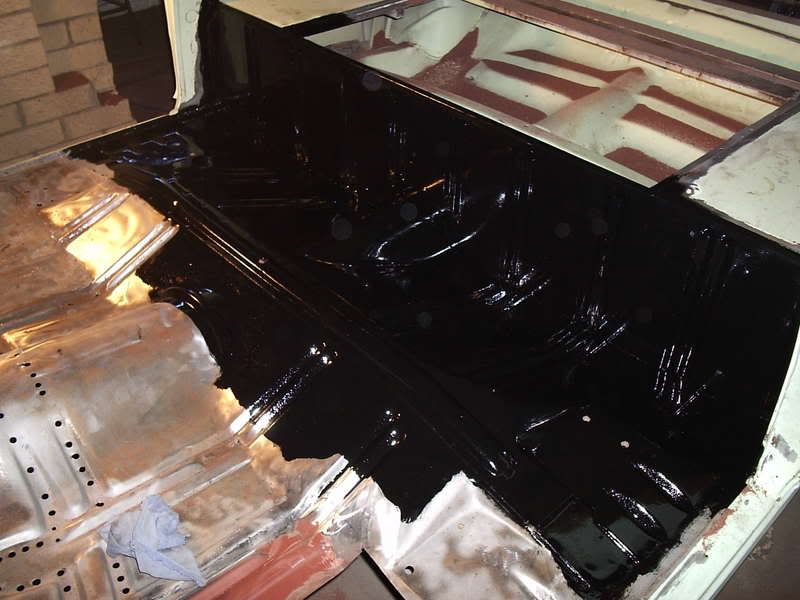 Then I had to fix up the dodgy repair where the gearbox crossmenber meets the sill. 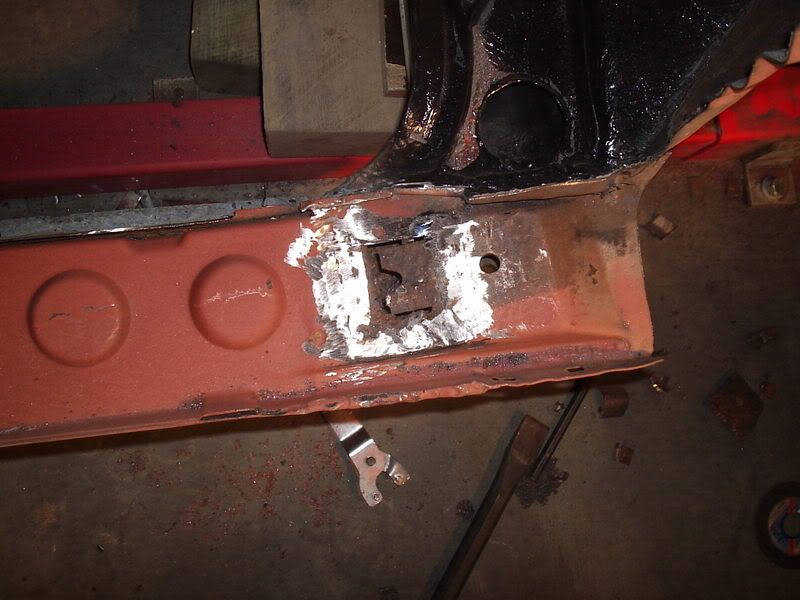 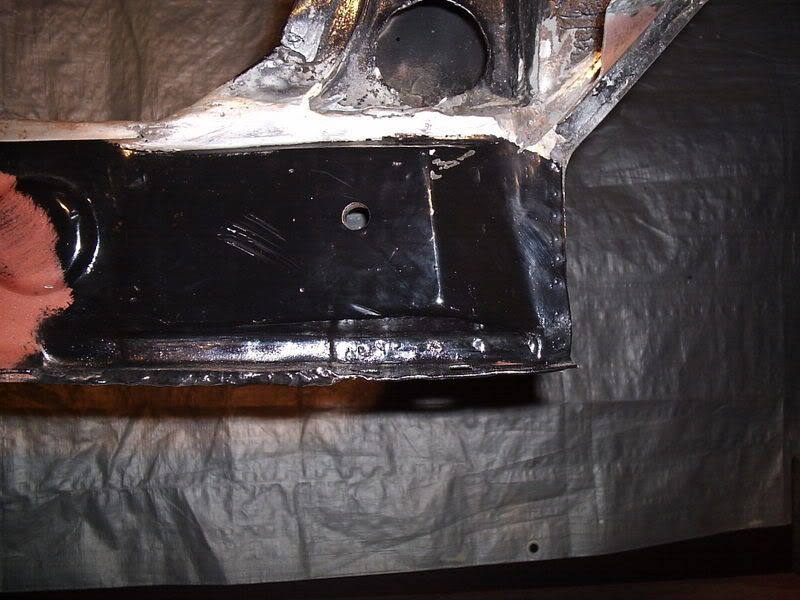 It wasn't as bad as it looks. Now I'm working on fixing the older and rough repair on the L H floor. I'm trying to bring it back up to an original looking state. Then I want to do the drivers side floor back to standard. So I'm almost back to the B pillar and once past that there's no rust apart from some small rust in the ends of sills. All the rest of the panels are like new bar the lower tailgate. So the rest of the inner body work should be easy . Once the floors and sills are done the next big thig is the welding in sides. I will update then with more pics. Brad |
|
|
|
« Last Edit: June 26, 2007, 08:20:00 AM by BRAD »
|
Logged
|
Id rather have a full bottle in front of me than a full frontal labotomy
|
|
|
|
FATBOY
|
|
« Reply #17 on: June 26, 2007, 08:32:27 AM » |
0
|
excellent work brad no im keen to start back on my van but i better first get the ute finished to help pay for the van and the 32 tudor projects ive got running at the moment
cheers fatboy
|
|
|
|
|
Logged
|
fatboy
0414712441
|
|
|
|
mcl1959
|
|
« Reply #18 on: June 26, 2007, 10:06:41 AM » |
0
|
Wow, that is a very detailed rust repair. A lot of work has gone into making that van NEVER rust again.
Top stuff !!!
Ken
|
|
|
|
|
Logged
|
|
|
|
customFC
Moderator
Guru
Offline
Model: FC
Posts: 5904
Ask me about microwaving cats for fun or profit.
|
|
« Reply #19 on: June 26, 2007, 10:42:35 AM » |
0
|
Lots of interesting new pics.
Took the time to reread some of the old stuff as well.
Good work on the repairs, should last the 50 years and then some.
Regards
Alex
|
|
|
|
|
Logged
|
|
|
|
|


