|
fccool59
|
 |
« on: April 28, 2006, 10:01:14 AM » |
0
|
Well I didnt make phillip island so the rush has slowed a little, I now have 2 years to finnish it but i cant see myself waiting that long. here are the 2 most current pics. 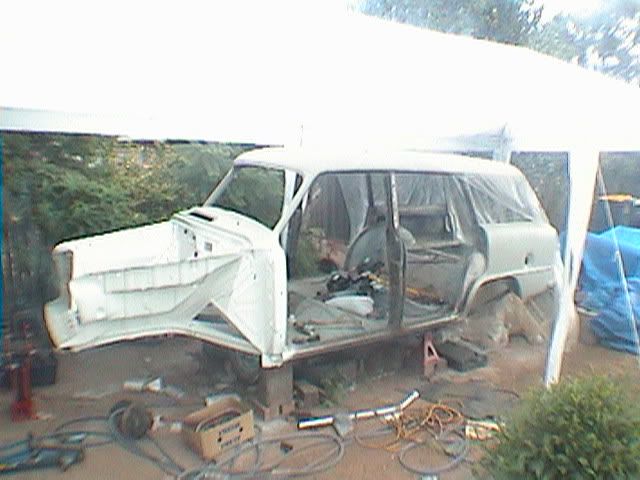 here is a bunch of parts being stripped of paint, first they were soaked in a bucket of thinners, this worked excellent on the acryllic stuff, was pretty weak on enamal and did near nothing to 2k and red oxide primer, its good for getting acrylic of anything that was plated becuase it doesnt damage what is under the acrylic. not sure of a proper way but i follow this with a wire wheel then a cup brush then sand it with 120 then use a scourer with acid. A sandblasting device would have made life more pleasant but i dont have one. 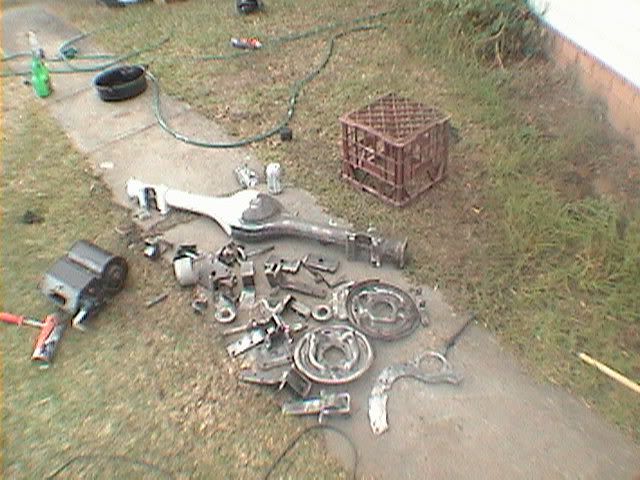 |
|
|
|
|
 Logged
|
|
|
|
|
Burnsy
|
 |
« Reply #1 on: April 29, 2006, 12:50:01 PM » |
0
|
OOOOhh a new thread, just had to be the first to post on it. Not limiting it to complete drivel though. Have you tried using Molasses for stripping. I have never tried it myself but have heard good reports. Apparently it takes a bit of time - you have two years  but does a great job on old paint and rust. I think there is an article on it on Ozrodders if you are interested, it's been a while since I read it so don't quote me on it. Keep up the good work work Leon, it is starting to come together and the finished beast should be fantastic considering the attention to detail you are making. Cheers, Mike |
|
|
|
|
 Logged
|
Mike
|
|
|
|
Glenn 'Stinky' Stankevicius
|
 |
« Reply #2 on: April 29, 2006, 08:40:14 PM » |
0
|
There are some cheap blasting nozzles out there at places like Super Cheap. Very messy though and considering your neighbours, it would be out of the question.
Although, I've had an idea about using an old dishwasher and one of these kits to make up a blasting cabinet, I have all the bits it's just a matter of getting a free day or two to try it out.
|
|
|
|
|
 Logged
|
|
|
|
HAD 708
Senior Member
   
 Offline Offline
Model: FE
Posts: 638
Holdens and the Mighty Woodsmen truly magnificent

|
 |
« Reply #3 on: April 30, 2006, 12:56:58 AM » |
0
|
A friend of mine uses straight molasses and it works a treat on all rust removal ad general filth. I am not sure about paint though and as soon as use take it out you must seal it straight away or it will rust worse than before. The parts can sit in the Molasses for months if need be!
Brett
|
|
|
|
|
 Logged
|
Brett Gillard
|
|
|
Shayne
qld-club
Senior Member
   
 Offline Offline
Model: FE and FC
Posts: 697
Just Cruisin'

|
 |
« Reply #4 on: April 30, 2006, 07:37:25 AM » |
0
|
Molasses is great for rust removal. Won't remove paint though. Also parts need to be cleaned (no grease etc) first. Otherwise the molasses can't get at the metal under the grease & oil. Neat molasses is okay, but mix about 8-10 parts water with 1 part molasses for a better brew. Use warm water helps mix the molasses, especially coming into winter. Use a bucket and suspend the parts on a bit of wire so that the molasses can attack all sides. I have a half plastic 44 gallon (200 litres for those metrically inclined) which can fit most parts in. It is acidic, cast iron and steel can be left in for a while, but careful with aluminium- it might disappear!
Electrolysis is another option- a google search or a look through a few vehicle and engine restoration forums will turn up some clues.
I fear we might be getting a bit off topic though. Good luck Leon FCCOOL. My hat goes off to you for the great job you are doing in your driveway. I occasionally whinge about not having enough room in my shed, but then a reality check reveals I have nothing to worry about at all. Hope to catch up one day.
|
|
|
|
|
 Logged
|
Old Holdens Never Die Because Fools Like Me Keep Them Going
|
|
|
|
fccool59
|
 |
« Reply #5 on: April 30, 2006, 10:16:12 AM » |
0
|
I have read a bit about using molasses but just used what i had here, Maybe on the next car, i ended up soaking the parts for about 6 hours in a diluted mix of deoxidiser, then used it neat with a scourer, some rust was sanded again and recleaned with the acid, then after the final rinse and dry i rubbed everything again with a scourer so all the parts were mainly dull silver with a gold tinge here and there.
Ill never learn, I just got the primer on (9pm)the parts, about 11 hours to late, first i couldnt find the masking tape, then the roll ran out and i had to look for a alternative.
then my smokes were lost, i needed one bad from the stress of doing it so late, found them and opened the new tin of 2k etch and it was hard and dry in the bottom (bought it last weekend) so i had to look for more, found a tin with a little in the bottom and thought it would do with a real light coat on everything but it didn't work running out halfway through. next i mixed the new tin the best i could and finnished it of, then i applied the 2k hs primer, and knocked my source of heat over leaving me with no lights, bugger.
Always the way, spend all day prepping stuff and leave no time for the primer, leave it to the next day and i have to repeat half the work. any way I knocked over the colum and scraped all the primer on the side of it, also i didnt leave enough time between fliping and the fuel tank, diff housing and sway bar stuck to the stands.
I figured if i paint these parts now i wont miss them in the rush once the body is painted and motor starts, speaking from experience of last time were i just about stopped sleaping as soon as the motor fired into life becuase i was to keen the go cruising in it.
Anyway, i went past my limit with the council of 8pm, hopefully nothing will happen but chances are i might get another letter in the mail.
|
|
|
|
|
 Logged
|
|
|
|
steamman
Senior Member
   
 Offline Offline
Model: other Holden
Posts: 283
Woodend Victoria

|
 |
« Reply #6 on: April 30, 2006, 10:29:50 PM » |
0
|
Keep up the great work Leon, i cant wait to see the end result. Cheers. Deano  |
|
|
|
|
 Logged
|
FE and FC"S rule.
|
|
|
|
fccool59
|
 |
« Reply #7 on: May 07, 2006, 07:25:21 AM » |
0
|
well all that batch off parts is now done and its time to start all over again with a second batch with front end, rear door and lower tailgate hinges and what ever else i can find, then its back to the body. pics probably dont show the best detail but this has the glosiest diff centre i have seen, i might clean up and paint all my centres so i have a good range of shiny diff centres to put in, fuel tank still needs a little work on top and a return line fitted, reason for the two top alternator brackets is to ruduce movement at high rpm, this was how the motor was when i bought the FE that first had it in it, all the grey painted stuff hanging of the stand with the tank on top are the rest of the parts for the motor bar the thermostat housing that i cant find, i have decided to go with chrome bolts for the outside of the motor so i dont have to worry about painting bolts, luckily the local robbos carry's a wide range of chrome stuff for old holdens, when i say that i mean they even have chrome bits for 48's as well as chrome grey motor rocker covers and sideplates. Try finding that in supercheap. there was big bunch of parts painted white last weekend like the hinges, diff housing, colum etc. once this thing goes back together it should be a bit more pleasant to work on and clean underneath but its not top notch show quality. Glenn (FC-V8) dropped in today with his v8 wagon, i think my wife now wants to do a chev conversoin in hers, if this takes over a year and a half to build i will need to try and do that one in a year, with her car i will probably get a little stuff done outside like sandblasting to speed things up a little, ofcourse i wont have to worry so much with that one about getting hassled about how much money goes on it 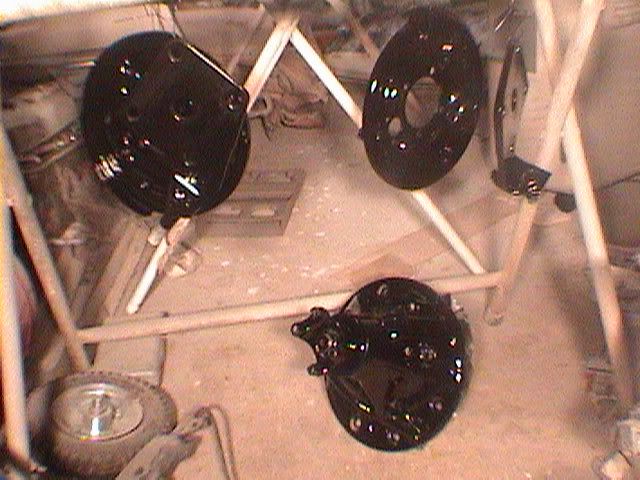  Parts are currently in the garage with the heater on listening to some cool music while the family freezes in the house with no heater. |
|
|
|
|
 Logged
|
|
|
|
|
Burnsy
|
 |
« Reply #8 on: May 07, 2006, 08:26:41 AM » |
0
|
Leon, looking good, those bits are shiney! Have you considered stainless allen key headed bolts for the outside of the motor rather than chrome bolts? I know I found that I could get a box of these cheaper than chrome bolts to do my sump, sideplates and rocker cover on the last red I did. I bought them from a specialist fastener wholesaler. They also don't tend to develop rust after a couple of years like chrome ones do around the edges where spanners have cracked the chome.
Keep up the good work,
Burnsy
|
|
|
|
« Last Edit: May 07, 2006, 08:27:52 AM by Burnsy »
|
 Logged
|
Mike
|
|
|
|
fccool59
|
 |
« Reply #9 on: May 07, 2006, 08:53:54 AM » |
0
|
yeah i was trying to find stainless becuase of the way the chrome ones evntually go orange inside but all those specailty places around here seem to only be open the hours i work, i bought a allen key sump bolt set for $32 at robbos wich is pretty dear but the sump takes a lot of bolts and most of the other sets were much cheaper to do the rest of the motor, they also have sets of gaurd bolts in chrome for $20, I noticed a fastener specailist the other day on the way to work, I just have to round up a bunch of bolts to take down and match up in new stainless and high tensile, one thing i am having trouble finding is good hinge screws for the doors, a few god damaged when i took the doors off.
The dear bolts are inside the motor were there is about $400-$500 spent on studs and bolts
|
|
|
|
|
 Logged
|
|
|
|
|
Ed
|
 |
« Reply #10 on: May 08, 2006, 11:24:24 PM » |
0
|
Hey Leon,
Like the shiny painted stuff...
I get all my stainless stuff from "Mr Stainless"
Victoria Road Drummoyne, they may have other outlets.
they have varying grades of stainless too.
Cheers
Ed
|
|
|
|
|
 Logged
|
in the shed
|
|
|
|
TorqueFC
|
 |
« Reply #11 on: June 14, 2006, 08:05:57 AM » |
0
|
 found this whilst going through some old pics...looks the goods  think it was from the rat day around 2003/4? |
|
|
|
|
 Logged
|
tests have proven that the final words before a fatal urban car crash are "OH ****"
in a rural car crash they are " Hold my stubby and watch this for skill!"
|
|
|
|
fccool59
|
 |
« Reply #12 on: July 03, 2006, 09:32:17 AM » |
0
|
its not the best time of year for rapid progress but im still ploding along. Not much has happened but here are some progress pics. first is a batch of parts getting preped for primer and paint. Second is a frontal shot, not much has been done to the car itself lately. Third is were I am stringing up the parts for etch primer followed by HS. In this pic I am attaching the tailshaft to the tree with mig wire, you can only use trees on a still day. Fourth is of some priming happening. I guess you think Im pretty clever taking pics of myself, its easy, I record on video then take the pics of the recorded tape. 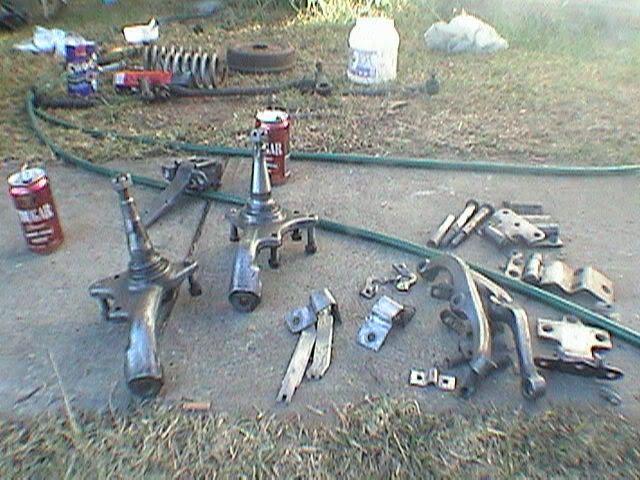 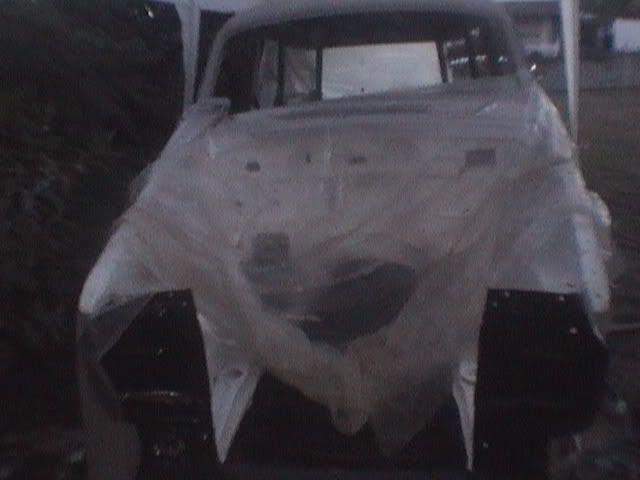 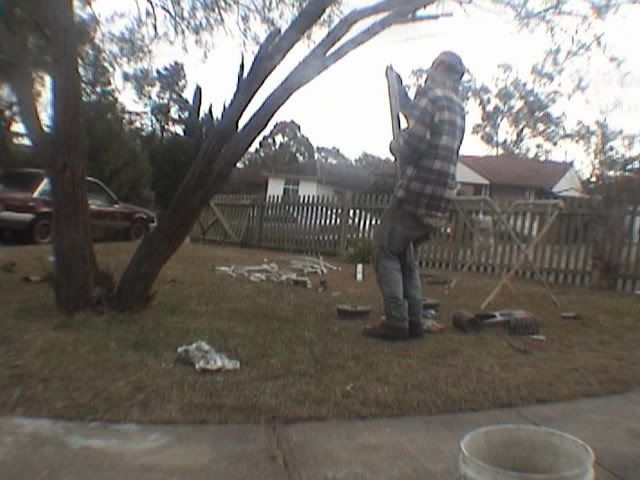  |
|
|
|
|
 Logged
|
|
|
|
|
fccool59
|
 |
« Reply #13 on: July 03, 2006, 10:41:27 AM » |
0
|
^^^ ^^^ Is this the rat day pic you went to post tourque? 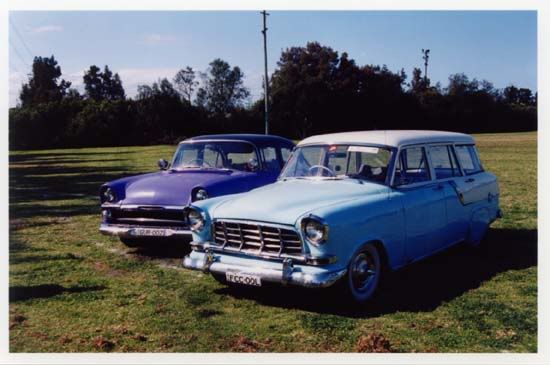 Sorry, I kind of stole it from you. |
|
|
|
|
 Logged
|
|
|
|
customFC
Moderator
Guru
    
 Offline Offline
Model: FC
Posts: 5904
Ask me about microwaving cats for fun or profit.

|
 |
« Reply #14 on: July 03, 2006, 11:34:11 AM » |
0
|
Hey Leon. I had heard that that Cougar stuff would strip the paint off car parts....guess this confirms it. Why do you always wait till it gets dark to paint??  Keep the progress happenin'. Regards Alex |
|
|
|
|
 Logged
|
|
|
|
|
Glenn 'Stinky' Stankevicius
|
 |
« Reply #15 on: July 03, 2006, 11:48:40 AM » |
0
|
Don't worry Leon, he stole it from the "The Rumbler" site, looks like the rumbler forgot to pay his hosting bills  BTW, How are the taillights going, any more work on them? |
|
|
|
|
 Logged
|
|
|
|
|
fccool59
|
 |
« Reply #16 on: July 04, 2006, 06:01:24 AM » |
0
|
Stinky, the tail lights are pretty much finished, but I am going to rub the primer back in a few spots back to tidy up a little with more filler or blade putty.
Alex, I aim for putting the paint on at around 11am so it can bake in the sun, something always happens and it never works out as planned. I have now gone from fast hardener to super fast, its working well but I still am worried about how well its bonding and how well it will last. The Last batch of parts look good but after painting I noticed S#$tloads of water coming through the air past the reg/water trap, the second inline trap and the last chance disposable trap.
I run the compressor till its full then drain that and the first two traps but I think the late afternoon dew was being sucked into the compressor as I was painting even though the compressor is in the garage.
After cleaning the paint off with couger rum you need to give them a thorough rinse, Then you treat the metal with some rtd bourbon, rinse it with vodka and dry it, some people use jack daniels but this car is being done on a budget and woodstock seems to be doing the trick.
|
|
|
|
|
 Logged
|
|
|
|
|
fccool59
|
 |
« Reply #17 on: July 24, 2006, 07:19:21 AM » |
0
|
update-  the front end is nearly ready to paint, the snout is now notched for the HR sway bar but I am still going to box off the bottom of the snout. all the other parts that go on the front end are already painted in 2k silver, I fitted new lowered bump stops to the lower control arms and bought some shorter shocks listed to suit HQ. I am trying to decide what colour to do the front end and tail shaft. I am not trying to look like a show car underneath, it will be to low to see, just want it to stay clean and fresh for as long as possible. I have a choice of silver, black or white in 2k for parts I have underneath, most showcars now have everything underneath in the one colour but I already have painted bits in different colours. my control arms and steering parts are all light silver, the rear leafs and diff centre is black and the diff housing and underside of the floor is white. I probably will do the tailshaft white but cant decide the colour for the front end. |
|
|
|
|
 Logged
|
|
|
|
Trevor_B
vic-club
Senior Member
   
 Offline Offline
Model: FC
Posts: 377
Melbourne VIC

|
 |
« Reply #18 on: July 24, 2006, 09:15:32 AM » |
0
|
Hi Leon, That notch for the HR sway bar looks impressive. Been trying to work out whether I had to do similar or not. What brand of bar were you looking to fit? I had a look back through my photos and found the one below from Jindabyne. It's Jason's (FEVanV6) from Cairns and has a Whiteline BHF5 bar fitted. Looks like it clears OK so was planning to give that a try. Maybe if it was fitted the other way around it would foul the outrigger?? Regards, Trevor B.  |
|
|
|
|
 Logged
|
FC Sedan, Ute & Wagon .... only a Panel Van required to make the set
|
|
|
|
fccool59
|
 |
« Reply #19 on: July 24, 2006, 09:30:15 AM » |
0
|
that looks like a better idea, too late now.
Mine dips down not forwards but is about the same thickness, ive looked at one already done simular to mine so i know it should work.
cant remember the brand of the bar, all I remember is the sticker said "our bars stay harder longer"
|
|
|
|
« Last Edit: July 24, 2006, 09:35:23 AM by fccool59 »
|
 Logged
|
|
|
|
|


