FE-FC Holden Discussion Forum
March 29, 2024, 04:36:48 AM *
Welcome, Guest. Please login or register.

Login with username, password and session length
News: The FE-FC Holden Car Club of NSW are proud to host the 19th FE-FC Holden Nationals. Check out the announcement video for more.
 
   Home   Help Search Calendar Login Register  
Pages: [1]   Go Down
  Add bookmark  |  Print  
Author Topic: FC Van  (Read 9452 times)
fcvan
Full Member
***
Offline Offline

Posts: 112


I love YaBB 1G - SP1!


View Profile
« on: June 24, 2015, 03:09:11 AM »
0

Hey all. Its been years since I put any progress updates/pics of my van up and thought it was about time. Its been a long road and quite a few times I've almost pulled the pin, but I've been working pretty hard on it again the last year and have made some good progress. Over the next week I'll post some updates.
 
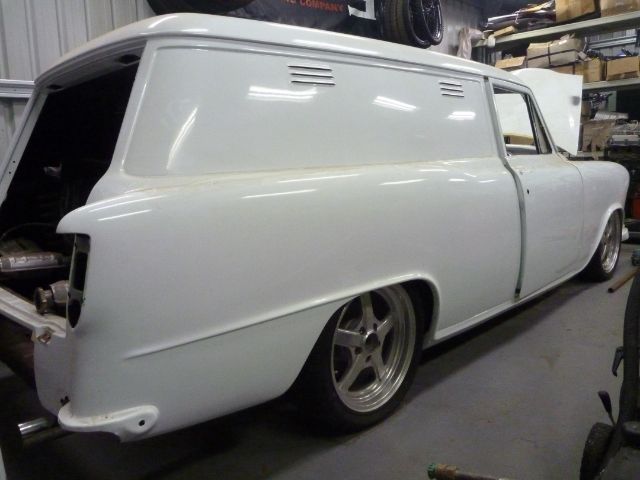
Heres the van back on its feet after a fitting a 4 link and airbags all round.


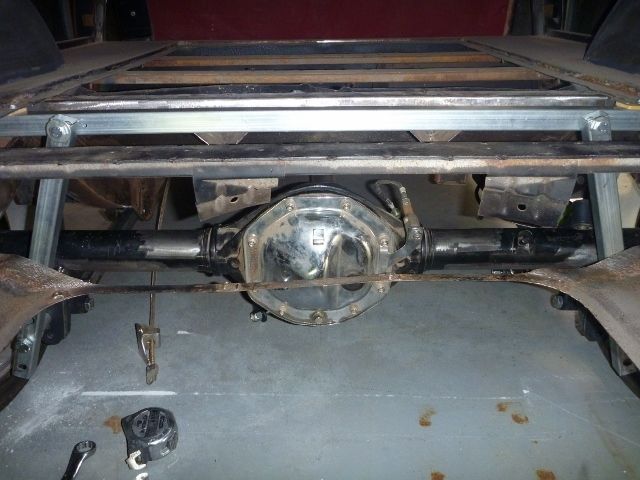
I started the fitment of the triangulated 4 link by cutting out the diff hump and tacking in some tubes to get some measurements off of.


 reinforcement plates to the front upper bar mounts


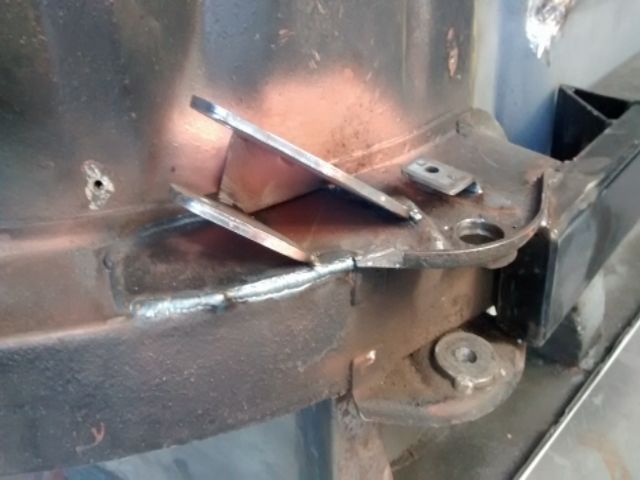
front mounts tacked in


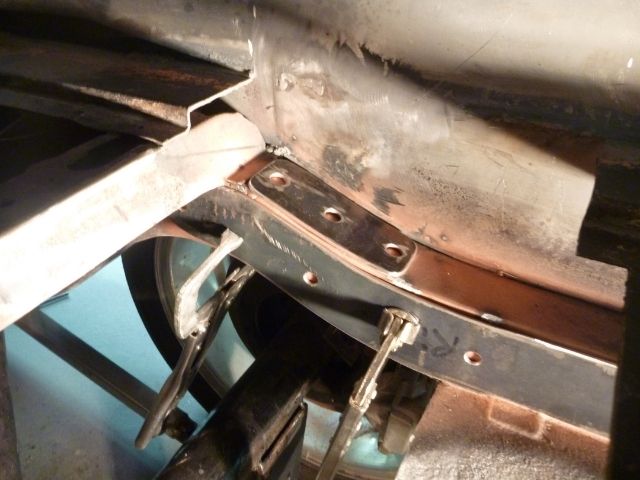
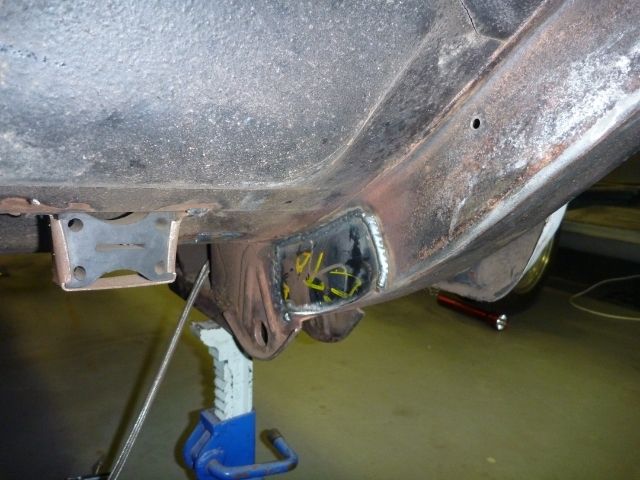
shock mount crossmember reinforcement plates ready for welding in


reinforcing plates welded in and shock mount crossmember and shock tabs tacked in


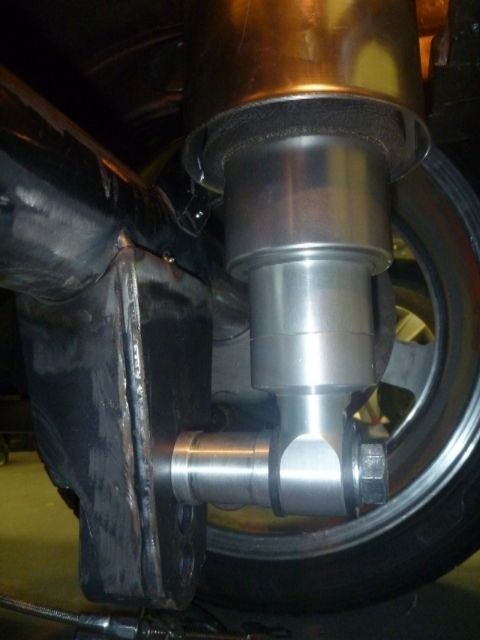
lower shock mounts tacked in . I machined up the shock spacers to get it exactly where needed for clearance


all set-up and ready for a test run .  I did plan on running the shocks off the same mount as the lower 4 link bars on an inward angle but it didnt leave me enough room for running the exhaust over the diff. So I ran the diff shock mounts inboard a little so theres a clear path for the exhaust to run through on the right hand side of the tank.


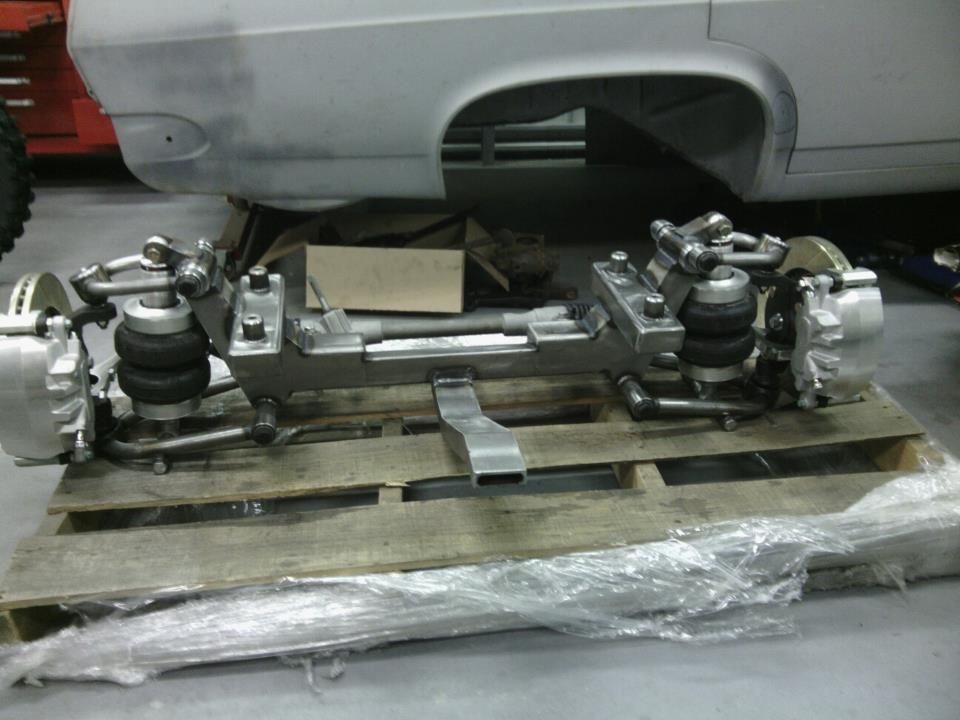
to get the airbags in the front I decided to bite the bullet and order a Southern Chassis Works front end. I ordered a rear mounted rack the same as I had set-up on the old HR front end but the rack is positioned much closer to the crossmember. I tried to modify the sump as much as I could to make it work but there just wasnt going to be enough oil volume so I had to get a front mounted rack.
Logged
59wagon
Full Member
***
Offline Offline

Model: FC
Posts: 150


View Profile
« Reply #1 on: June 24, 2015, 03:33:56 AM »
0

Wow, there're some serious mod's going on there.  Well done.  Looking forward to more pic's and descriptions.  Cheers, John
Logged
VAN059
Full Member
***
Offline Offline

Model: FC
Posts: 208


Brisbane, QLD.


View Profile
« Reply #2 on: June 24, 2015, 07:58:20 AM »
0

I'll be watching with envy  Wink
should have a quick tidy up on mine underway shortly, followed by a total rebuild after the Nationals
Looking forward to updates!
Cheers
Marc
Logged

Smokin Words and Shoutin Turds
fcvan
Full Member
***
Offline Offline

Posts: 112


I love YaBB 1G - SP1!


View Profile
« Reply #3 on: June 24, 2015, 10:44:30 PM »
0

Hey Marc, and I'm in envy cause you got a van on the road. haha.
Logged
fcvan
Full Member
***
Offline Offline

Posts: 112


I love YaBB 1G - SP1!


View Profile
« Reply #4 on: June 24, 2015, 11:40:03 PM »
0

Next job was to replace the diff hump and steel around the fuel tank. The sheetmetal that supports the fuel tank was fixed up poorly by someone previously and as I am going to be running a space saver tire I decided to move the fuel tank mounting up. I went level with the bottom of the chassis to get the tank up as high as possible for clearance and to get it out of sight so it didnt look like a drop tank. I made a frame to support the tank and it made it easier to fix the surrounding sheetmetal, including the new diff hump. I lost some pics so there isnt a close up of the new diff hump but you can see it on the pic of the underside shot on the rotisserie.. I also moved the tank to the left just a little to give more exhaust to tank clearance.


Logged
fcvan
Full Member
***
Offline Offline

Posts: 112


I love YaBB 1G - SP1!


View Profile
« Reply #5 on: June 25, 2015, 12:16:06 AM »
0

The firewall was replaced on the van quite a few years ago and the guy was also meant to fabricate matching inner fenders. Well it all went south with that guy and I didn't even know if I'd see my van again. Its been on the to do list ever since and I was going to pay someone to roll some new panels but decided to tackle it myself. I dont have the skills or tools to wheel/bend some new panels so I decided to smooth out the existing shape.  I measured all the pressings and got a mate to cut some strips to weld in. That was a slow process keeping the strips level and working them into the internal and external radiuses. Also taking my time to let it cool and not let it get too hot. It was a huge job, one that I kept putting off, but am pretty happy with the result.


No turning back now!


Logged
fcvan
Full Member
***
Offline Offline

Posts: 112


I love YaBB 1G - SP1!


View Profile
« Reply #6 on: June 25, 2015, 01:15:56 AM »
0

The fab shop that made my radiator also fit new radiator side panels to suit. I was never happy with the way that he set it up so out with the grinder.The radiator was made a little too big so it was quite a job making it all fit nicely.  I started by positioning the radiator where I wanted it and making a new weld in radiator support. Once i had that in position I had to modify the bonnet catch panel to wrap around it. I cut the rear hump out of the original and had my mate bend me up a new piece to weld in.   Next I removed the radiator side panels. It was fully welded to the inner guard so that was a nightmare getting those out !   After making some cardboard templates and transferring to steel I made sure it was all centered and welded them in flush with the back of the radiator support.


Logged
fcvan
Full Member
***
Offline Offline

Posts: 112


I love YaBB 1G - SP1!


View Profile
« Reply #7 on: June 25, 2015, 01:44:29 AM »
0

The radiator was sitting up too high as I wanted the top of the tank to be flush with the new radiator support panel. As the radiator was too tall the only way to get it down was to notch a small section for the lower tank to sit into. Once that was done I had some ali bent up mm perfect to keep everything flush and smooth.  Another mate welded them to the radiator and job done. The front end was sandblasted and 2pac primed ready for the next stage.


Logged
FCRB26
Guru
*****
Offline Offline

Model: FE and FC
Posts: 3802


peter.mallaby
View Profile
« Reply #8 on: June 25, 2015, 07:01:11 AM »
0

[quote  Its been on the to do list ever since and I was going to pay someone to roll some new panels but decided to tackle it myself. I dont have the skills or tools to wheel/bend some new panels so I decided to smooth out the existing shape.
[/quote]

I reckon its all a confidence thing after seeing all the work you did on the rest i reckon now after all that you could confidently do the inners from scratch.
Top effort tho she looks smick.
Only thing to watch the 4 link upper arms i did the exact same on mine back in the day i ended up tearing them out (probably due to driving like a dick) an old hot rodder told me it was partly due to the wrong angle of the upper arms so i ended up cutting the floor and welding in a crossmember like your coilover bracket? something to think about with all the other smick work you have done.
The shop that helped do my sedan were absaloute fanatical about 4 link set ups the current set up in it we re made the whole rear seat base and pointed the triangulated section to the centre.

Logged

Ed
Guru
*****
Offline Offline

Model: FE
Posts: 3311


Ed74mnd
View Profile
« Reply #9 on: June 26, 2015, 02:21:54 PM »
0


Certainly one of the smoothest engine bays around.

Cheers
Ed
Logged

in the shed
ubeuty
Junior Member
**
Offline Offline

Posts: 47


COOL


View Profile
« Reply #10 on: June 27, 2015, 01:34:16 PM »
0

Looking impressive and great to see another Panelvan on here
Logged
fe350chev
Guru
*****
Offline Offline

Model: FE and FC
Posts: 2601


View Profile
Re:
« Reply #11 on: July 07, 2015, 03:49:04 AM »
0

Great to see you back into it. That's gunna have some nice crisp lines and look awesome when finished. Well done.
Logged

Deano

Current Rides: 1958 "Black and White Taxi" FC special Sedan, 1957 FE special Sedan, BA Futura,  2015 VF Commodore, 1956 Austin Tipper Truck
propig2003
Junior Member
**
Offline Offline

Model: FC
Posts: 52


I love YaBB 1G - SP1!


View Profile
« Reply #12 on: July 07, 2015, 07:10:12 AM »
0

G'day mate, reading this rebuild with great interest. Coming along nicely mate. I read your comment about the rear mounted rack and the lack of oil volume. A mate actually manufactured a sump for me that allowed us to run the rear mounted rack through the sump. Works extremely well on a blown sbc.


Sent from my iPhone using Tapatalk
Logged
NES304
Guru
*****
Offline Offline

Model: FC
Posts: 2874


Yes Dear


nes304
View Profile
« Reply #13 on: July 07, 2015, 05:37:29 PM »
0

Jesus 😳
Logged

FireKraka
Senior Member
****
Offline Offline

Model: FC
Posts: 646


View Profile
« Reply #14 on: July 08, 2015, 10:20:50 AM »
0

Yes my son  Grin Grin Grin
Logged
VAN059
Full Member
***
Offline Offline

Model: FC
Posts: 208


Brisbane, QLD.


View Profile
« Reply #15 on: July 08, 2015, 12:36:17 PM »
0

That's some black magic there  Shocked Shocked
Logged

Smokin Words and Shoutin Turds
Pages: [1]   Go Up
  Add bookmark  |  Print  

Share this topic...
In a forum (BBCode) 
In a site/blog (HTML)

 
Jump to:  

Powered by MySQL Powered by PHP Powered by SMF 1.1.21 | SMF © 2015, Simple Machines Valid XHTML 1.0! Valid CSS!
Page created in 0.037 seconds with 20 queries.