|
Fc1958
|
 |
« on: July 20, 2009, 08:13:22 PM » |
0
|
|
|
|
|
|
 Logged
|
Old Holdens never die
they just go faster!
|
|
|
nige and Jody
Junior Member

 Offline Offline
Posts: 58
Where do I start?

|
|
« Reply #1 on: July 20, 2009, 08:34:03 PM » |
0
|
Maaaate, Awesome!!
Love the colour!!, good luck with the rebuild and keep us updated with your progress.
Cheers
Nige
|
|
|
|
|
Logged
|
FC225 (in progress), FB215 (waiting), EJ229A (go'er)
|
|
|
|
RET
|
|
« Reply #2 on: July 20, 2009, 10:43:53 PM » |
0
|
Wow, that bonnet is not your average fixer-upper  Best of luck with it. Standards aren't that common. Remember, it's a lot cheaper to learn from other people's experience than your own. That's what the club and the forum are here for. cheers RET |
|
|
|
|
Logged
|
|
|
|
Not Happy Jan
nsw-club
Senior Member
Offline
Model: FC
Posts: 957
Aussie adventure
|
|
« Reply #3 on: July 21, 2009, 07:44:27 AM » |
0
|
Hey FC 1958,
Thats my old FC> I can't believe it.
I had it about 20 years ago and bought it as a wreck! I sold it to a guy how blew up the motor and he just abandoned it! It was a great car back then. I was thinking about it the other day cos it had original number plate surrounds.... not any more! Its not the original interior obviously but it still looks in pretty good shape!
Got some pictures that i will have to scan. Where do you live??
Regards
Nick
|
|
|
|
|
Logged
|
You can never have too many!
Port Macquarie NSW
|
|
|
|
Fc1958
|
|
« Reply #4 on: July 21, 2009, 11:20:14 AM » |
0
|
lol the other side of the Cominara Parkway , Thornleigh
|
|
|
|
|
Logged
|
Old Holdens never die
they just go faster!
|
|
|
|
Fc1958
|
|
« Reply #5 on: July 21, 2009, 10:59:38 PM » |
0
|
love to see the old pics mate, do you go to the monthly meets ? if so ill catch ya there  |
|
|
|
|
Logged
|
Old Holdens never die
they just go faster!
|
|
|
Not Happy Jan
nsw-club
Senior Member
Offline
Model: FC
Posts: 957
Aussie adventure
|
|
« Reply #6 on: July 22, 2009, 09:04:34 PM » |
0
|
trying to get to a meeting. Was all set for last meeting then a mate turned up from the country!
I'll bring them aloong. It was a great old bus!
|
|
|
|
|
Logged
|
You can never have too many!
Port Macquarie NSW
|
|
|
|
Fc1958
|
|
« Reply #7 on: July 22, 2009, 09:45:18 PM » |
0
|
|
|
|
|
|
Logged
|
Old Holdens never die
they just go faster!
|
|
|
|
Fc1958
|
|
« Reply #8 on: July 23, 2009, 12:01:21 AM » |
0
|
end of day 3 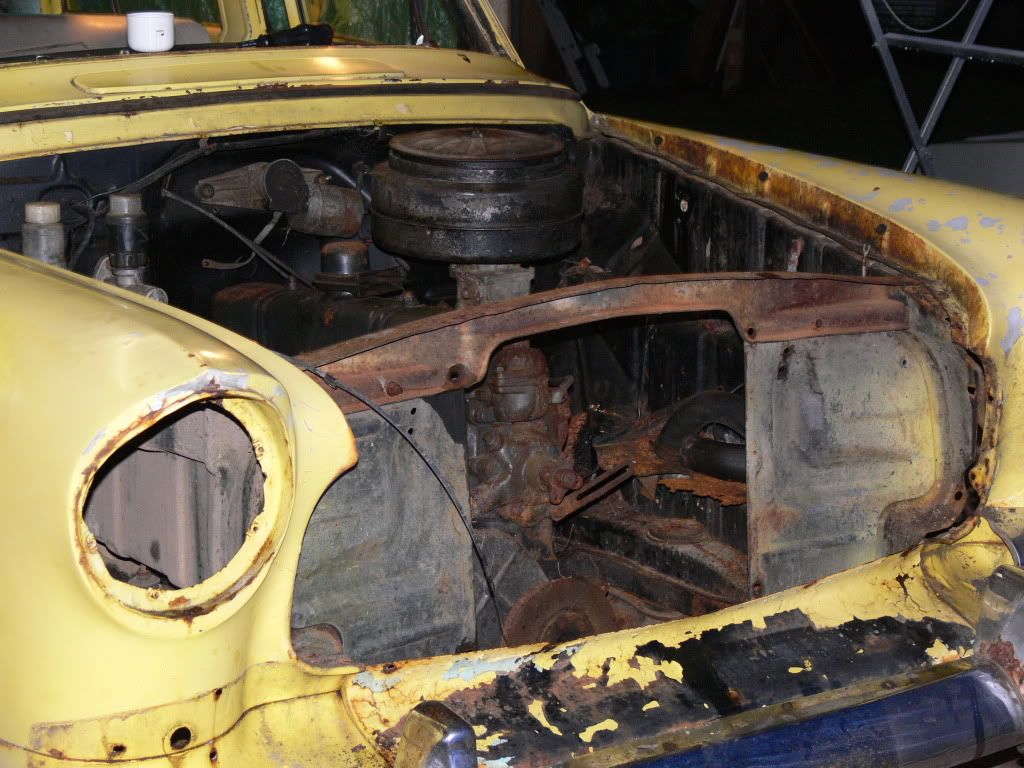 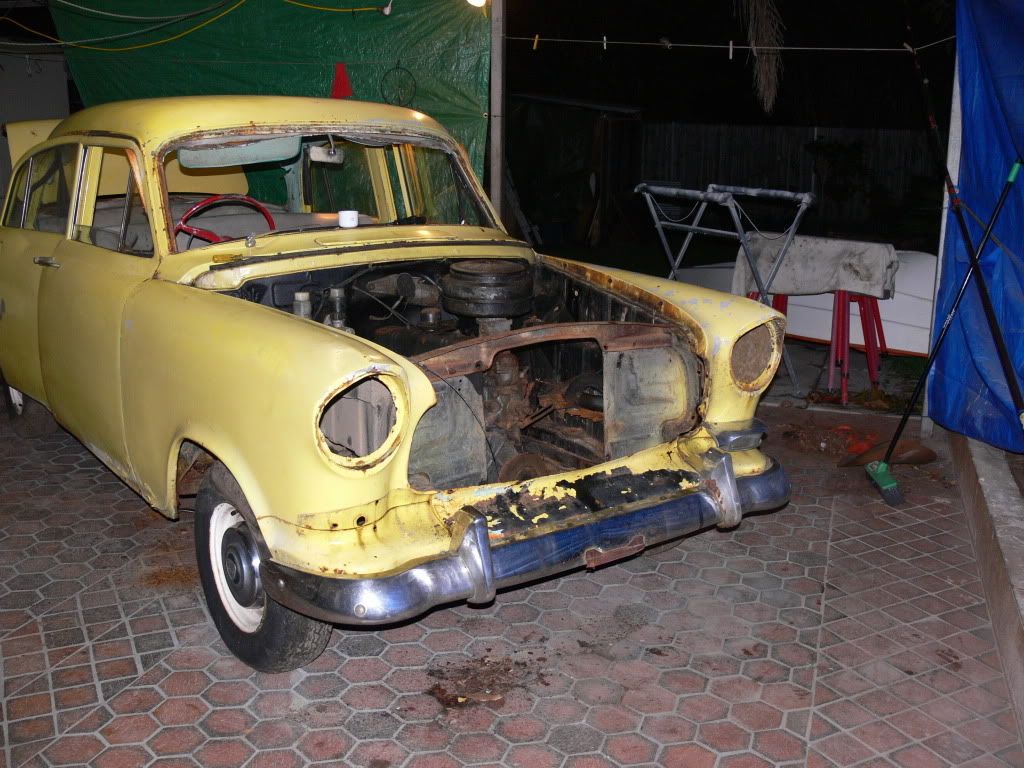 well that was fun lol. 2 bumper bar bolts and the rh guard is off but I think the neigbours might get upset at 2330  |
|
|
|
|
Logged
|
Old Holdens never die
they just go faster!
|
|
|
|
Fc1958
|
|
« Reply #9 on: July 23, 2009, 02:32:52 AM » |
0
|
Day 3.5 ..just couldn't sleep 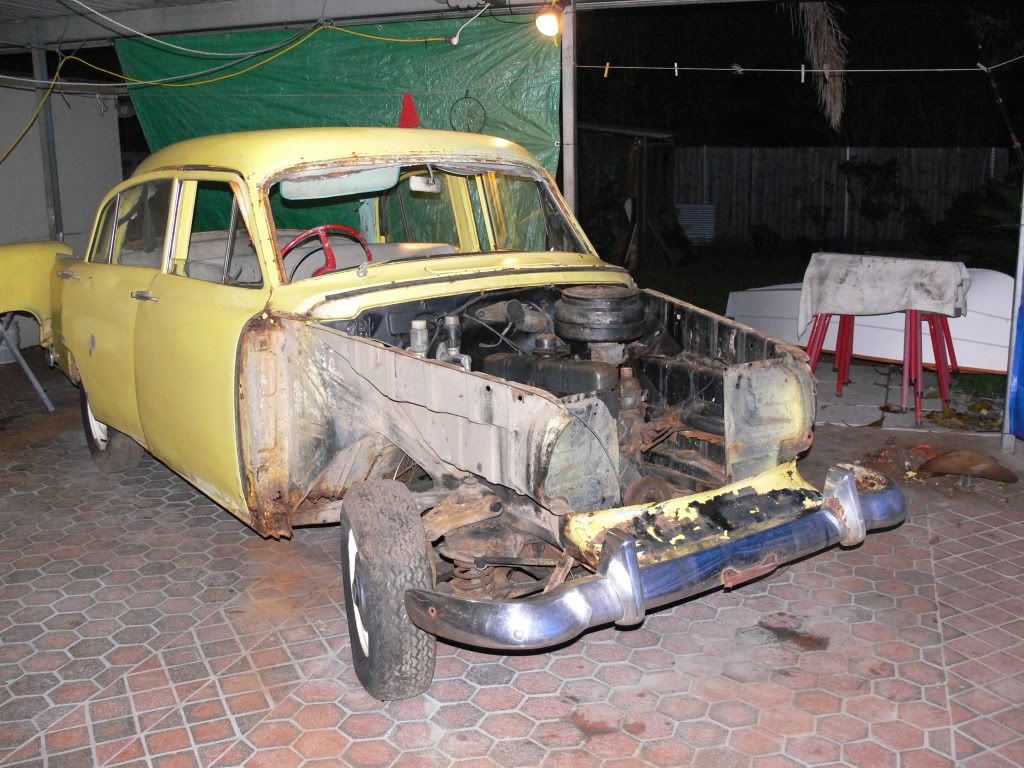 |
|
|
|
|
Logged
|
Old Holdens never die
they just go faster!
|
|
|
|
NosFEratu
|
|
« Reply #10 on: July 23, 2009, 09:20:19 AM » |
0
|
Hi Fc1958 and welcome. I, and a lot of others, look forward to seeing more progress shots of your car and your smiling face along side it! Best of luck with it all and keep that enthusiasm up!  Kathi |
|
|
|
|
Logged
|
NosFEratu   |
|
|
|
FB_MAD
|
|
« Reply #11 on: July 23, 2009, 09:45:04 AM » |
0
|
G'day Fc1958, I love the happy grin on your face in day 1 first pic  .Keep the enthusiasm up along with the progress pics. Good to see you are doing your bit in saving another one from the ravages of weather and time. Have fun . Cheers. |
|
|
|
|
Logged
|
Has anybody seen my red pen??
|
|
|
|
Fc1958
|
|
« Reply #12 on: July 25, 2009, 07:05:51 PM » |
0
|
|
|
|
|
|
Logged
|
Old Holdens never die
they just go faster!
|
|
|
|
Fc1958
|
|
« Reply #13 on: July 26, 2009, 06:49:54 PM » |
0
|
|
|
|
|
|
Logged
|
Old Holdens never die
they just go faster!
|
|
|
|
mcl1959
|
|
« Reply #14 on: July 26, 2009, 07:24:35 PM » |
0
|
Best to leave it all intact as it is and remove the column in one piece.
However, this is how it is done.
1. Disconnect all wires coming out of steering column.
2. Remove small cover plate holding wires in place on the column.
3. Remove the horn contact ring via the 2 small screws and withdraw wire through column.
4. Remove screw holding the indicator cover & remove.
5. Attach a draw wire to the remaining wires emerging from the steering column.
6. Remove 3 screws visible around the centre of the opening and withdraw indicator assy and wires up through column and leave draw wire in place.
7. Remove the large spring and seat from the steering shaft.
8. This exposes the gearshift support which is retained by three bolts - after removal of these bolts and the gearshift lever, the honey pot can be withdrawn
When installing ALL the wires have to be attached to the draw wire before pulling it through.
Ken
|
|
|
|
|
Logged
|
|
|
|
|
Fc1958
|
|
« Reply #15 on: August 31, 2009, 01:17:24 AM » |
0
|
another day off work Frontend removal Tommi style 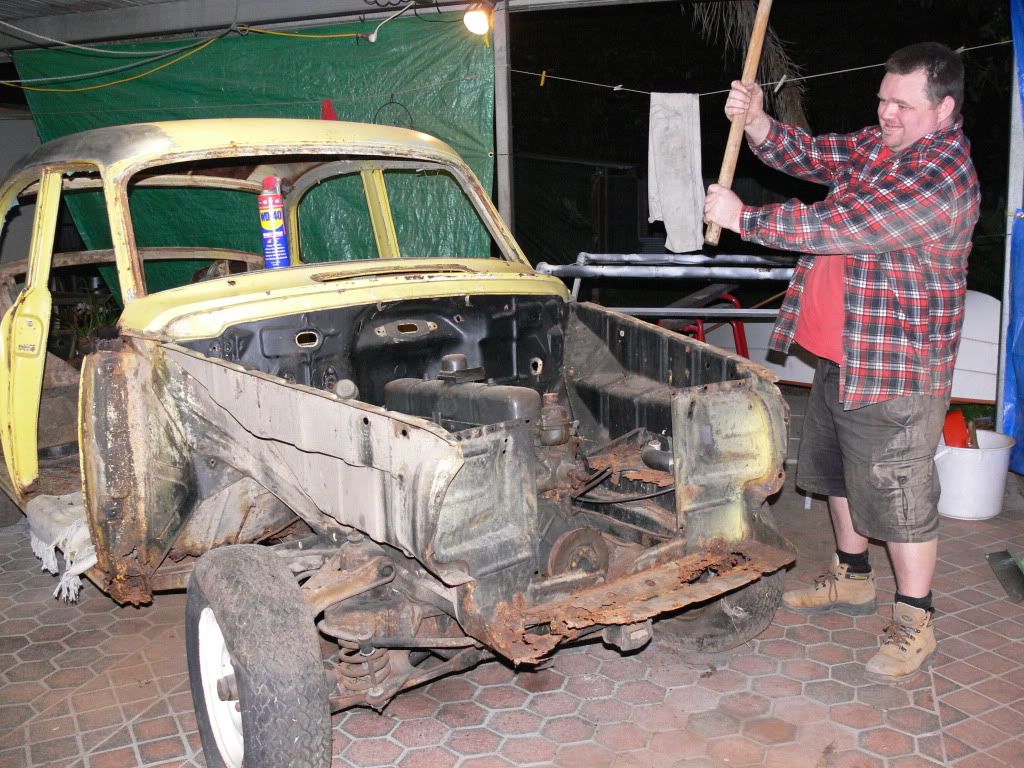 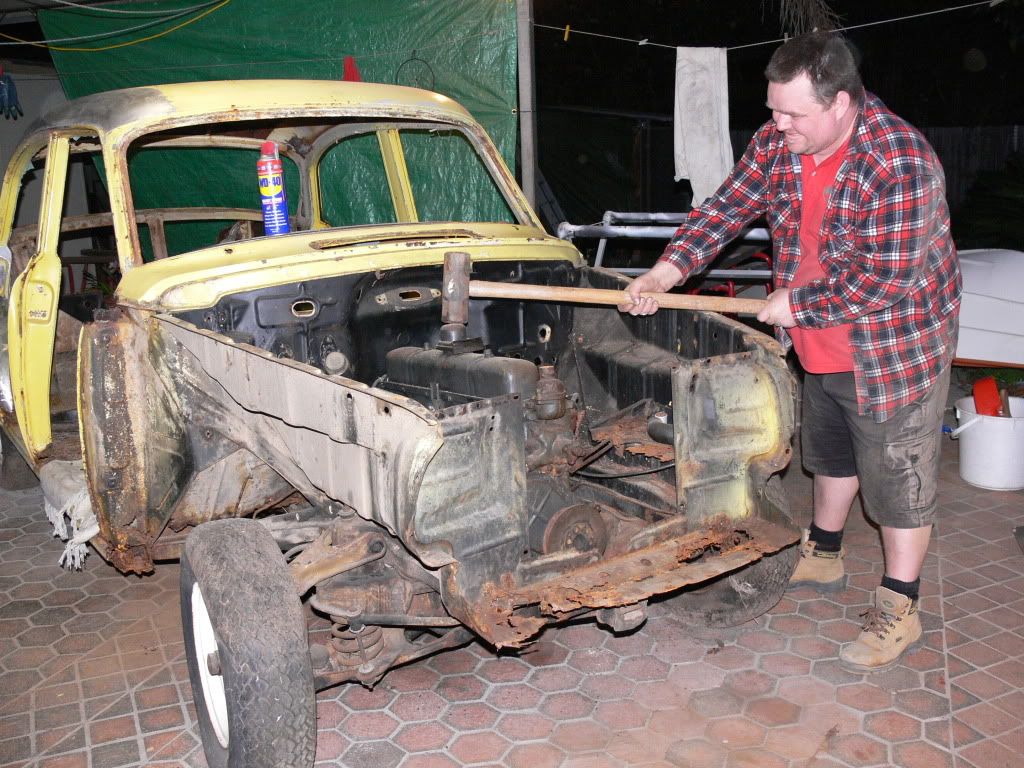 haha joking.... got curious on whats underneath 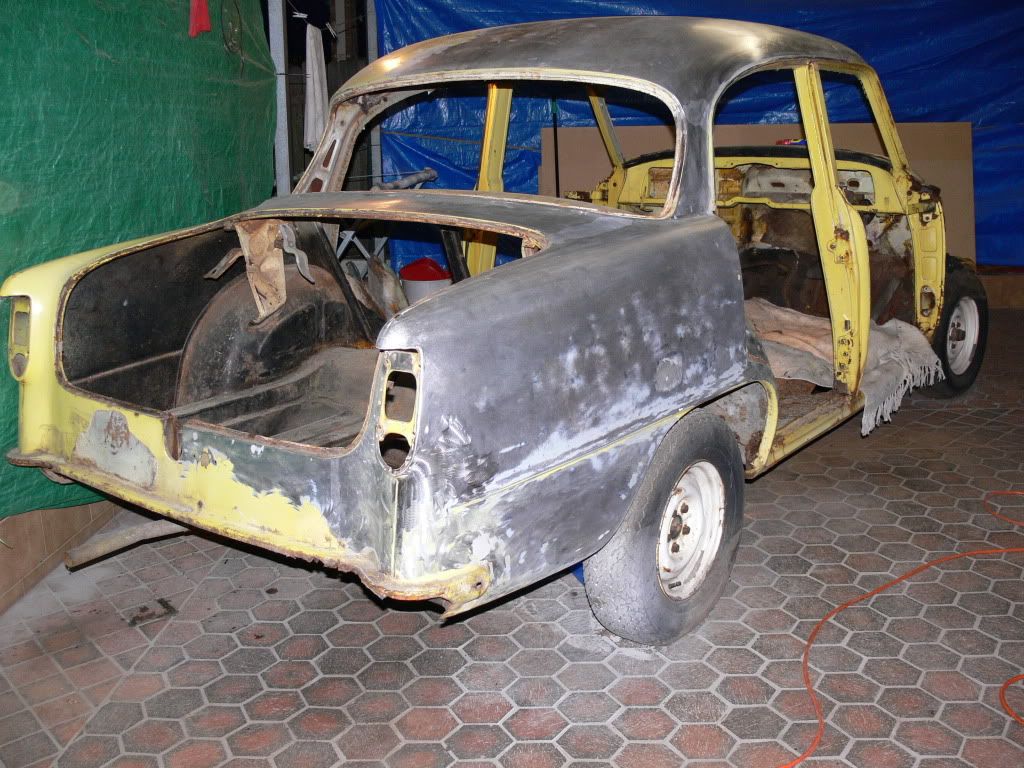 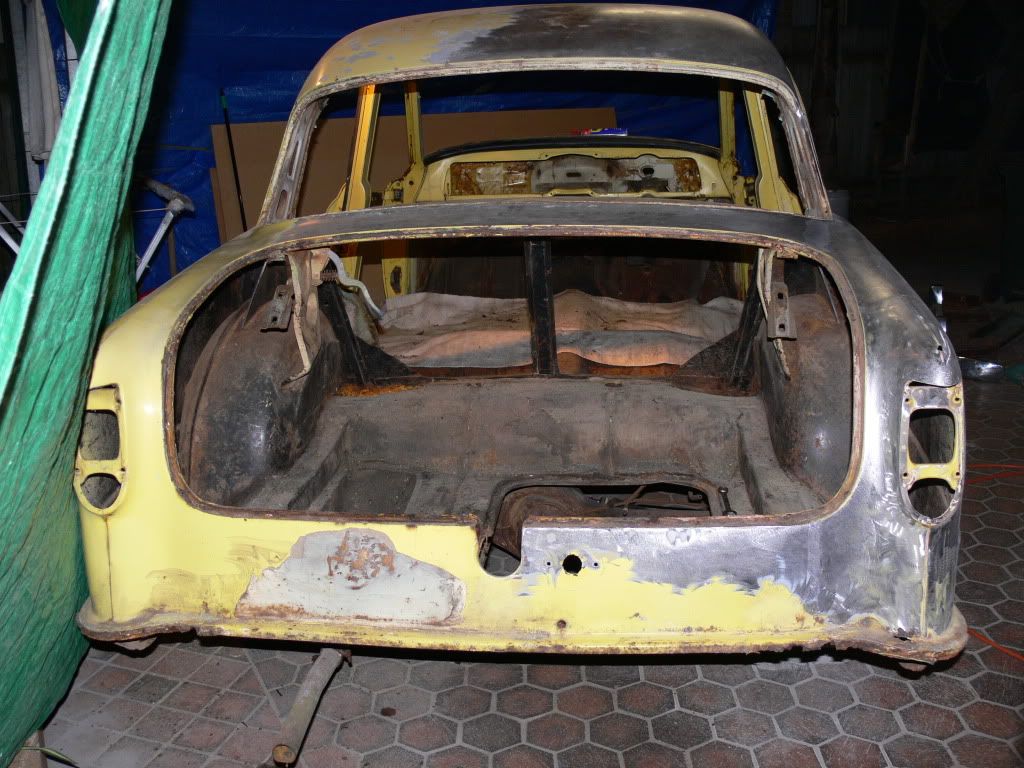 lost the front bar and saw the lack of subframe   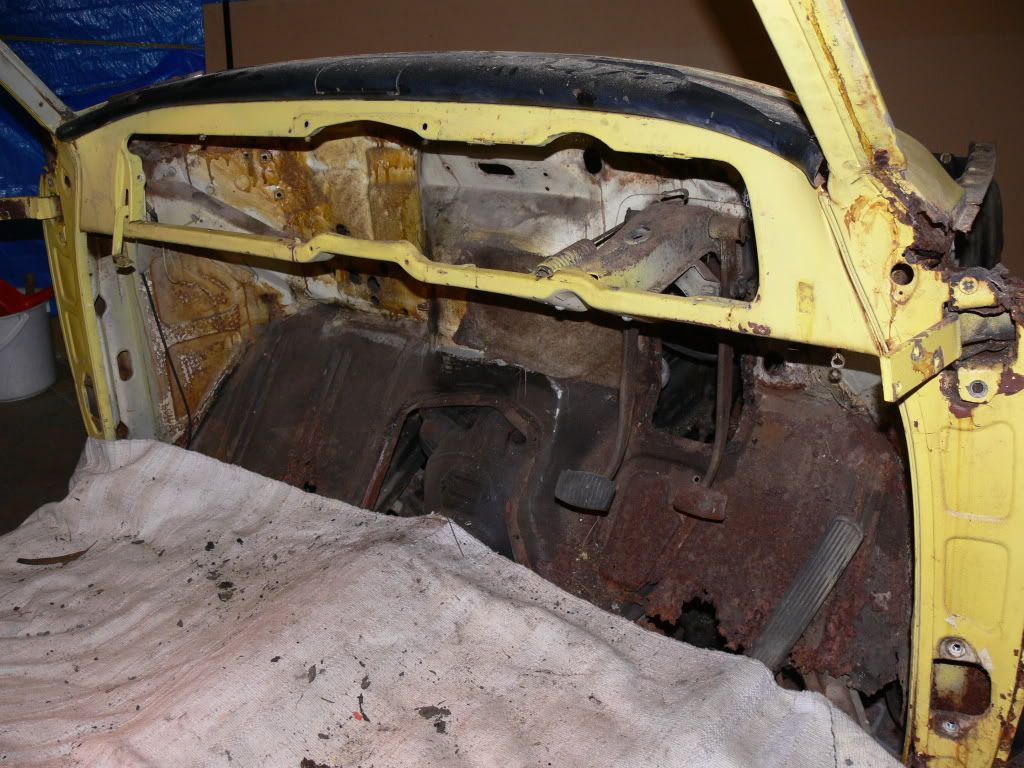 my type of store room 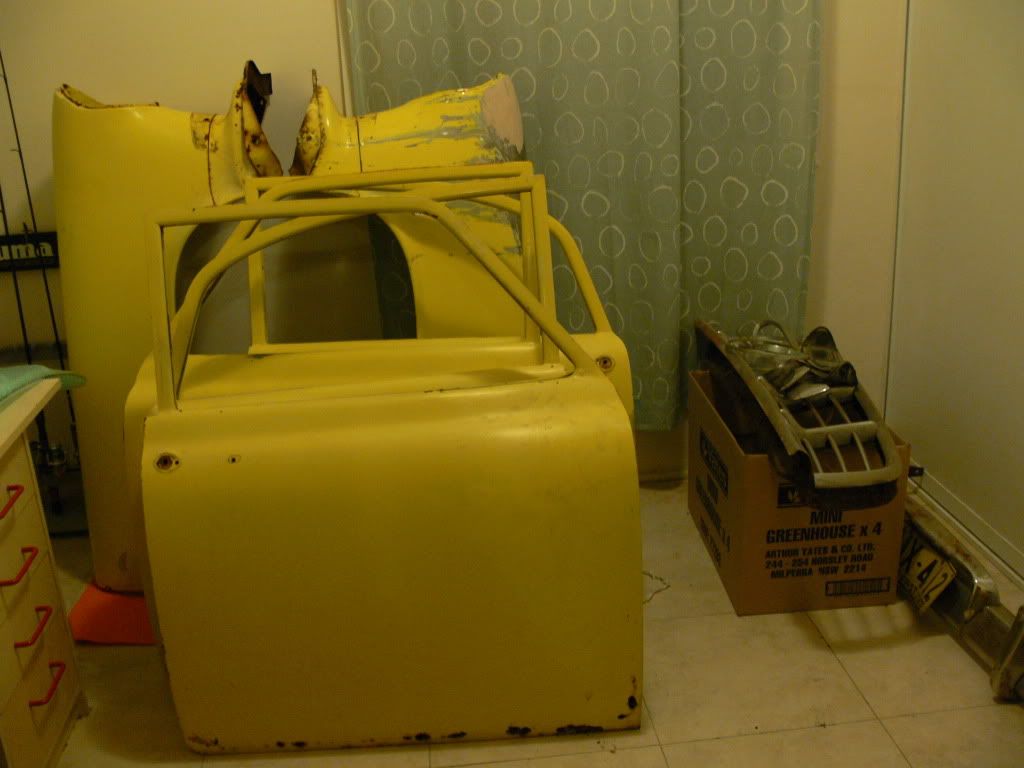 off to get some stands tomorrow so i can drop the diff and frontend (without the hammer) |
|
|
|
|
Logged
|
Old Holdens never die
they just go faster!
|
|
|
Rusty_T
nsw-club
Senior Member
Offline
Posts: 680
I love YaBB 1G - SP1!
|
|
« Reply #16 on: August 31, 2009, 01:24:56 PM » |
0
|
Going well Tommi, Keep it up and don't forget what RET said, if you get stuck ask. That's what the club and forum are about. Best of luck and keep the progress pics coming. Cheers Rusty
|
|
|
|
|
Logged
|
|
|
|
|
mcl1959
|
|
« Reply #17 on: August 31, 2009, 08:52:32 PM » |
0
|
Ouch - that rust in the top of each A pillar looks nasty
Ken
|
|
|
|
|
Logged
|
|
|
|
|


