Mustard
Newbie

 Offline Offline
Model: FE
Posts: 8
BEER Its not just for breakfast anymore

|
 |
« on: April 21, 2010, 09:39:23 AM » |
0
|
First a big thank you to Stinky for helping me get the pictures on to photo bucket. The link to the photos are at the bottom of this page. I recently had to change all the door rubbers and boot rubber on my FC "Black Betty" and so I start this how to guide with a big thank you to the blokes in the forum for their advice info and Pics who made my job easier. I would like to pay it forward as they say so to those of you who are about to rock.... er I mean rubber. If the old rubbers are still in place take time to study where they are now and how they look and take photos of it if you can. all this will help you later on. I do apologise for the black on black photos but I hope it gives you a bit of an idea as to how to go about this job. OK here we go. Img 1,2 As you can see all the doors and boot lid have been removed and stacked on shopping bags filled with old news papers. 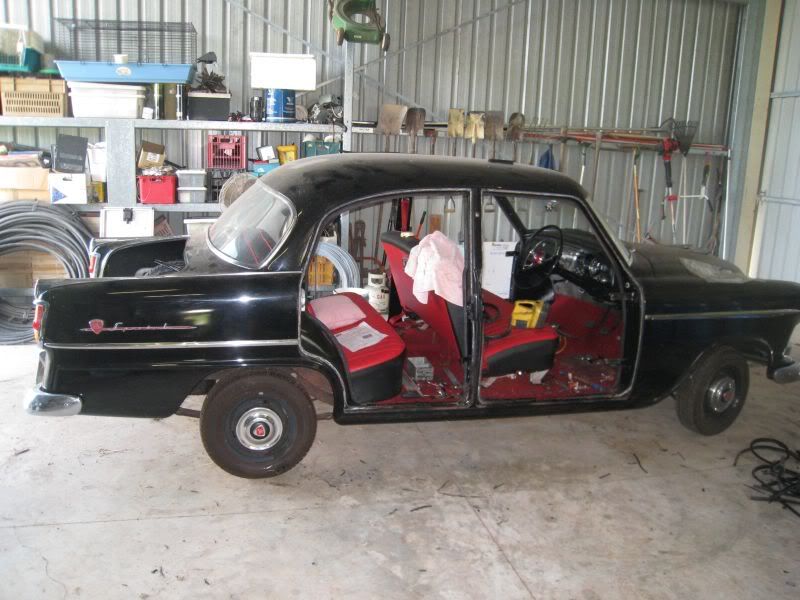 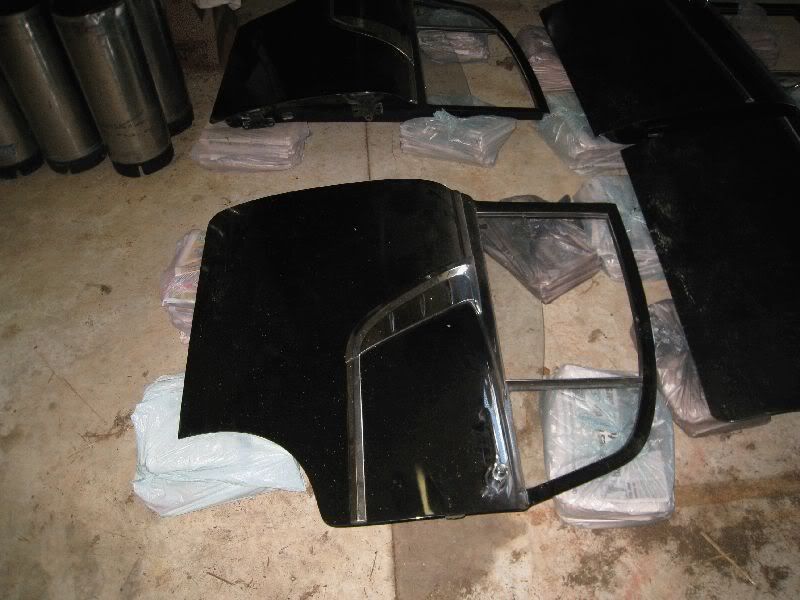 You'll have to remove the door trims. Mark around the hinges so you can put the door back to where it was before. I had all the bolts loosened and then I got my better half (Thanks Jude) to remove them and then I could lift off the doors. I couldn't undo the screws from the front hinges so I had to undo the bolts from inside the door. Don't forget on the back door you'll have to remove the rear door check strap from inside the door as well. Img 3,4 Shows the fun I had to remove the old rubbers and the silicone that they were held in by. I used a couple of old screwdrivers to dig out the bulk of the silicone and then I used a curly weave Plastic buff (available from Bunnings) to clear out the rest and any traces that were left were taken care of by a good hard rub using a course rag soaked in "Prepsol". (Check to see if the paint is Perpsol safe on a bit that won't be seen later like under the scuff plates) 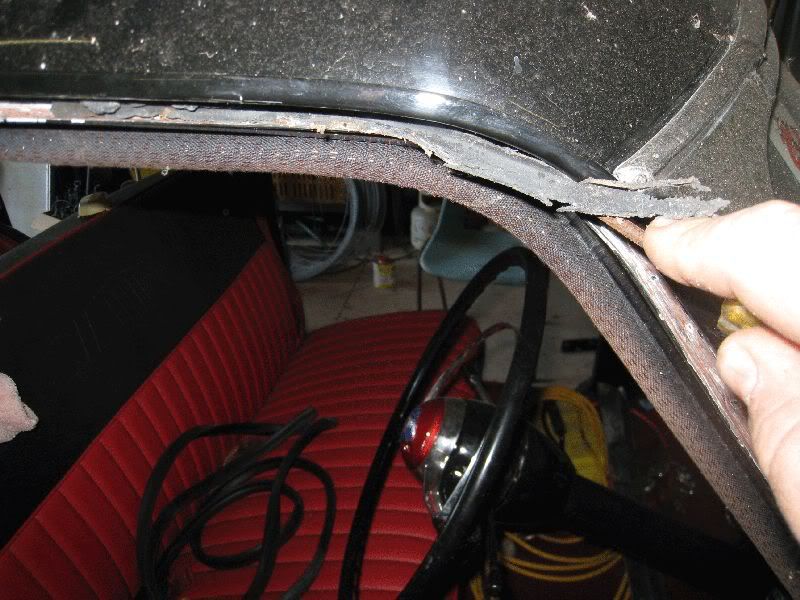 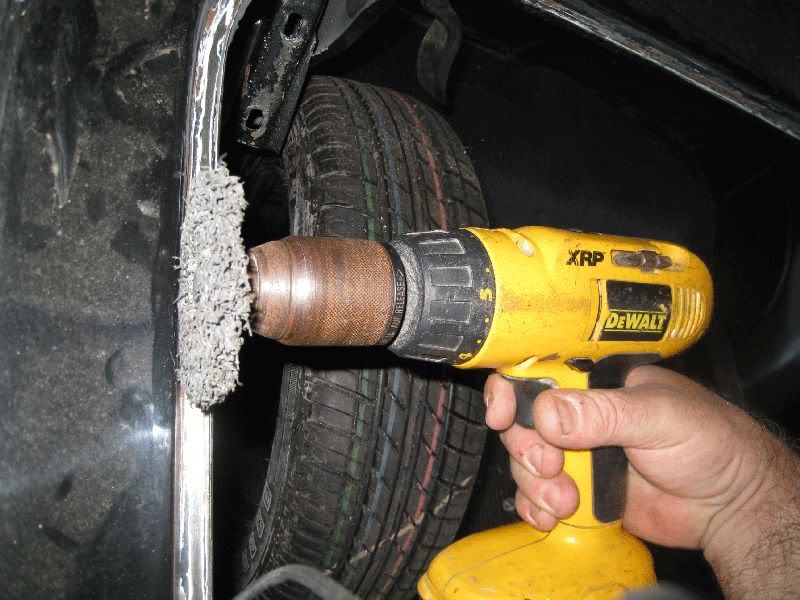 Img 5,6 Shows the cleaned out bailey chanels and the finished spray afterwards. 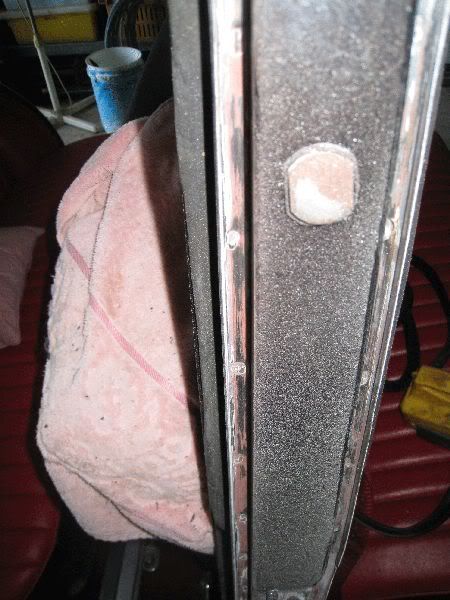 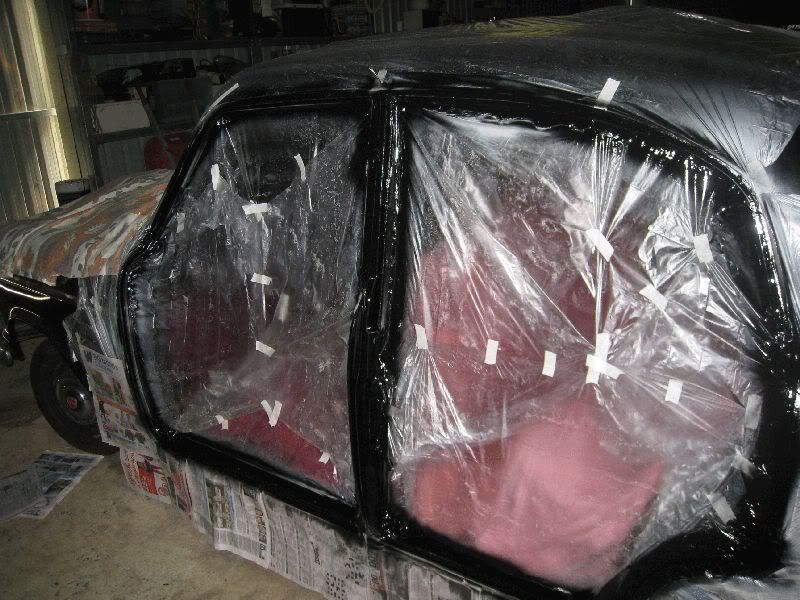 Img 7,8 Shows the tools of the trade one is the "Olfa" Knife available from bunnings its good as it allows you to adjust the blade length and the second bit of kit is called a "Fid" and is used in leadlighting it is made of tough nylon and fits in you hand perfectly and is just the right shape that lets you push the rubber into the channel with ease and also if you slip you won't do any damage to the Duco. 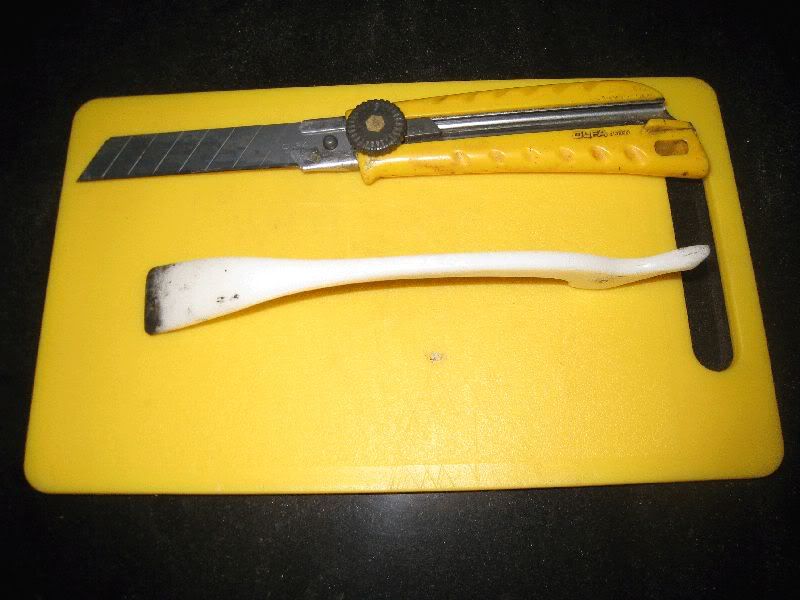 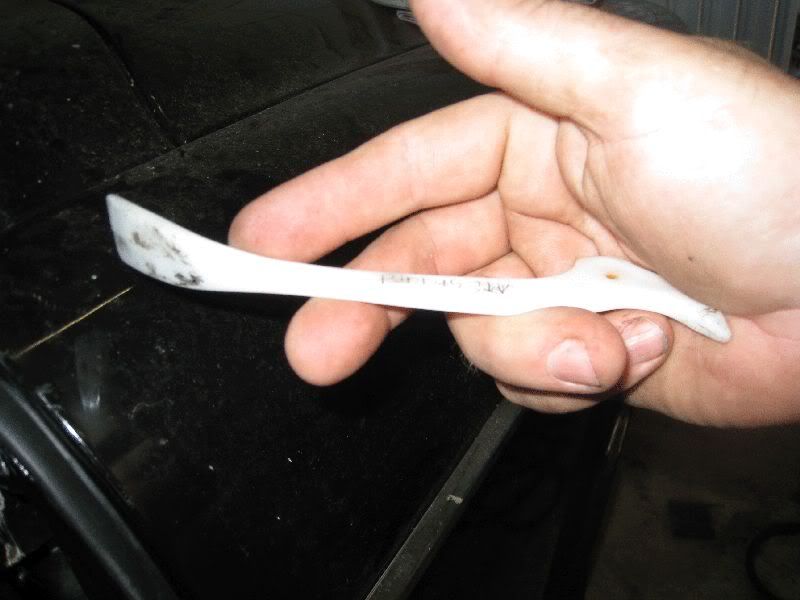 OK so now your ready to start gluing the rubbers into the channel.... Hang On Whoa Up A Minute !!! First off have a go at fitting the rubbers without glue it lets you get a feel for the job before using glue and this will save you making any cock ups later. I did it this way on both the doors on one side and it made things a whole lot easier when I did start to use the glue. Plus it lets you position the rubber in its right spot to start from which you can mark with a pencil and you can also mark out where you'll have to cut the rubbers to go over the hinges if your set of rubbers don't have the cut outs (Re Rare Spares) so you'll be able to cut these bits out before you start. A little tip when cutting rubber is to dip the blade in water for a frictionless cut and cut it in one direction only this will give you a straight as a die cut. |
|
|
|
« Last Edit: April 21, 2010, 11:43:37 AM by stinky »
|
 Logged
|
|
|
|
Mustard
Newbie
Offline
Model: FE
Posts: 8
BEER Its not just for breakfast anymore
|
|
« Reply #1 on: April 21, 2010, 09:40:39 AM » |
0
|
Img 9 to Img 14 Right you've had a practice and are feeling confident lets glue those suckers in. Before we go any further let's talk about the Glue It's called "Loctite 406" which I got from Rare spares. Its basicly a super glue and as such will stick the rubber to the car in seconds (This is good ) as well as to your skin (this is bad). It can be unstuck by going down to the chemist and asking the lasses there for a bottle of super glue remover but they will know this product better as Nail Polish remover or accetone. Get some before you start keep it near, lest you spill some of the 406 in your lap and end up gluing something together you'd rather not of glued. OK there endeth the safty lesson. Now when you use this on the rubber try to remember less is more you only want a thin line of glue 1 to 1.5mm wide as you don't want it squelching out the sides. You only want to glue the base of the rubber to the base of the channel and try gluing about 30 to 40 mm at a time in the begining other wise the glue will dry before you get to push it in the channel as you get better at it you can do it in longer sections but remember the longer the section the faster you'll have to work all well and good if you can do it. Just remember when you teararse you'll make mistakes. Better off taking your time. I positioned the bottom part of the rubber which is the bit where the 2 drain notches are cut out central so each notch is about the same from where the channels start to curve up (see IMG-9). 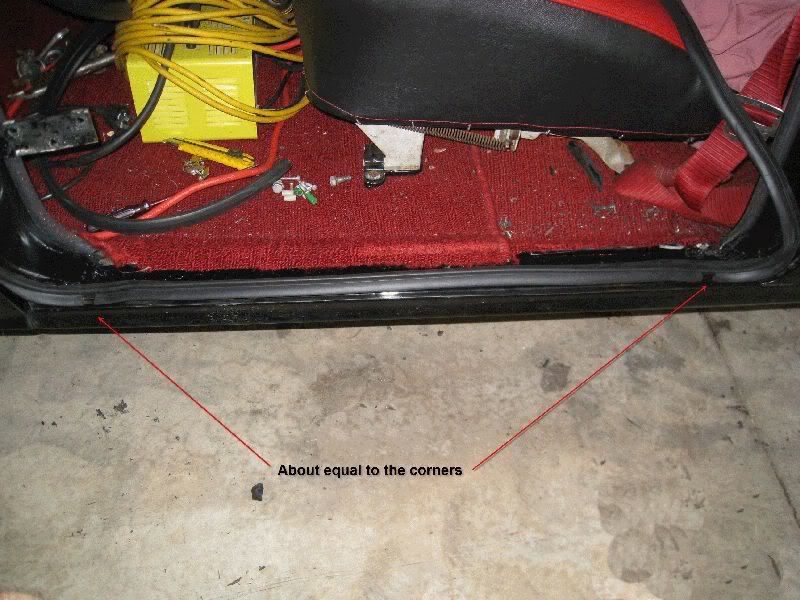 Now start to work you way up the channel until you get to 75 to 100mm from the right angle top corner. Then start from the other side and work up until you get about the same distance from the top as well. Leave the base (Scuff plate bit) unglued as this can be done last. 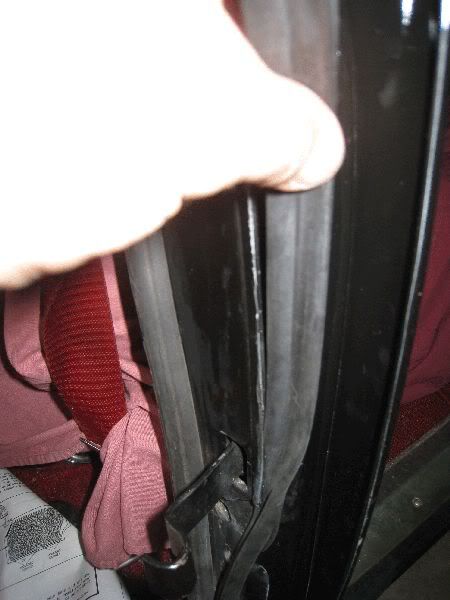 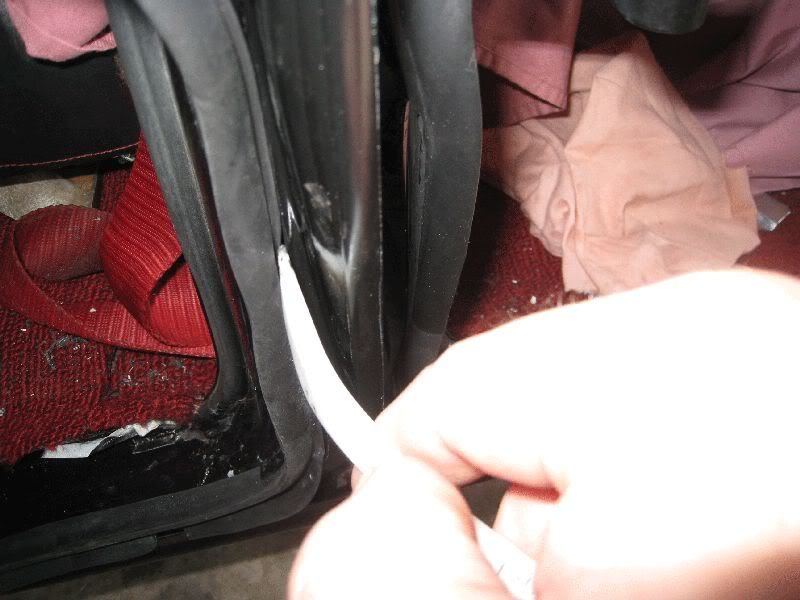 Now we come to the tricky bit the 45 deg join. (Check Img 1st Cut to 4th Cut.) O.K. this is how I do them first I cut the vertical rubber at 90 degrees and leave it about 12mm longer than the top of the channel this makes it easier to hold against the channel and mark the height of the top of the channel. Now cut it so that it sits in the channel right to the top. If your not sure leave it a bit longer and then push it into the channel to see how it fits better to be a bit long and re trim it then cut it too short. Now remove the vertical rubber and do the same with the horizontal one till it too fits snugly against the side.Doing it this way makes sure that you have the exact length that you need. 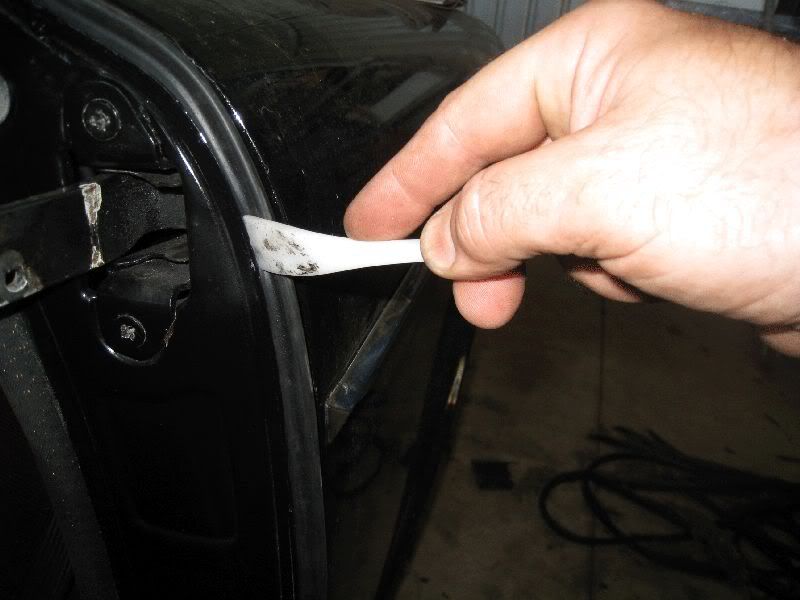 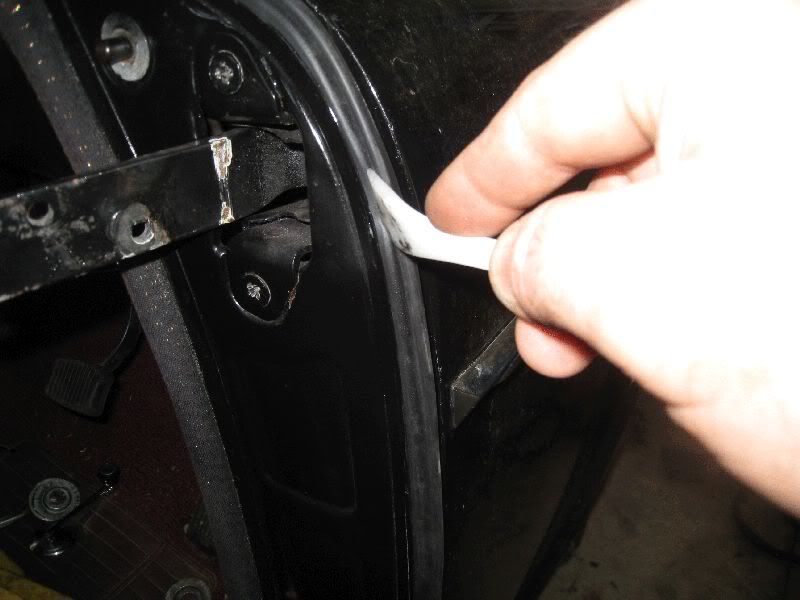 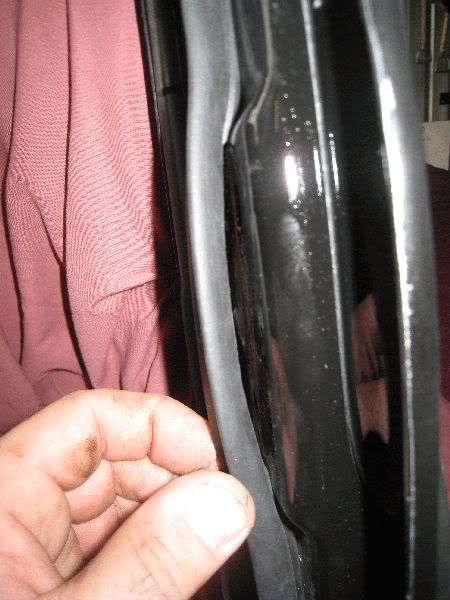 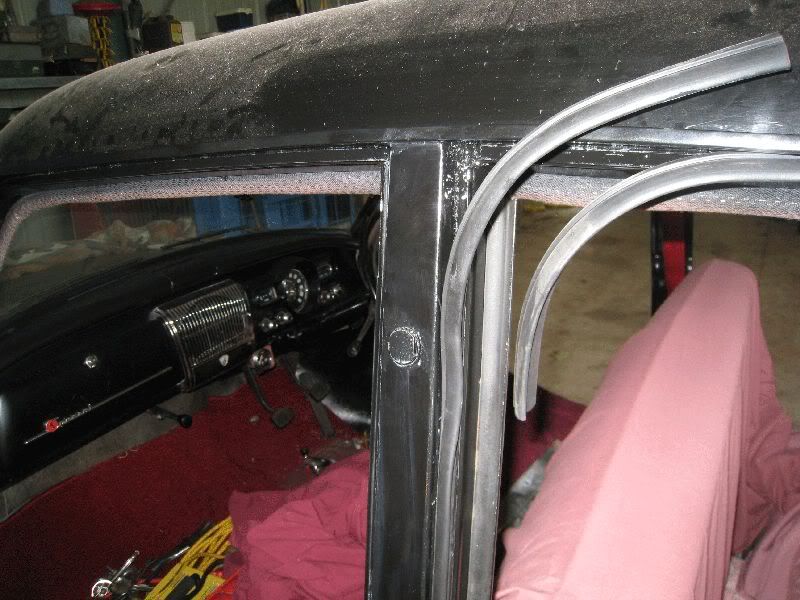 |
|
|
|
« Last Edit: April 21, 2010, 11:53:17 AM by stinky »
|
Logged
|
|
|
|
stapla
Full Member
Offline
Model: FE
Posts: 197
I love YaBB 1G - SP1!
|
|
« Reply #2 on: April 21, 2010, 11:51:09 AM » |
0
|
Geat post. Thanks for putting your time and effort into the forum for others to share.
Peter
|
|
|
|
|
Logged
|
|
|
|
|
Glenn 'Stinky' Stankevicius
|
|
« Reply #3 on: April 21, 2010, 11:54:42 AM » |
0
|
Now remove the horizontal one reinsert the vertical one and mark with a pencil a 45 deg line from the top corner through to the cut out in the bottom corner of the bailey channel. Remove the rubber from the channel and cut it see img_ 16,17 then reinsert the rubber checking that you are happy wih it if it's OK then leave it in place and put the horizontal one against it and using the vertical one as a guide mark it with a pencil leave it slightly longer and cut it till they fit together and sit straight and doesn't bunch up in the channel. 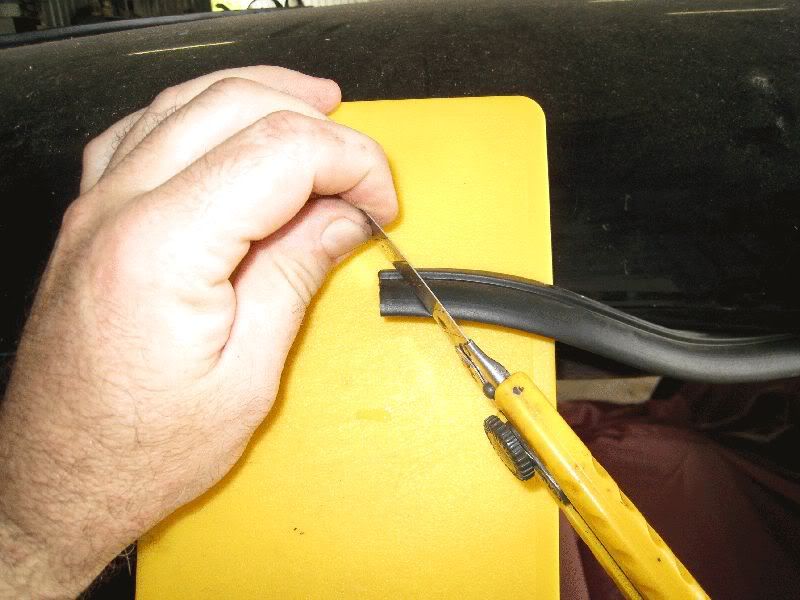 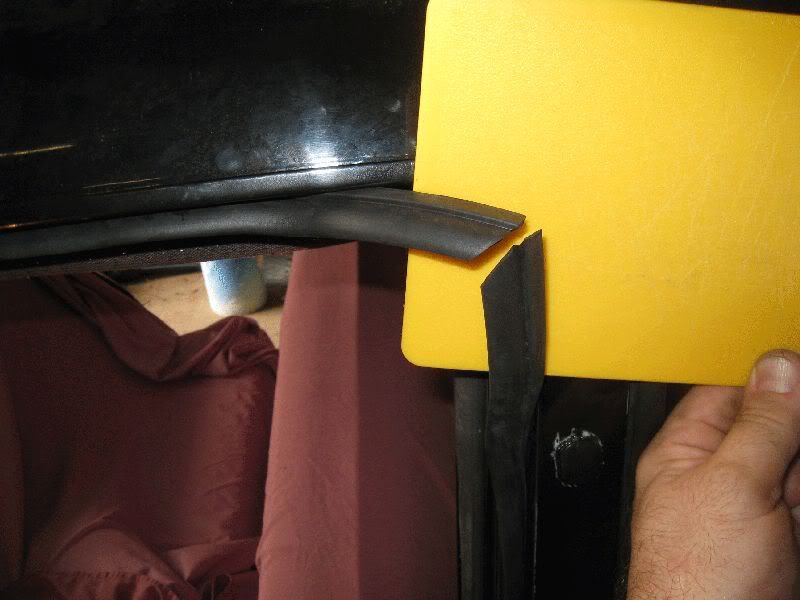 Now before you glue them in the channel take them out of the channel and glue them to gether I did this a little bit at a time so I had a chance to get the join exactly right. IMG_18 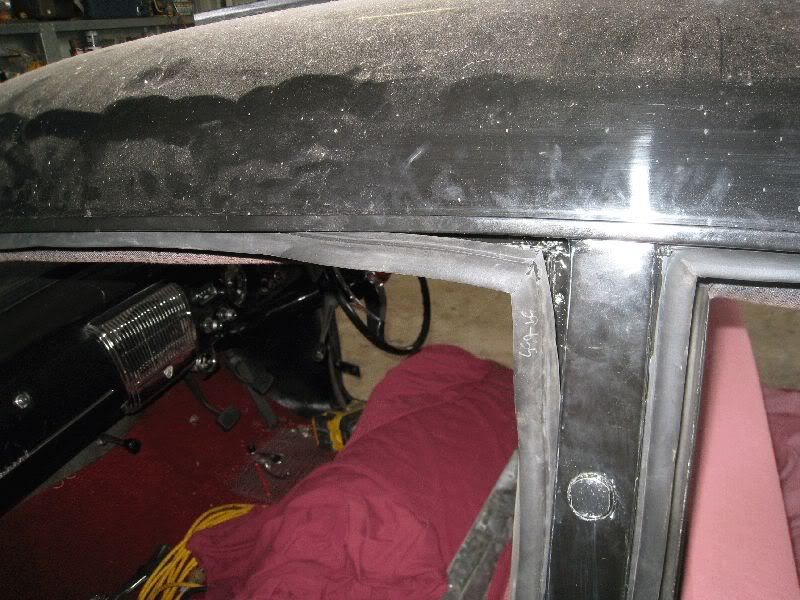 Now glue the finished 45 deg corner in place in the channel.Thats 1 done 3 to go. Put the doors back on and when closing them for the first time do it slowly checking that its not pushing the rubber into the door gap. If it does like it did in a couple of spots on mine put a couple of tiny spots of glue in the crease and tack the rubber to itself try on a scrap bit first to see how much to glue and how much to fold it back.When the jobs done spray all the rubbers with "Rubber Magic" This stuff is the preverbial "Bloody little Beauty" in a spray can. That's it. Bobs your Uncle Janes your Aunty and two bob on the first horse to win. If you need any more info you can send me an email and if you live in Darwin I can come out and give you a hand. Cheers. Mustard This is the link to the photobucket site http://s657.photobucket.com/albums/uu293/fefcforum/Mustard/ |
|
|
|
|
Logged
|
|
|
|
|
Glenn 'Stinky' Stankevicius
|
|
« Reply #4 on: April 21, 2010, 11:58:07 AM » |
0
|
Sorry, it got a bit messy when I added the photos to the post and went over the 5000 character limit, so the last bit from me is the conclusion of Mustard's post.
One little trick I used (from motor trimming) is to dry fit the rubber and get it perfect, then get out a wax pencil and mark intervals of 20cms or so on both the rubber and the body. That way when doing the final fit a bit at a time you'll line the rubber up exactly and not have to stretch or compress to compensate.
|
|
|
|
|
Logged
|
|
|
|
CraigA
nsw-club
Senior Member
Offline
Model: FC
Posts: 471
|
|
« Reply #5 on: April 21, 2010, 02:19:49 PM » |
0
|
Great post and in my opinion the right way to fit the rubbers.
Now you've closed the doors have you had to make adjustments around the rear door hinge area (the Rares rubber is way too thick here) and around the middle A pillar (the rubber is the wrong profile and will generally roll out over time).
About 50% or more of the cars at Orange had the rubber hanging out in this area.
|
|
|
|
|
Logged
|
|
|
|
|
TTV6FC
|
|
« Reply #6 on: April 21, 2010, 06:35:50 PM » |
0
|
Nice "How To" Mustard.Wow,another black FC!Is it an original black FC though as I notice it doesn't have the Fall Red paint inserts on the B pillar,door jambs or door tops?Could you put up the plate details for us?Cheers,Jamie.
|
|
|
|
|
Logged
|
Run your fingers over my Holden and I'll run my Holden over your fingers!!!!
|
|
|
freddyc
qld-club
Senior Member
Offline
Model: FC
Posts: 637
|
|
« Reply #7 on: April 21, 2010, 07:32:41 PM » |
0
|
I HATE YOU, why did you not post this 2 months ago? lol
regards fred
|
|
|
|
|
Logged
|
Townsville North Queensland
|
|
|
Mustard
Newbie
Offline
Model: FE
Posts: 8
BEER Its not just for breakfast anymore
|
|
« Reply #8 on: April 22, 2010, 10:22:27 AM » |
0
|
Craig A - no the rear doors weren't a problem on "Black Betty" but around the front doors and the guards were, but a thin line of glue did the trick and the use of rubber magic also helped. After I finished the job when I was happy with the "Fit" of the seals I left the doors closed for 2 weeks straight and let them bed in and this helps also.
TTV6FC- No mate she wasn't black to start with she was 2 tone grey but I'm glad for that I like the black better. The plate details are as follows.
Body - FC/225 29300M
Trim - 254 - 247
Paint - 253-7773
Insert - 253-5300
Top - 254-7773
Freddyc - Sorry about that mate but as soon as I get the Delorean out of the shed and up to 88 MPH I'll make it up to you. lol
|
|
|
|
|
Logged
|
|
|
|
pedro
qld-club
Guru
Offline
Model: FC
Posts: 1683
If you haven't grown up by 50, you don't have to.
|
|
« Reply #9 on: April 22, 2010, 06:35:10 PM » |
0
|
Nice looking FC Mustard, how about a few pics of her all back together, I'm sure I'm not the only one who'd like to see them, hey Jamie  Pedro |
|
|
|
|
Logged
|
I love animals - they taste great
F4+
|
|
|
|
GM
|
|
« Reply #10 on: April 22, 2010, 07:51:08 PM » |
0
|
"406" Where have we heard about that before? Kathie...........John.......?
|
|
|
|
|
Logged
|
Upon the hill there stood a cow.
It must have moved, It's not there now.
|
|
|
|
TTV6FC
|
|
« Reply #11 on: April 22, 2010, 09:10:37 PM » |
0
|
I have used 406 for years (and 401) although not in "American Pie 2" style for anyone who is familiar with the movie...hehehe.It is great stuff but as has been mentioned,is just as effective on sticking your fingers together as it is on the repair....
|
|
|
|
|
Logged
|
Run your fingers over my Holden and I'll run my Holden over your fingers!!!!
|
|
|
|
NosFEratu
|
|
« Reply #12 on: April 22, 2010, 09:23:01 PM » |
0
|
|
|
|
|
|
Logged
|
NosFEratu   |
|
|
Martin
Senior Member
Offline
Model: FC
Posts: 891
Jim
|
|
« Reply #13 on: April 27, 2010, 12:16:15 AM » |
0
|
Clark Rubber have a profile that looks much like the Rares door seals, but the sealing section lies flatter - it fits well on that section at the base of the "A" pillar. It doesn't bulge out, and it does seal - we drove through a hell of a rain storm for quite a distance out of Mildura on the way home from Orange, and my newly-fitted door seals didn't let any water in. I was very pleased.
Good descrriptive post and pics, Mustard.
Martin
|
|
|
|
|
Logged
|
The liver is evil. It must be PUNISHED
Martin
Marion. South Aust.
Ebay user id: lewis1411
|
|
|
|
Glenn 'Stinky' Stankevicius
|
|
« Reply #14 on: April 27, 2010, 12:41:43 AM » |
0
|
They might come from Restorer's Hotline Martin, we had Andrew from Restorer's (Adelaide Rare Spares branch) come to the last SMASA Meeting for a talk. As well as stocking Rare's gear they make a lot of other rubber profiles that Rares and other places wouldn't bother with because the demand is so low.
|
|
|
|
|
Logged
|
|
|
|
|
smithy
|
|
« Reply #15 on: April 27, 2010, 07:54:57 AM » |
0
|
i might just add a little trick aswell. if you are putting the seals in for the first time following a rebuild, or simply re-newing them you will need to gap the doors again as the new rubbers could alter how the door sits in the frame. if you have someone to assist you when hanging the doors then the job will be easier, if not a little trick i found is to use 2 trolley jacks and some thin pieces of ply, these are mainly to protect the doors but also will distribute the weight more evenly. starting at the back doors then work forward. first get the doors onto the hinge and nip the bolts up , place 1 trolley jack at the front and one to the rear of the doors and jack up till the weight is taken up. alternate between the 2 jacks raising and lowering them, and sliding the door forward and back ( by using the 2 jacks you can also get a diagonal movement) until you feel the correct angle has been achieved. tighten bolts up and VERY carefully and slowly close the door, keeping an eye on the gaps as you do. once the door is closed ( or sitting in the frame) you can then see which way it will need to come next keep doing this with the 2 jacks until you are satisfied the gaps are right. it is going to take some time, and could be frustrating at times but all it needs sometimes is to be moved 1-2mm at the hinge to achieve 4-5mm at the edge. once the back is done then move onto the heavier front doors, get these right then you can adjust the front guard to get the leading edge gap on the front door right. you have to be careful when opening or closing the fronts with the guard on as it is easy to catch the edge of the guard and chip the new paint   then striker plates and your in business.. and as mentioned before rubber magic, or i used autoglym rubber treatment the rubbers and close the doors for a couple of weeks. hope this is helpful. |
|
|
|
|
Logged
|
i may be getting older, but i refuse to grow up!
|
|
|
|
TTV6FC
|
|
« Reply #16 on: May 29, 2010, 08:51:14 PM » |
0
|
Hey Mustard.It is interesting (to me) that I also have an FC with the same plate details as was your vehicle.Only difference is mine was built in Adelaide.Just a question to yourself and anyone else who may be able to help,do you have any detailed photos of what happens to the rear rubbers where they go over the door hinges as I forgot to take detailed photos of mine before taking them out.Cheers,Jamie.
|
|
|
|
|
Logged
|
Run your fingers over my Holden and I'll run my Holden over your fingers!!!!
|
|
|
|
mcl1959
|
|
« Reply #17 on: June 20, 2010, 09:50:55 PM » |
0
|
The rear door rubbers are a special shape where they go over the hinges. Point to dismantlers - don't throw away the rubbers when you take them out - I usually reuse these sections in the new rubber.
You can recreate the shape with the new rubber by cutting out the back of the rubber until it sits right in the gap.
Ken
|
|
|
|
|
Logged
|
|
|
|
|
TTV6FC
|
|
« Reply #18 on: June 20, 2010, 09:58:53 PM » |
0
|
Thanks Ken,I have been waiting for someone to reply to my question as I am just about to install my rubbers.Cheers,Jamie.
|
|
|
|
|
Logged
|
Run your fingers over my Holden and I'll run my Holden over your fingers!!!!
|
|
|
Royal
qld-club
Full Member
Offline
Model: FC
Posts: 145
I love YaBB 1G - SP1!
|
|
« Reply #19 on: June 21, 2010, 09:29:04 AM » |
0
|
Jamie If you purchased your rubbers from The Restores hotline and purchased the custom fit ones as I did the section over the hinge has already been flattened so it fits quite easily, my experience anyway Roy
|
|
|
|
|
Logged
|
Just "HOLDEN " on
|
|
|
|


