crowbar
vic-club
Junior Member

 Offline Offline
Model: FE
Posts: 80
I love YaBB 1G - SP1!

|
 |
« on: August 04, 2007, 06:21:32 PM » |
0
|
Can anyone give me some tips on this conversion
I have searched through the forum and have collected heaps of information thanks to all that use this site
I have just fitted a volvo disc brake rear end and am currently running Torana front disks
I have a gemini booster, XB ****master, and HQ poportioning valve ready to fit
My problem is that I am unsure of how to fit the Booster to the firewall
eg The booster has a bracket that originally bolted to the gemini firewall does this need modification? using this appears to make the pushrod to short for the brake pedal
If anyone else has done this conversion I would be gratefull for any tips
|
|
|
|
|
 Logged
|
|
|
|
|
mcl1959
|
|
« Reply #1 on: August 04, 2007, 08:23:14 PM » |
0
|
The easiest thing to do is ditch the original Gemini bracket and make up a new one altogether. Attach the booster pushrod to the pedal and measure the distance between the booster and the firewall and then make the bracket to suit this dimension. I have never done this conversion so don't know how close or far the booster will end up from the firewall. If the booster ends up so close to the firewall that the booster bolts are too close to put nuts on then you can shorten the pushrod and attach the booster directly to the firewall. This will mean that you will have to carve a bigger diameter hole into the firewall. The last resort is to lengthen the pushrod so that a bracket can be made to fit.
Ken
|
|
|
|
|
Logged
|
|
|
|
|
Chuck
|
|
« Reply #2 on: August 05, 2007, 03:18:25 PM » |
0
|
Crobar These may help: 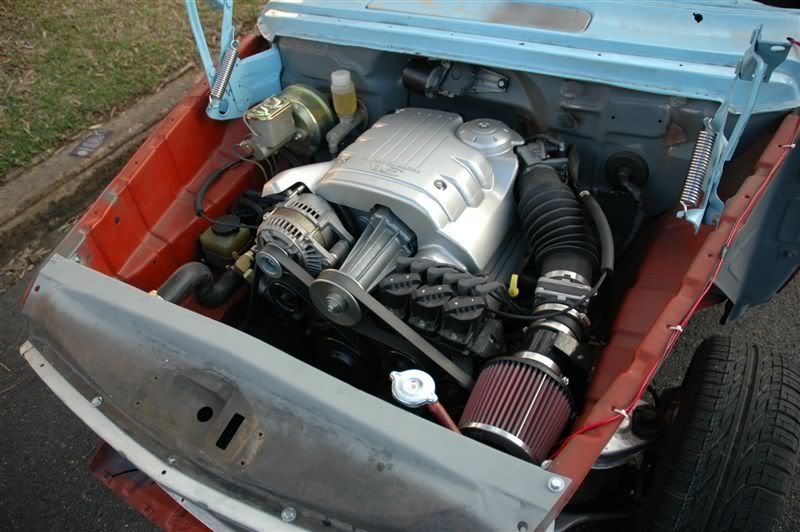 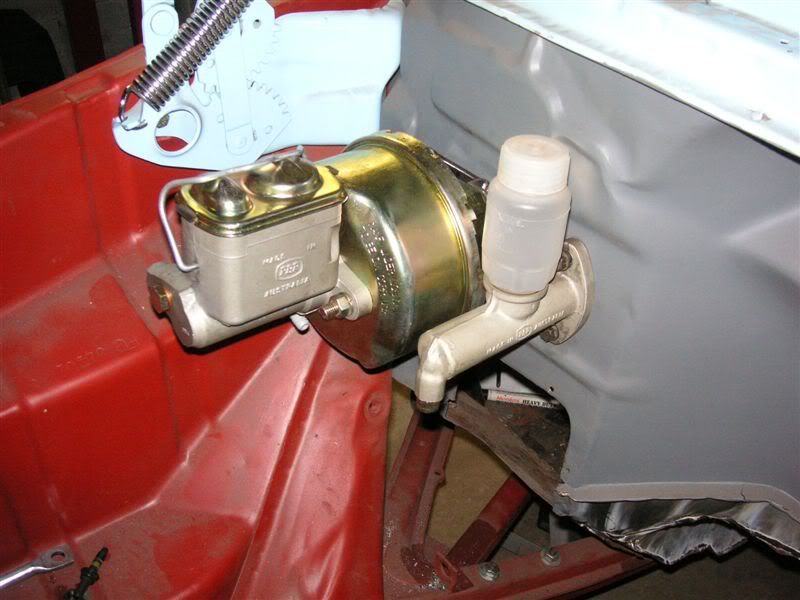 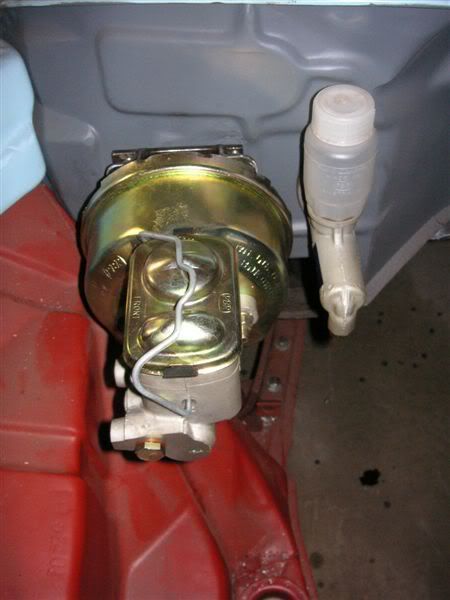 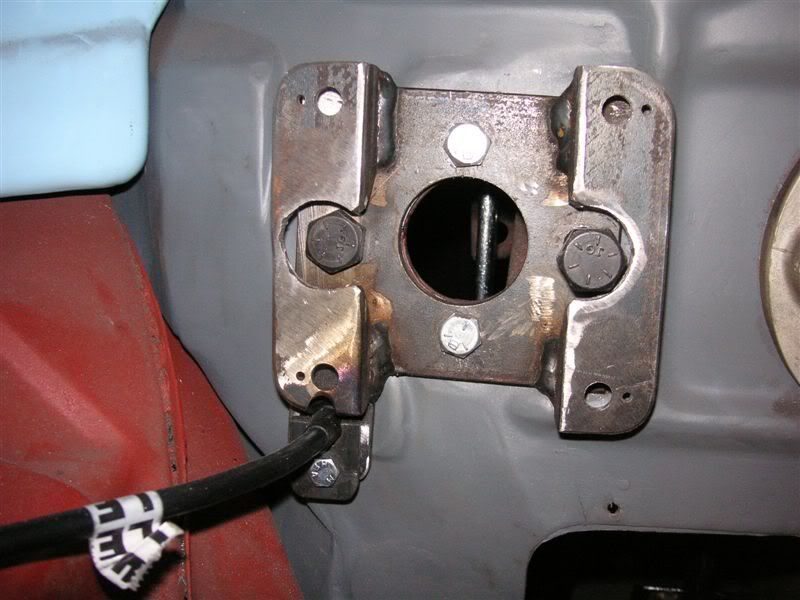 The flat plate is 5mm and the angle is 30 from memory. This will give you clearance for the studs on the back of the booster that originally held the bracket and will position the push rod the correct distance from the clevis mount on the brake pedal (it did with mine at least. The rest is self explanatory. Chuck |
|
|
|
|
Logged
|
So yes it has changed my life. I can remember when I had a wife, a mortgage and a dog; I dont have any 3 of those things any longer
Dr Gregory W Frazier
|
|
|
crowbar
vic-club
Junior Member
Offline
Model: FE
Posts: 80
I love YaBB 1G - SP1!
|
|
« Reply #3 on: August 05, 2007, 06:29:59 PM » |
0
|
Thanks ken and chuck
Much appreciated especially the pics
Cheers
Haydn
|
|
|
|
|
Logged
|
|
|
|
Trevor_B
vic-club
Senior Member
Offline
Model: FC
Posts: 377
Melbourne VIC
|
|
« Reply #4 on: August 05, 2007, 09:15:34 PM » |
0
|
Hi Crowbar, I have fitted a TD Gemini Booster to an FC ute without too much challange. I had to make up an adaptor between the end of the booster pushrod & the pedal but that wasn't too hard:  otherwise it bolted up using the same holes in the firewall (with a small amount of elongation):   The only other mod I did was to use a VN Commo brake master cylinder - still a 1" bore but has built in proportioning valve. This required some work re master cylinder mounting bolts. While the car is yet to be road tested, it fitted fairly easily. She looks like this at the moment:  Hope this helps. Trevor_B |
|
|
|
|
Logged
|
FC Sedan, Ute & Wagon .... only a Panel Van required to make the set
|
|
|
crowbar
vic-club
Junior Member
Offline
Model: FE
Posts: 80
I love YaBB 1G - SP1!
|
|
« Reply #5 on: August 06, 2007, 06:03:11 PM » |
0
|
Thanks gents
I have cut and shortened the original bracket and it worked out perfect
But when I went to fit the master it is out of alighnment it does not sit at 12 oclock it sits on about a 20 degree tilt 11 oclock
Can this be easily overcome or do I have the wrong Booster, if so all is not lost I have still got the right bracket made up
I was told it was out of a TD and it looks the same as in the photos that have been posted
Cheers
Haydn
|
|
|
|
|
Logged
|
|
|
|
|
mcl1959
|
|
« Reply #6 on: August 06, 2007, 08:31:02 PM » |
0
|
There are 3 Gem boosters, one with 4 bolts, one with 2 bolts horizontal (this is the one you want to suit the XB m/c) and another with 2 bolts on an angle (this is the one you have)
Regards Ken
|
|
|
|
|
Logged
|
|
|
|
crowbar
vic-club
Junior Member
Offline
Model: FE
Posts: 80
I love YaBB 1G - SP1!
|
|
« Reply #7 on: August 07, 2007, 08:03:19 PM » |
0
|
ALL IS WELL AND COMING TOGETHER
I RESOURCED THE RIGHT BOOSTER TODAY AT THE LOCAL WRECKERS(RECYCLERS)
WHAT I DID FIND WAS THAT THE PUSH ROD WAS ABOUT 3 TO 4MM SHORTER THAN THE PREVIOUS ONE I HAD AND WAS NOT SEATING INTO THE BACK OF THE MASTER FAR ENOUGH AND PRELOADING THAT 2 MM REQUIRED BUT CHANGING THEM OVER FIXED THE PROBLEM
THANKS FOR ALL THE HELP
CHEERS
HAYDN
|
|
|
|
|
Logged
|
|
|
|
crowbar
vic-club
Junior Member
Offline
Model: FE
Posts: 80
I love YaBB 1G - SP1!
|
|
« Reply #8 on: January 03, 2008, 08:26:40 PM » |
0
|
Gents
I still have not got this right
I have now extended the push rod to 87mm and I still get a slight leak out of the back of the master cylinder the brakes do not lock at this
Do you think that the rear seal is leaking? or the push rod needs more extending
The pedal has hardly any travel and the brakes work fine , except for this slight leak which has taken the paint off the booster
Does anyone else that has performed this mod know what length the push rod has to be? I have heard 74.5mm but I am way beyond this and I don't know if I should keep going
I think that I read on this forum once that if you put a fine wire in a port that you could tell, but I have done a search and can not locate it
Any help greatly appreciated
Cheers
Haydn
|
|
|
|
|
Logged
|
|
|
|
FC427
nsw-club
Guru
Offline
Model: FC
Posts: 2457
I love YaBB 1G - SP1!
|
|
« Reply #9 on: January 03, 2008, 08:54:43 PM » |
0
|
I have used this set up on a few Hot Rods and made the push rod 74.5 long and it worked fine.....FC427......
|
|
|
|
|
Logged
|
As I lay rubber down the street I pray for traction I can keep, but if I spin and begin to slide please dear god protect my ride
|
|
|
|
mcl1959
|
|
« Reply #10 on: January 04, 2008, 11:09:21 AM » |
0
|
The Ford m/c needs a preload of about 2.5 mm. This is why the need for the sligthly longer pushrod. (74.5mm is the correct length). A stroke of luck means that the pushrod from one Gem booster is exactly right for the other booster - You should be able to place the m/c in position on the booster and see a 2.5 to 3 mm gap between the m/c and the booster and then "feel" a springiness when you push the m/c into place. Too long of a push rod is NO GOOD. and you could experience a fluid leak from the back of the m/c.
The wire you speak of is to test if a residual valve is in either of the outlet ports of the m/c. All drum brake outlet ports have a small valve behind the seat in the m/c which you can feel with an opened up paper clip for instance. So if you have disc front, you don't want a valve - if you have drum rear, you do want a valve in place. If you poke the piece of wire into the m/c port with no valve in it, the wire will go in about 2 cm and hit against a solid wall. With a valve in place you will feel an obstruction and a slight rubbery feel.
To remove a valve - screw a self tapper into the hole in the middle of the seat (be careful not to damage the seat) place the self tapper head in a vice and tap the m/c until the seat is extracted. the valve will fall out now. Replace the seat by screwing a brake fitting into place (preferably one without a pipe in it).
If after making all these settings correct, the m/c still leaks, then it is most likely that you have a fault with the m/c.
Hope this is of interest and answers all your questions.
Ken
|
|
|
|
|
Logged
|
|
|
|
crowbar
vic-club
Junior Member
Offline
Model: FE
Posts: 80
I love YaBB 1G - SP1!
|
 |
« Reply #11 on: January 06, 2008, 09:20:22 PM » |
0
|
Thanks Ken
Did what you suggested but the 74.5mm pushrod was still to short and would not preload the master
I then did some measurements and calculations and came to the conclusion that it would not be long enough
I then had a good look at the booster that I took the 74.5mm pushrod out of (angled studs)and discovered a round rubber disc that sits in the seat behind the pushrod
I removed it and took a photo but cant work out how to attach it to this post
This round rubber disc would extend the pushrod by 5mm
I hope that this is what has been causing me greif
Does anyone know
I think that maybe this has been dislodged by the wrecker that I got it from
Anyway I will try it this week
Need some sleep have had a hard week on after hours standby for work
Cheers
Haydn
|
|
|
|
|
Logged
|
|
|
|
FC427
nsw-club
Guru
Offline
Model: FC
Posts: 2457
I love YaBB 1G - SP1!
|
|
« Reply #12 on: January 06, 2008, 09:33:03 PM » |
0
|
That round rubber pad is the reaction pad and must be retained ......FC427.........
|
|
|
|
|
Logged
|
As I lay rubber down the street I pray for traction I can keep, but if I spin and begin to slide please dear god protect my ride
|
|
|
|
mcl1959
|
|
« Reply #13 on: January 06, 2008, 09:40:56 PM » |
0
|
As FC427 said, nothing more to add  Ken |
|
|
|
|
Logged
|
|
|
|
|


