FC427
nsw-club
Guru

 Offline Offline
Model: FC
Posts: 2457
I love YaBB 1G - SP1!

|
 |
« Reply #60 on: June 16, 2009, 08:38:24 PM » |
|
I have not seen them joined as you intend to do for a long time [butt joint on the axle tube ]the usual these day's is to cut the flange of the axle side clean it up in the lathe, put a tapper on it so it is ready weld it back on... a solid bar is then passed through the center that fits snugly in to the carrier bearings and has cones to slide on the bar at the ends in to the bearing cones to align it ...while it is tacked up then the alignment bar is removed before fully welding ... after welding it is reinserted to check it is still aligned quiet often it is then put in a gig and pressed to correct any misalignment from welding [the gig used is often an old crankshaft straiting gig] I am not saying that your method will not be successful just have not seen it done that way for a Long time good luck with it ......FC427.......
|
|
|
|
|
 Logged
|
As I lay rubber down the street I pray for traction I can keep, but if I spin and begin to slide please dear god protect my ride
|
|
|
|
JB
|
|
« Reply #61 on: June 17, 2009, 08:26:44 AM » |
|
The problem that I had for cutting it off at he flange was that I am planning on using that abs and this would have meant aligning the sensors again... Wasn't sure on how accurate i could do this and though that for the application would be easier to cut and join. I am planning to make a sleeve on the lathe to insert and help align the 2 back together again. Hope it all works... the worst that can happen is i have to get another one i guess.  I do appreciate the advise. Cheers Jason. |
|
|
|
|
Logged
|
Phone +64 223509263
|
|
|
|
bomer
|
|
« Reply #62 on: June 21, 2009, 07:14:14 PM » |
|
hey i just wanted to congratulate you on your build so far
its like watching a episode of overhaul your moving so fast
cant wait to see move pics
keep up the good work
adam
|
|
|
|
|
Logged
|
|
|
|
|
JB
|
|
« Reply #63 on: June 24, 2009, 10:45:36 PM » |
|
|
|
|
|
|
Logged
|
Phone +64 223509263
|
|
|
|
FATBOY
|
|
« Reply #64 on: June 26, 2009, 07:24:03 PM » |
|
Geez that brings back memorys when i did the tub job on my van many moons ago looking godd
regards fatboy
|
|
|
|
|
Logged
|
fatboy
0414712441
|
|
|
|
JB
|
|
« Reply #65 on: June 29, 2009, 07:52:53 PM » |
|
|
|
|
|
|
Logged
|
Phone +64 223509263
|
|
|
CraigA
nsw-club
Senior Member
Offline
Model: FC
Posts: 471
|
|
« Reply #66 on: June 29, 2009, 08:01:48 PM » |
|
Looking great Jason.  Can't wait to see the next update. |
|
|
|
|
Logged
|
|
|
|
|
|
|
JB
|
|
« Reply #68 on: July 05, 2009, 09:57:51 AM » |
|
|
|
|
|
|
Logged
|
Phone +64 223509263
|
|
|
|
EffCee
|
|
« Reply #69 on: July 06, 2009, 08:12:02 AM » |
|
Looking good Jason, I can't wait for the next update, you are helping to keep me motivated and for that I thank you.  Keith |
|
|
|
|
Logged
|
Canberra, ACT F4+ |
|
|
weddo
tas-club
Senior Member
Offline
Model: FC
Posts: 726
HIS, HER's & OUR's

|
|
« Reply #70 on: July 06, 2009, 12:12:47 PM » |
|
Great work Jason, very inspiring.
If you intend to register the ute, at what "hold points" do you have your engineer inspect the work?
regards
Weddo
|
|
|
|
|
Logged
|
|
|
|
|
JB
|
|
« Reply #71 on: July 06, 2009, 11:51:06 PM » |
|
Thanks guys, Weddo, my engineers comes up every 5 weeks from Townsville, and ha seen my car twice so far... nearly all of the fabrication is done now, so I will expect 1 more final inspection for certification. Got some more done today... Finished the welding the diff back together, and managed to get the mounting points welded in for the 4 link suspension. 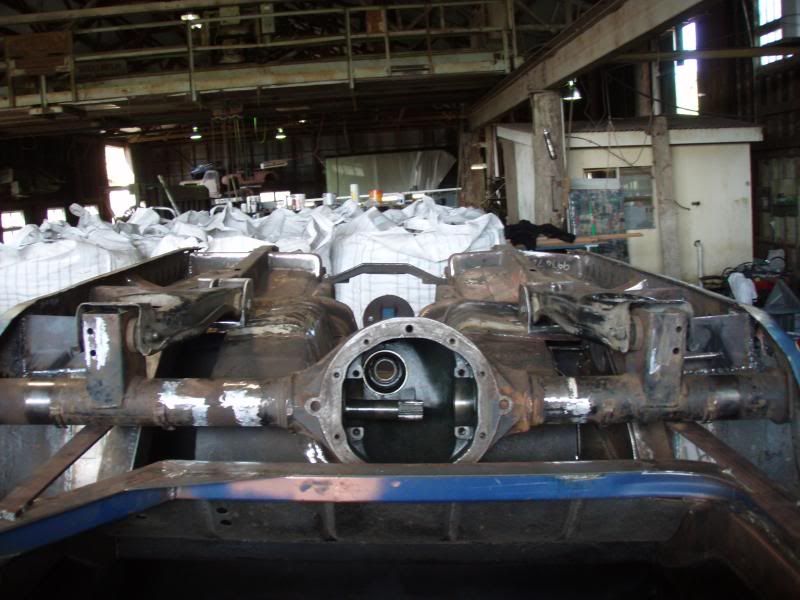 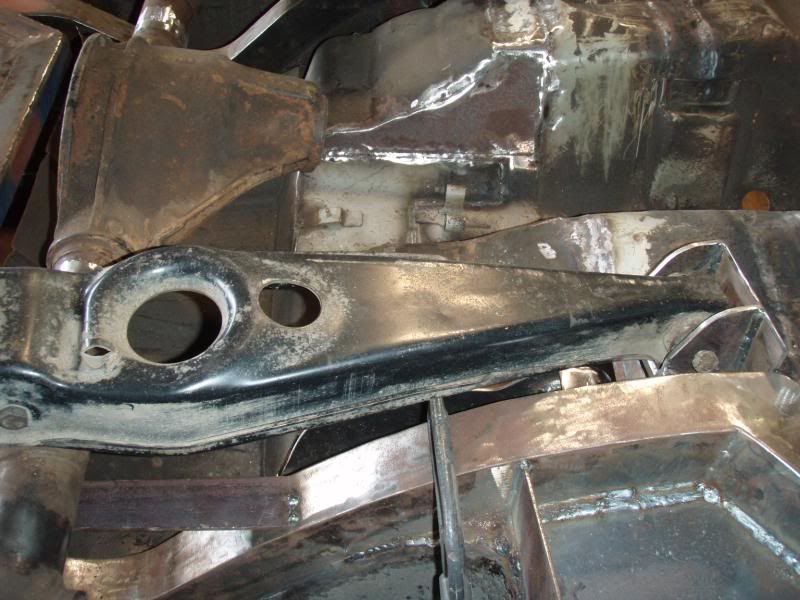 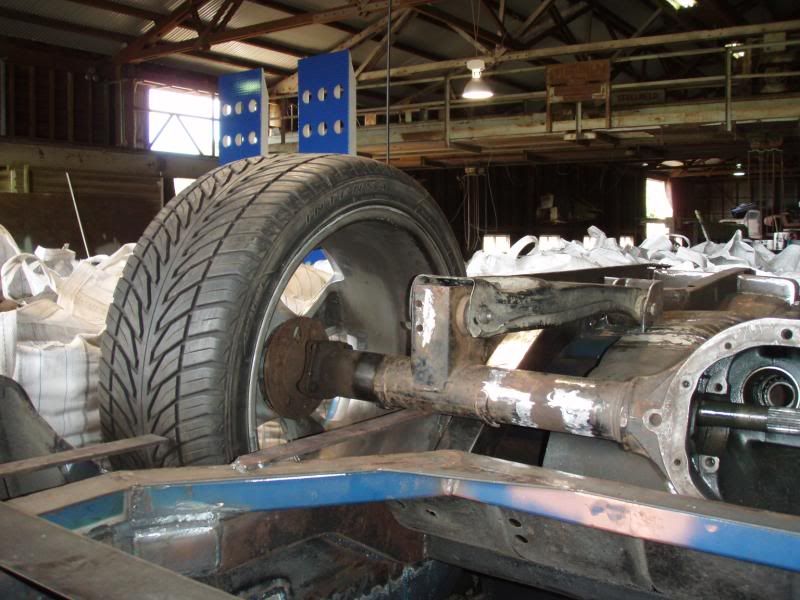 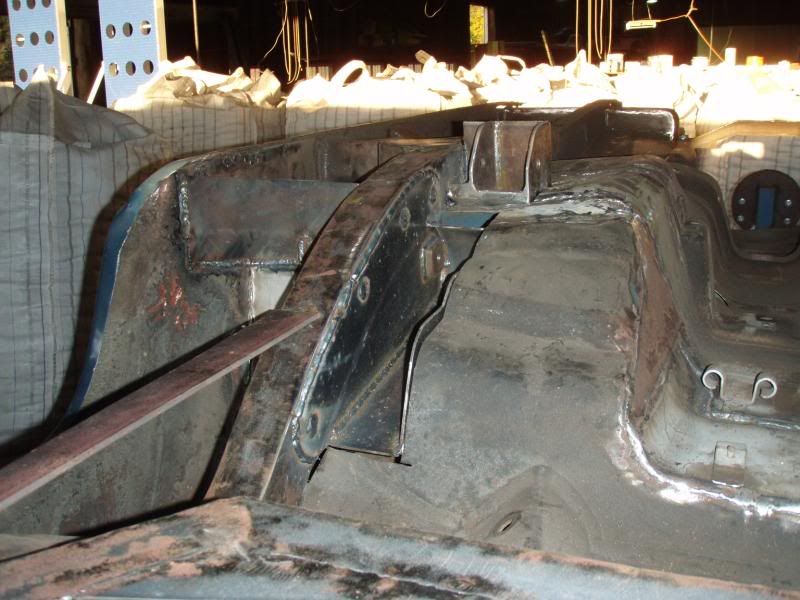 Tomorrow I hope to finish the top trailing arms... Cheers Jason. |
|
|
|
|
Logged
|
Phone +64 223509263
|
|
|
pedro
qld-club
Guru
Offline
Model: FC
Posts: 1683
If you haven't grown up by 50, you don't have to.
|
|
« Reply #72 on: July 07, 2009, 07:37:07 PM » |
|
Jason you're a bloody legend, keep up the good work, I'd also like to say thanks for the inspiration if i hadn't seen what you'd done with your ute there's no way i would have attempted the floor swap on my wagon.
Pedro
|
|
|
|
|
Logged
|
I love animals - they taste great
F4+
|
|
|
|
Ed
|
|
« Reply #73 on: July 08, 2009, 10:57:18 AM » |
|
Lots of trick looking bracketry and lovely engineering going on Jas.
Cheers
Ed
|
|
|
|
|
Logged
|
in the shed
|
|
|
|
JB
|
|
« Reply #74 on: July 08, 2009, 07:22:53 PM » |
|
All of the ideas came from the book that I described earlier, but all of their brackets looks shiny... not a little rusty like mine. A little more humid up here i guess.  But there is a sandblaster just outside for me to use and I think I am going to use POR15 on it. So should look a treat when I get to do it. The fuel tank should also be ready at the end of next week and is looking great from what i saw yesterday. The Radiator came back... total cost $252 so not bad for a custom radiator! But there is a long way to go to Orange so i have to keep at it, and hope the funds keep up... Jason. |
|
|
|
|
Logged
|
Phone +64 223509263
|
|
|
|
TTV6FC
|
|
« Reply #75 on: July 08, 2009, 07:47:55 PM » |
|
Nice work Jason.Where are the rear coil springs going to sit as I'm guessing they are not in the original location on the trailing arm as they will foul on the chassis rail you have fabricated.Are they coil overs mounted on the the back of the diff?  .I might have missed this somewhere.  |
|
|
|
|
Logged
|
Run your fingers over my Holden and I'll run my Holden over your fingers!!!!
|
|
|
|
JB
|
|
« Reply #76 on: July 08, 2009, 08:08:20 PM » |
|
I am going to fit coil overs from the lower trailing arms to close to where the original shockers were mounted on the angle. I have to make up brackets to go from the arms yet to accept the coil overs... but not sure the width of the bracket to make yet, until I get them. I dont know if the eyelets are of different sizes yet or not so an at present researching it. Where i plan to locate them may still yet foul on the upper trailing arm and I wont know until i see one. The other option that I have is to mount them on the front or the back of the diff in a more upright position. as this is the first time i have done this i don't have the answers I need.. Yet! But thats half the fun, I have been getting very excited to get the diff done to this stage To actually get it finished in the next couple of week for me will be a sense of accomplishment. Cheers Jason. |
|
|
|
|
Logged
|
Phone +64 223509263
|
|
|
|
DN2168
|
|
« Reply #77 on: July 08, 2009, 08:15:12 PM » |
|
Keep at it jason, you have done more in 2 weeks than I have in 2 months lol.
Dean.
|
|
|
|
|
Logged
|
|
|
|
GMB-58FC
Senior Member
Offline
Model: FC
Posts: 391
Stage one complete...
|
|
« Reply #78 on: July 08, 2009, 09:38:39 PM » |
|
Inspiration thats all i can say  I look forward to the updates Jason and hopefully get a few more ideas with my car haha |
|
|
|
|
Logged
|
ABS Hobart- 6231 5855
FOR ALL YOUR BRAKE & CLUTCH NEEDS.
PM FOR QUOTE
|
|
|
|
JB
|
|
« Reply #79 on: July 08, 2009, 10:58:09 PM » |
|
Thanks for all of your kind and positive responses... they haven't gone unnoticed Jason. |
|
|
|
|
Logged
|
Phone +64 223509263
|
|
|
|


