|
mikey
|
 |
« on: August 28, 2007, 12:51:31 PM » |
0
|
Hello all, Long time coming but finally started on the rebuild, have had this car sitting around for waaay too long doing nothing. First car was an FC with the usual red motor, disc brakes, four on the floor and fatties all round. Nice grey and white combo. Ken should still have the info as I drove it around oh so many years ago. Not long after I sold it I regretted it (seems a standard emotion doesn't it?) Looked around for another one and found this FE. It was purchased as a incomplete restoration, I pretty much trailered it home, pulled it apart a bit more and placed it up on the rotisserie and let it gather dust. Three floor pan sections have been placed in prior to me getting it and unfortunately the repairs were not quite up to scratch. The areas were covered in tar/bitumen and it has taken a bit of work to get the areas clean for re-welding. Just some general pics of where I am at the moment. Shell up on the rotisserie. The solid frame allowed me to pull it up on the trailer with the shell still on it. 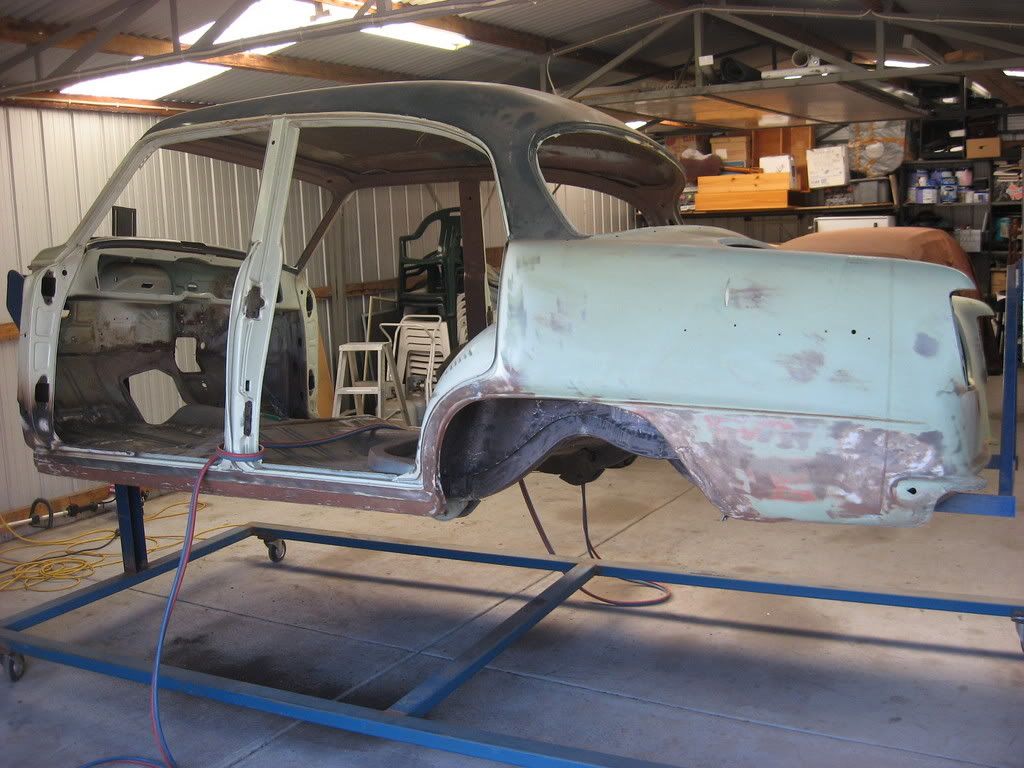 Rear shot showing the adjustment to enable the shell to spin around on its center of gravity, took and educated guess as to where it would be and made the adjustment slots to suit. 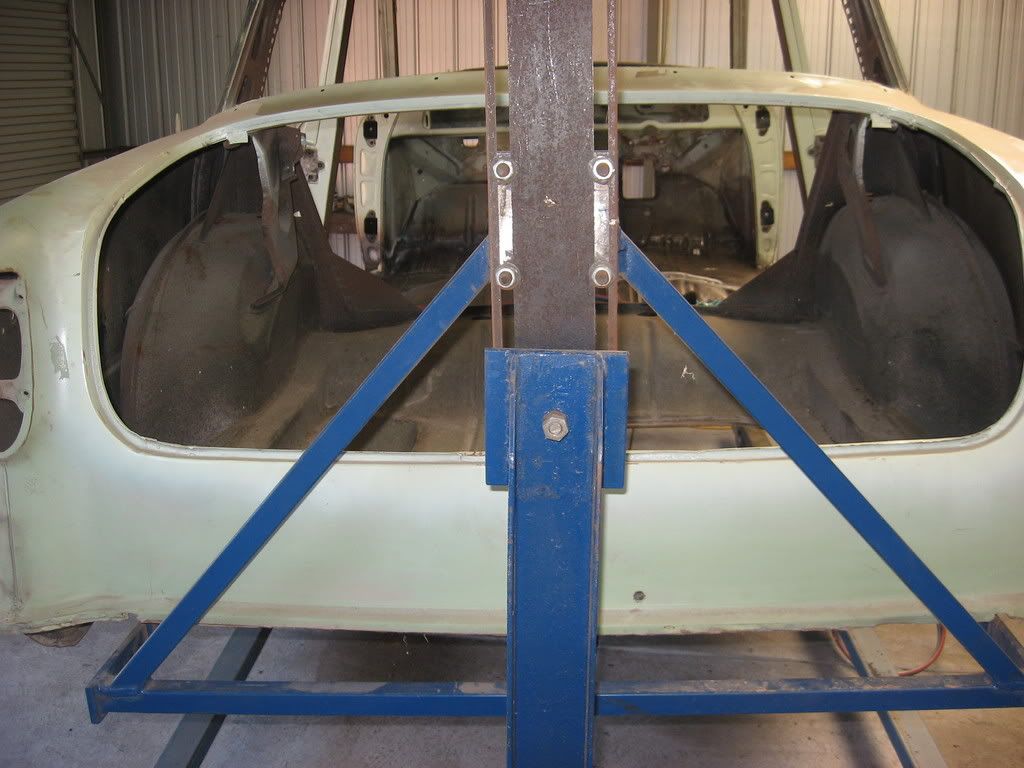 Front shot, gear box is normally used to operate large butterfly valves. Stops shell from spinning when you lean on it and rotates 360 degrees. 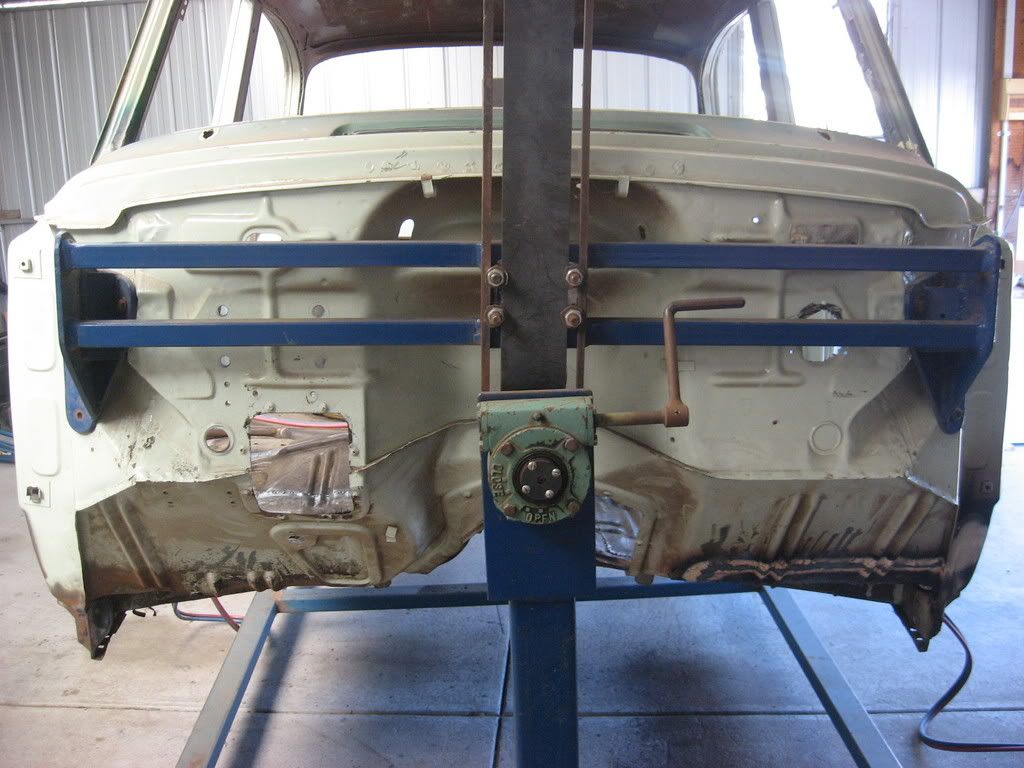 The under side of the floor pan showing the cut out for the large gearbox tunnel to go in. The cross member was cactus so took that out as well. New old stock one to go back in. 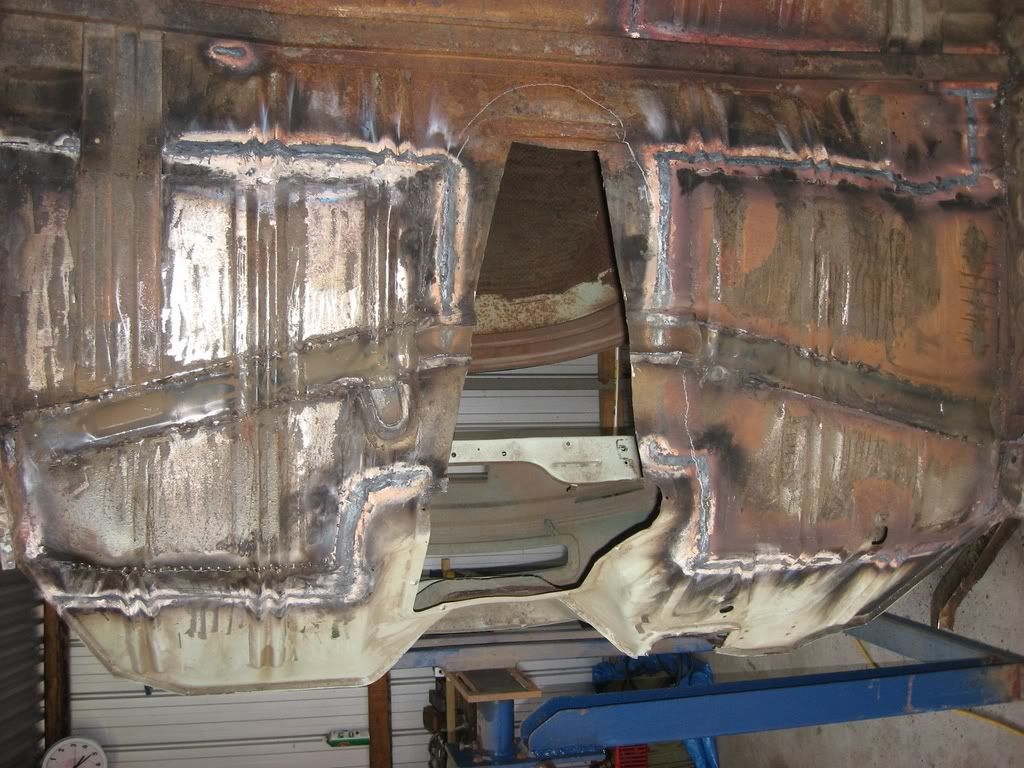 Gearbox tunnel just sitting in position. 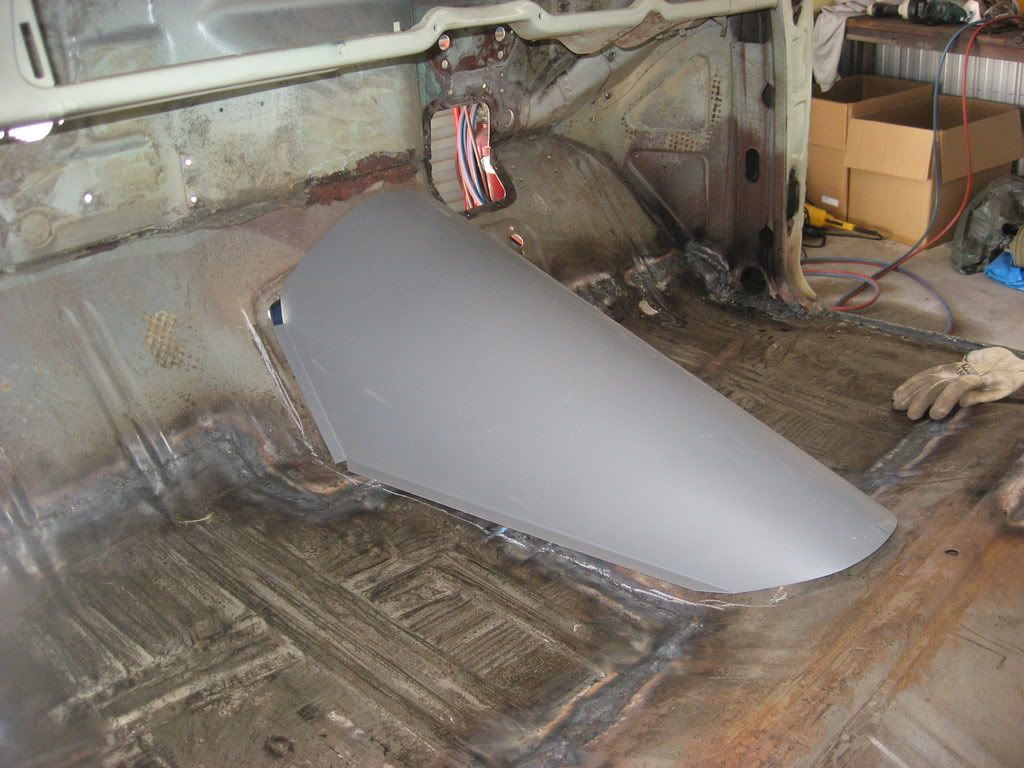 Thats it for now, by the way I need a floor pan support on the drivers side, look in wanted parts for the picture. Cheers. |
|
|
|
|
 Logged
|
Our Lady of Blessed Acceleration, don't fail us now!
|
|
|
customFC
Moderator
Guru
    
 Offline Offline
Model: FC
Posts: 5900
Ask me about microwaving cats for fun or profit.

|
 |
« Reply #1 on: August 28, 2007, 11:00:54 PM » |
0
|
Looks like a nice project, and a good solid start.
Regards
Alex
|
|
|
|
|
 Logged
|
|
|
|
|
mikey
|
 |
« Reply #2 on: May 22, 2008, 01:01:57 PM » |
0
|
It's been a while but here are a few more pics of my progress. Sandy gave me a hand to sandblast the shell and has been given 2 coats of black Por 15 rust preventative paint. For those interested the bottom took exactly 1 liter doing two coats and the inside took just under a liter again two coats . Por 15 goes on like silk and dries nice and smooth with high gloss. Downside is that it costs $72 for a one liter can.  I am being evicted out of the shed where you see it now (my sister has sold the house) Can't really complain as I took over half the shed for a while and turned it into my own little blast chamber.  Will be less of a hassle to continue progress on it when it is my own shed. 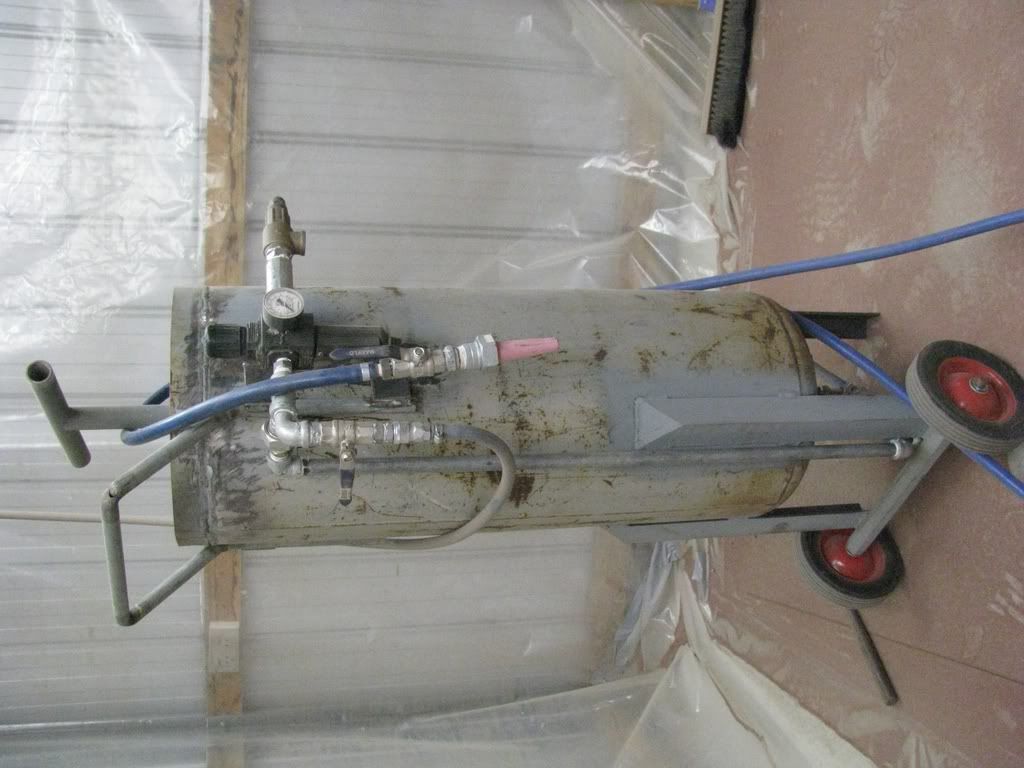 Everyone this is Sandy, Sandy say hi to everyone. (I made her) 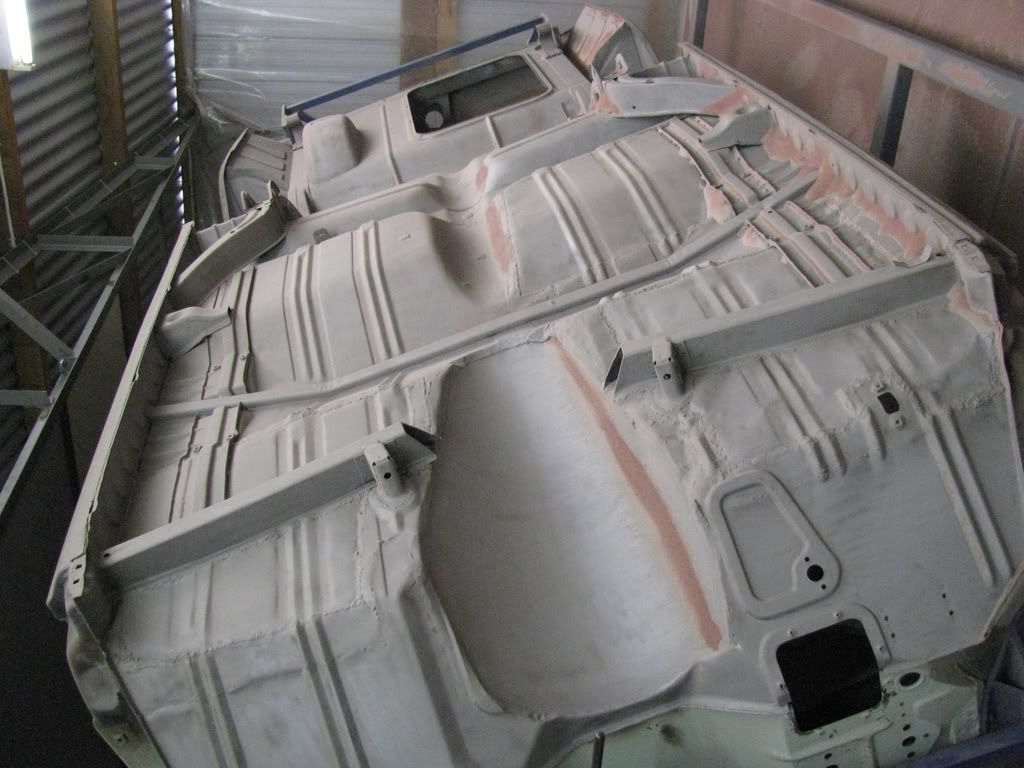 Still have to put in the tunnel support brace. 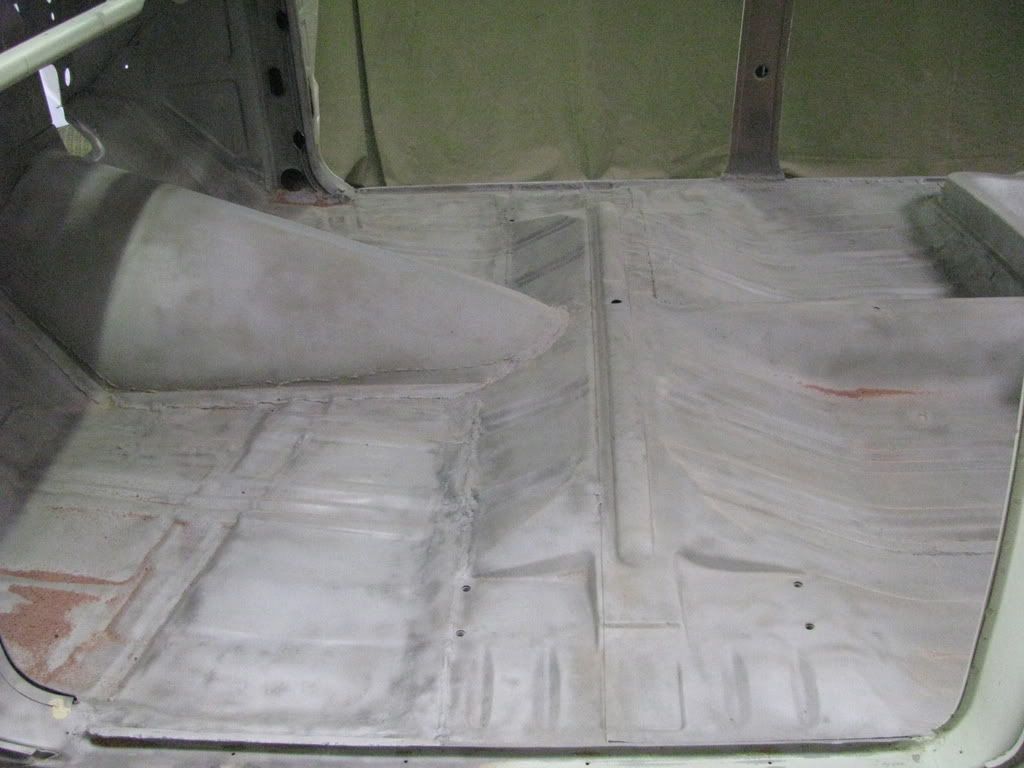 Blasted right up the inner firewall. 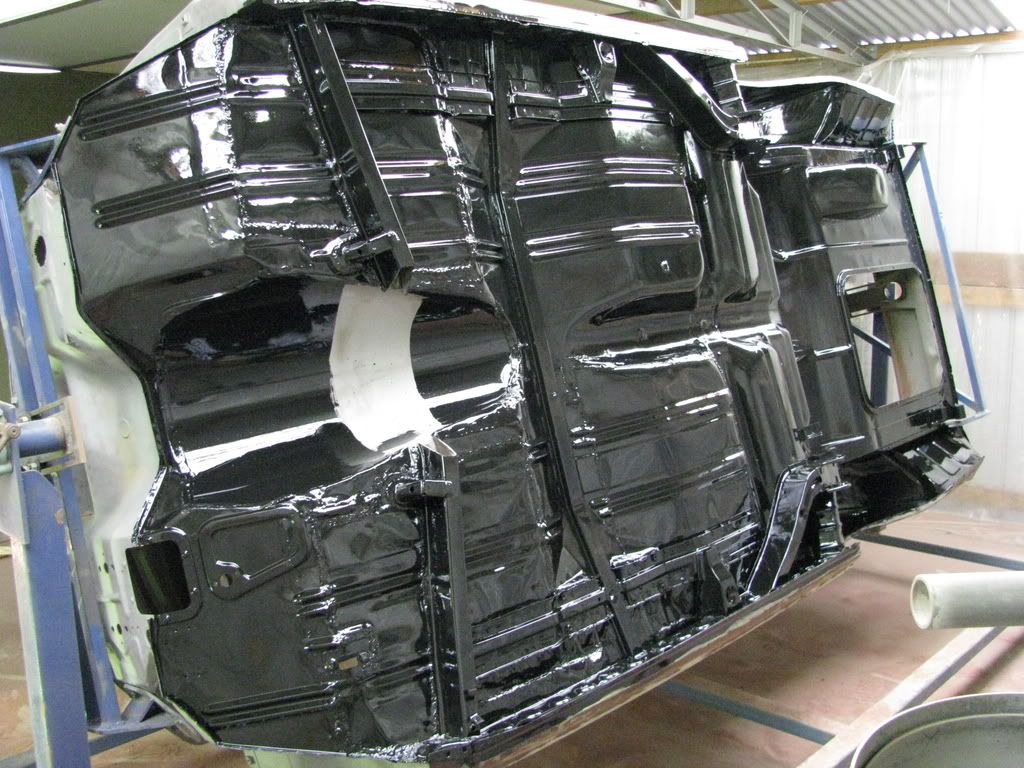 Nice and shiny, pity it wont get seen. 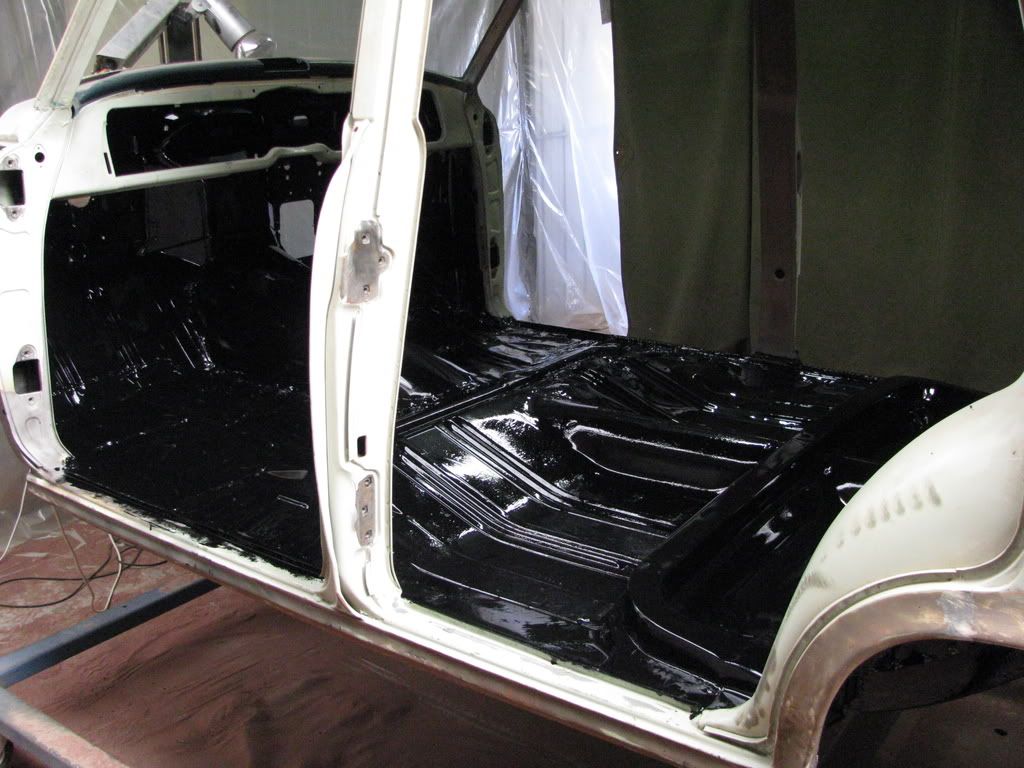 |
|
|
|
|
 Logged
|
Our Lady of Blessed Acceleration, don't fail us now!
|
|
|
|
Ed
|
 |
« Reply #3 on: May 22, 2008, 03:04:58 PM » |
0
|
Looking real good Mikey,
another top quality build in progress.
Cheers
Ed
|
|
|
|
|
 Logged
|
in the shed
|
|
|
|
NosFEratu
|
 |
« Reply #4 on: May 22, 2008, 03:58:44 PM » |
0
|
Looks good Mike.  And it doesn't matter if it won't be seen underneath - it's more about you having peace of mind that what you have done will protect it for as long as possible. Keep posting the progress shots for us. Kathi  |
|
|
|
|
 Logged
|
NosFEratu   |
|
|
|
EffCee
|
 |
« Reply #5 on: May 22, 2008, 06:02:48 PM » |
0
|
Looking Good Mike,
Although no one will see it at least you have peace of mind knowing that you did it properly.
The work so far looks great. How did you get your sand blaster to work. Is it pressurised of is it essentially a container of sand. I have one that I just put the sand in a bucket and it draws the sand up the bucket, the hose isnt very long and I have tried a longer hose but this reduces the sand flow. From the look of your unit it seems to be pressurised, I am wondering if this would work better.
Keith
|
|
|
|
|
 Logged
|
Canberra, ACT F4+  |
|
|
|
mikey
|
 |
« Reply #6 on: May 22, 2008, 07:42:46 PM » |
0
|
I personally could think of nothing worse than doing a half baked job then driving the car for years to come with full knowledge that under neath is slowly rusting away. Who knows it may anyway but at least I have the peace of mind that at least I have done all that is practically possible to keep the rust at bay. The blaster is a pressure pot type, I saw the plans on Ebay, a guy in the states had them for sale for around $6 US. It is made from a 40 kg LPG bottle that Dad had been using for years as an air receiver. The bottle is actually upside down and the end has been cutoff and welded on backwards to allow the sand to be loaded in. I hydrostatic pressure tested the completed unit to 300 PSI with no problems. It worked quite well but could have used a bigger air compressor. The one I was using did have a fair output and did have a 13 Amp motor on it (was using a 15 Amp outlet) If I did it again I would certainly hire a petrol air compressor with tons of air on hand. The only hassle is that the bottom T piece where the air met the sand would block up from time to time. A quick smack with the hammer on the pipe sorted that out. The damp air wetting the garnet was the culprit as the compressor did not have a proper moisture removal system on it. Done again I would get a ton of copper pipe and roll it in a coil and chuck it in a wheelie bin full of cold water to knock the water out. 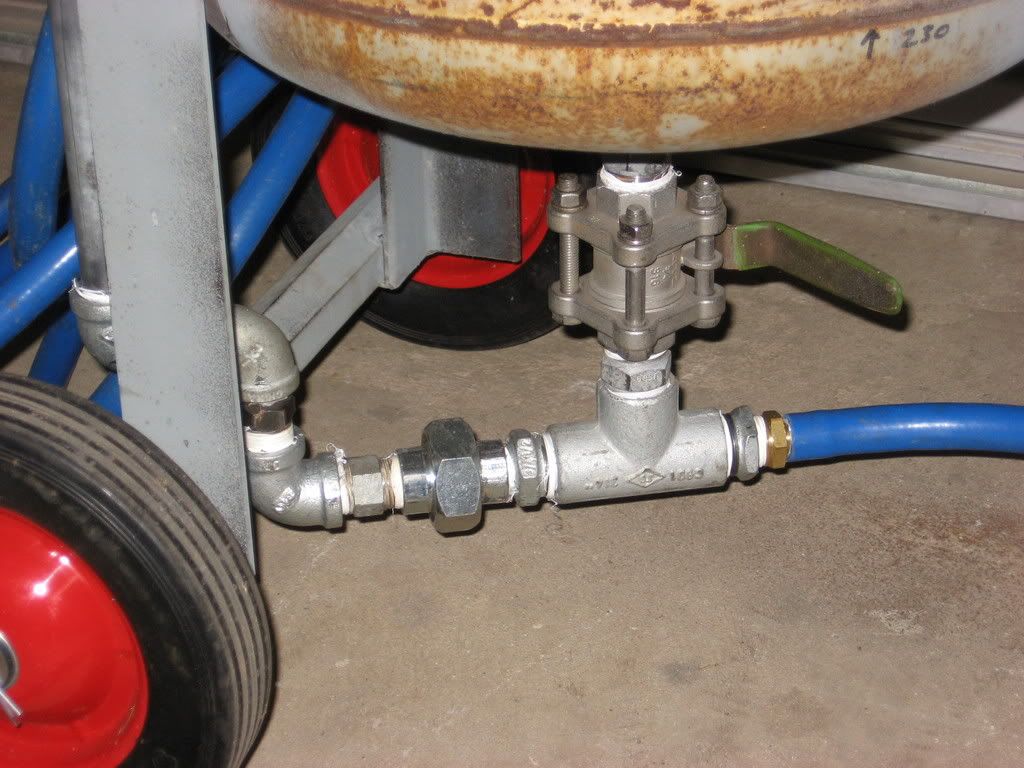 |
|
|
|
|
 Logged
|
Our Lady of Blessed Acceleration, don't fail us now!
|
|
|
|
mikey
|
 |
« Reply #7 on: June 11, 2008, 11:45:02 PM » |
0
|
A few more pics. Laid down a bit more Por-15 paint, this time on the inside of the roof and right up under the dash. Undoing the door hinge screws two of the four hinge nuts had ruined the nut supports and required repair, these are the nuts for the front door hinges that poke out of the A pillar and sit in the area under the front guards. The nut support had splayed out and looks like the nuts had become rusty from being splashed with water from the road. Bending them back only snapped them off. I repaired the problem and hopefully will never have to fix it again. 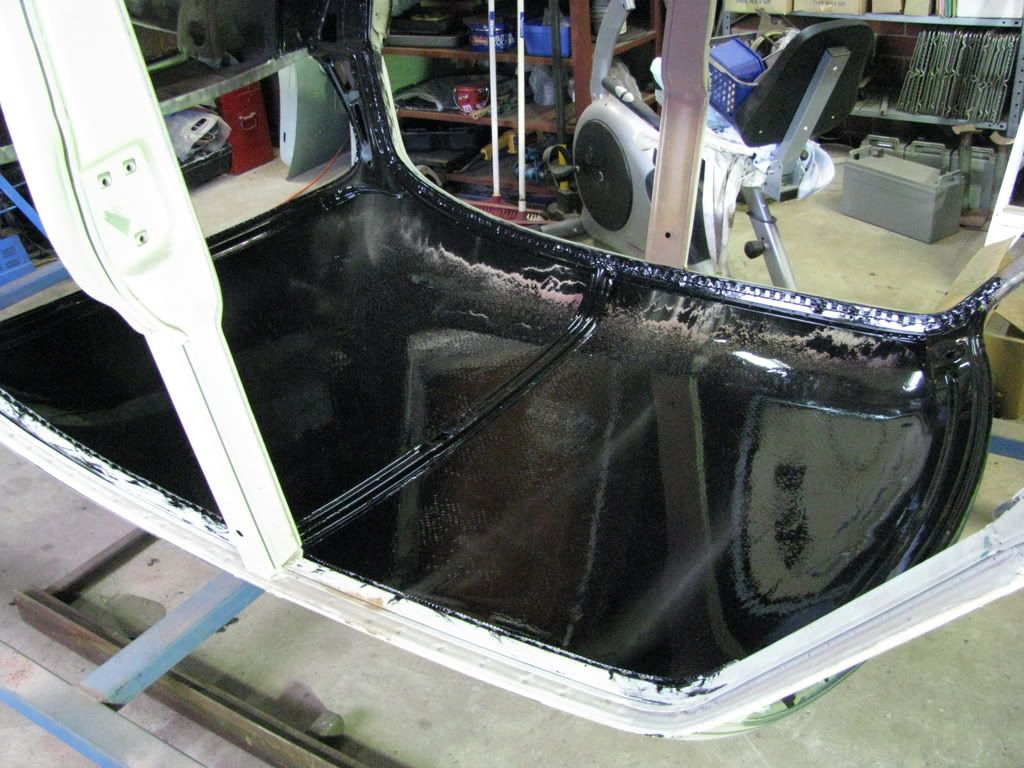 High gloss paint reflects a lot and does not actually look this bad, the sandblast grit is still coming out of cavities every time I rotate the shell  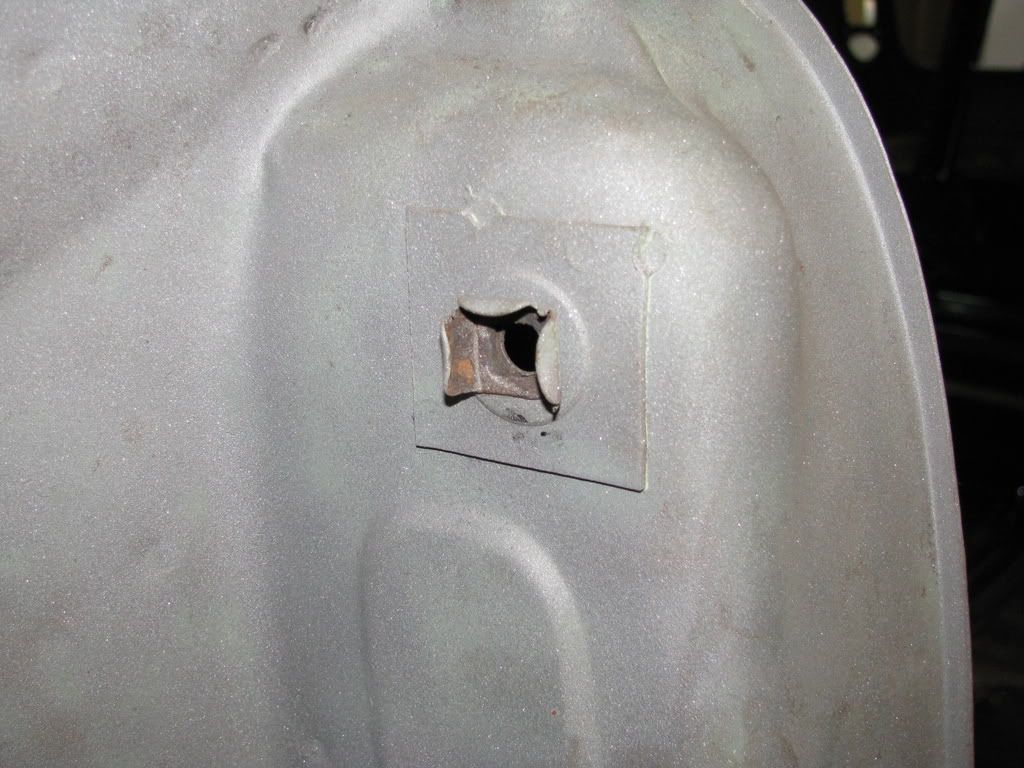 These nut supports have been splayed out. 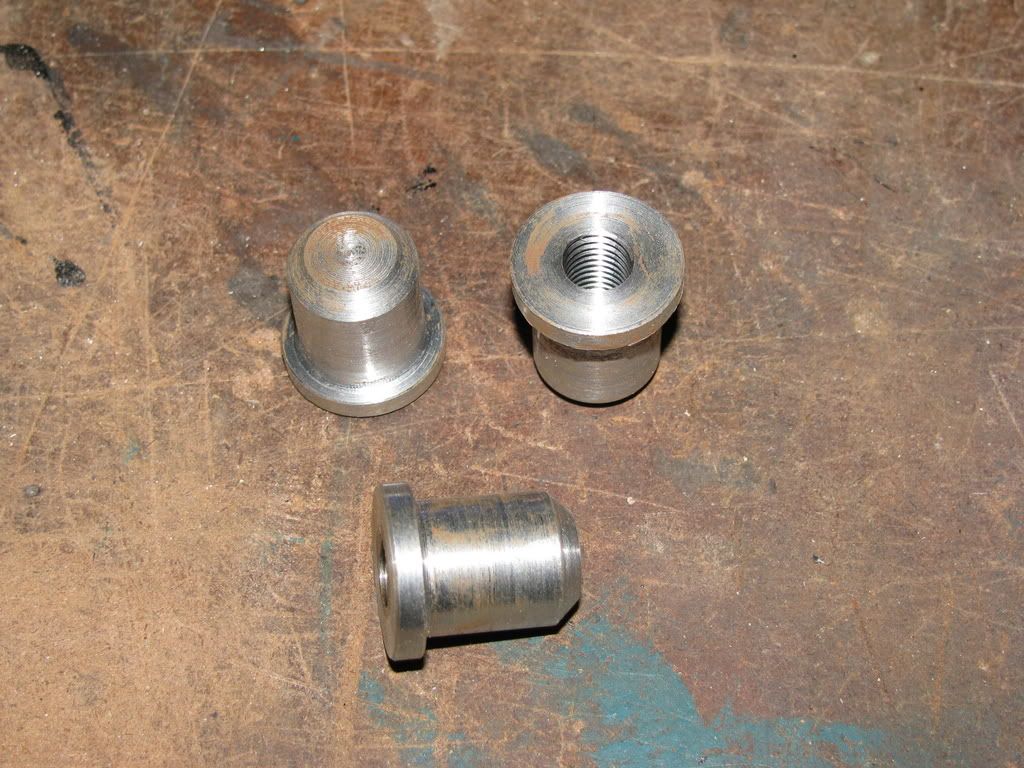 Made these up. 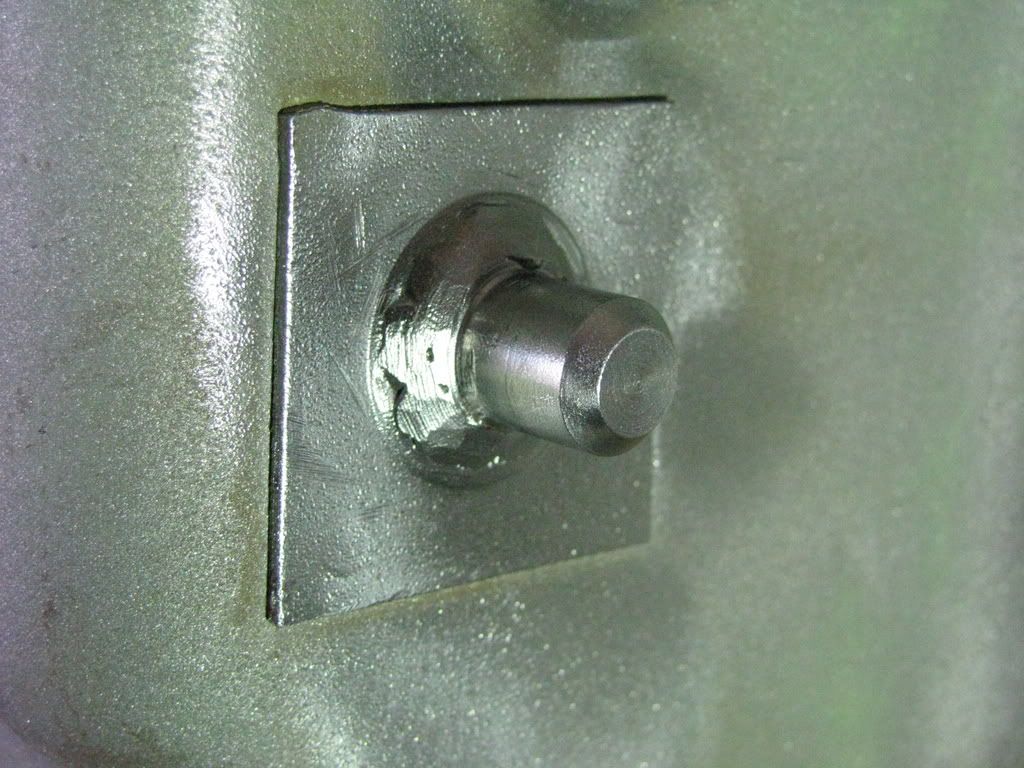 Welded them on after fitting the hinge. Now have a new "nut" and is watertight for ever. |
|
|
|
|
 Logged
|
Our Lady of Blessed Acceleration, don't fail us now!
|
|
|
|
Paul In Ireland
|
 |
« Reply #8 on: June 12, 2008, 04:21:40 AM » |
0
|
How much did it cost you to make the sand blaster? What is the sand you use or is it a grit you buy ready made? Did you ever post up the plans of the blaster on the site for other s to "read"?  |
|
|
|
|
 Logged
|
The International FE FC Fleet of Ireland
Education is where you read the fine print. Experience is what you get when you don't.
|
|
|
|
mikey
|
 |
« Reply #9 on: June 12, 2008, 09:12:09 AM » |
0
|
Hi Paul, The only things I had to buy were the wheels, around $12 each from bunnings if I remember correct and 2 ceramic nozzles with fittings on the end of the hose. I bought the nozzles for about $30 off the guy who I got the plans from. The only thing I supplied for the blaster was the bottle (had it for years), the angle iron legs and some of the piping. The rest of the stuff came from work, fittings, regulator, hose, ball valves and PSV (pressure safety valve) rated at 1000 kPa. Didn't really need it as most air compressors have their own PSV. (Did it cause I could) I work in a large chemical manufacturing plant and there is heaps of this stuff around. Never use true sand as this can lead to silicosis which is a respiratory disease. Breathing in pulverised silica dust is no good  I used Garnet which I got in 25 kg bags for $25. I called up a few sandblaster supply places and this seemed the normal price. That is not to say it doesn't come with it's own dust hazards. At work we manufacture Chlorine which is a toxic gas and at times have to wear full face canister masks, this was perfect for using to blast. I just put clear tape on the face glass and replaced it from time to time as the abrasive does bounce back into you. Also had on a pair of disposable overalls with a hood done up right around the mask. Search for blasters on ebay and other tool shops. They do have them but are quite small and cheap quality but have the basics which you could fix up a bit. What would I do different? The nozzle I really battled with. The smallest carbide nozzle I could find here was 1/8" 3.2 mm. That is a pretty big hole for a compressor at home to supply enough air. Could get a 3/32" 2.4 mm from the US but it cost about $100  . I ended up getting 2 ceramic nozzles at 3/32" but ceramic is hard but not that hard and did wear out a bit. Did notice the supply pressure falling away towards the end. As I was blasting away towards the end I was thinking I really wish I had a carbide nozzle and had a light bulb moment and at that time I really could have kicked myself so so hard. I am a fitter and machinist by trade (plant operator now) and still play on the workshop machines, what do these machines use to cut metal?? Carbide cutting tips, so what you say....... many of these tips have a hole in the middle to clamp them down, I could have made a holder for these tips and blasted through them for nothing. #@@%$^^&&^%$##@$%^^&&^^%$!!!*&^())^% (lots of swearing)  Any engineering shop would be happy to give worn tips away. All in all not a bad experience as I had the time to make it and the room to use it. Some of the quotes to blast the shell were very scary and this led me down this path. That being said I saw Pedro get his shell blasted and undercoated for $500. ( correct me if I am wrong P) Not a bad price at all. I think that covers everything Paul and have sent you a PM. |
|
|
|
|
 Logged
|
Our Lady of Blessed Acceleration, don't fail us now!
|
|
|
|
FC0058
|
 |
« Reply #10 on: June 28, 2008, 08:18:56 PM » |
0
|
OK Mikey
Since I am harassing others for updates I figured I should find out what your up to and how your build is going.
Cheers Jim
|
|
|
|
|
 Logged
|
Forgiveness is easier than permission.
|
|
|
|
mikey
|
 |
« Reply #11 on: June 29, 2008, 11:40:45 PM » |
0
|
Ok Jim, Been a bit slow here of late, the only thing of note that I have done is to weld up some rust holes in the passenger sill. One other sill repair I have to do is to fix a previous attempt by the guy who I purchased the car off. Also have been playing with my doors, I only had 4 door shells with hinges and had to get all the internals for them ie glass, runners, window winders, handles and all screws. Big thanks to Ken for coming to the rescue. 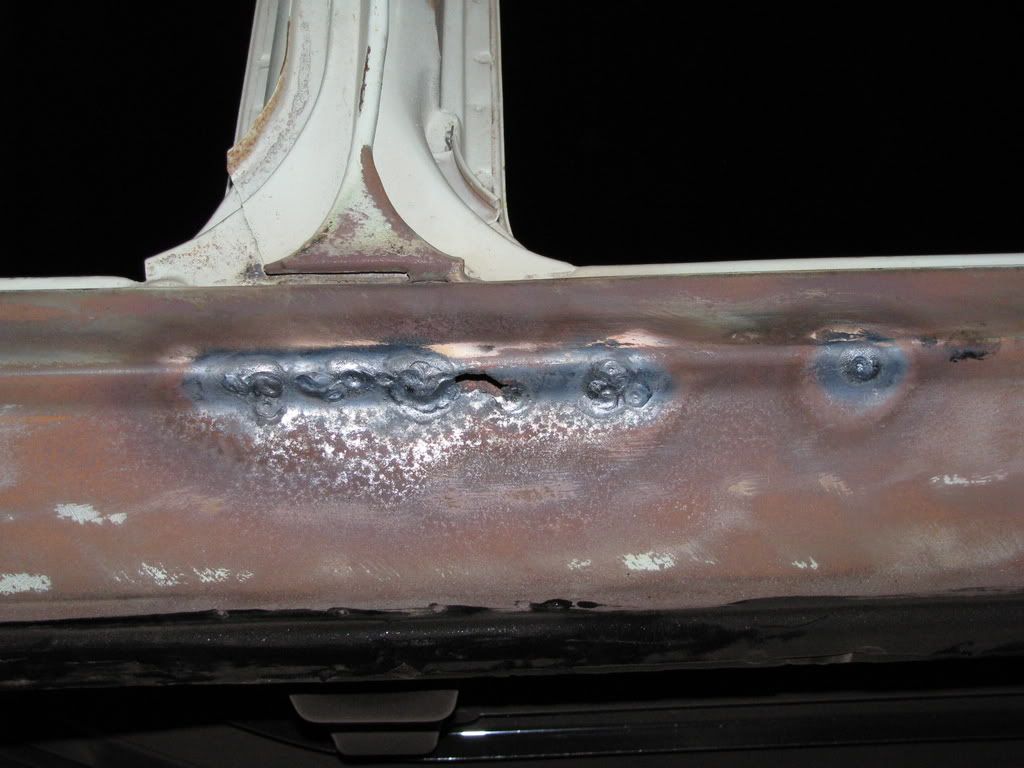 Most of these holes were just coming through so I tapped them in a bit and have used the oxy to just fill them in a bit. One hole is a bit bigger, will slip a small backplate in through the hole and fill. The welding looks terrible in the photo doesn't it? I used the smallest flame possible but some of the sill was so thin it just blew through  Does not look that bad in person  Honestly  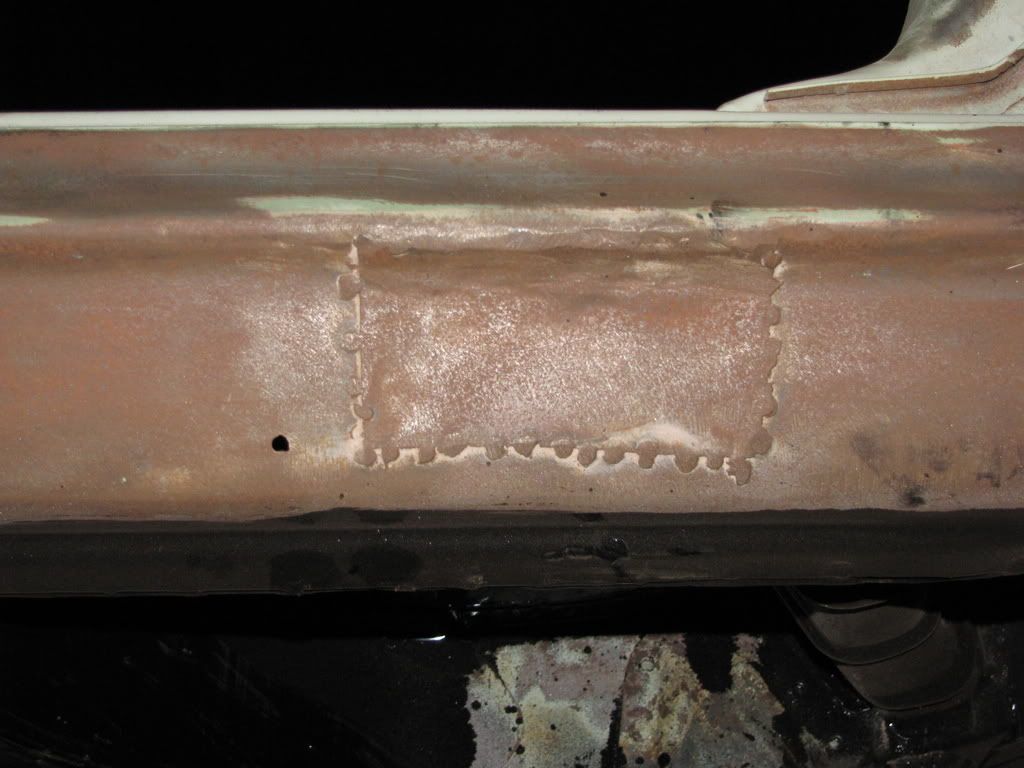 This is a previous attempt at a repair and sits proud of the sill, it has just been placed on top and tacked welded. It had bog on top trying to hide it. More soon hopefully. Thanks for reading. Cheers M |
|
|
|
|
 Logged
|
Our Lady of Blessed Acceleration, don't fail us now!
|
|
|
|
mcl1959
|
 |
« Reply #12 on: June 30, 2008, 09:20:27 PM » |
0
|
Mike, I have to say that sill repairs such as these are going to be fairly short term and more rust will find its way through. To stop this rust permanently you would have to replace the sill panel entirely. If you were able to look inside the sill you would see quite a lot of rust in the area where the holes you have repaired are. You could try putting a rust converter on the inside of the sill - this may stop the rust action but it is not the easiest thing to do properly. Your welds look fine.  Ken |
|
|
|
|
 Logged
|
|
|
|
|
mikey
|
 |
« Reply #13 on: July 01, 2008, 01:43:26 AM » |
0
|
Hi Ken, Thanks for the comments, I have been very reluctant to even start fixing the rust in the sills as I have been dreading what I may find. Really, really, really don't want to replace the sill at all unless absolutely required.  For me I am taking a gamble that it will be ok if I do all I can to prevent future ingress of rust. The plan at the moment while the shell is still up on the rotisserie is to block off the drain holes and pour in a liter of Por 15 protective oil that I have into the sill cavity and rotate the shell to cover all internal surfaces and drain. Might repeat a couple of times. This oil is similar to fish oil in properties but without the smell. As I was typing this I had to pop out into the shed just to have a better look at the sill as I was not sure if it is a true blind cavity, It looks like a completely sealed unit, but not sure if it has openings anywhere else. Would hate to fill it up with oil and see it pour out of somewhere I might have missed. Ken no doubt in your time restoring cars you would have pulled off a sill or thirty.  (If this option is not workable then I will just go with the option stated below) As part of the rust preventative program for the long term I have been thinking about drilling a hole at either end of the inner sill and fitting a rubber grommet. This will allow the grommets to be removed and allow me to use a compressed air gun with a venturi set up to blow a big mist of preventative oil down the "tunnel". It's the best way I can think of getting to all internal surfaces when the car is back on it's wheels. Feedback?  Cheers M |
|
|
|
|
 Logged
|
Our Lady of Blessed Acceleration, don't fail us now!
|
|
|
|
Ed
|
 |
« Reply #14 on: July 01, 2008, 08:54:41 AM » |
0
|
Hey Mikey,
Good idea with the oil and holes to apply it, although I would be making absolutely sure all the paper thin bits of the sill are cut out and replaced. While it may seem a big job now, it will be an even bigger job if the rust rears it's head after paint and panels are complete.
Cheers
Ed
|
|
|
|
|
 Logged
|
in the shed
|
|
|
|
mikey
|
 |
« Reply #15 on: July 01, 2008, 11:33:22 AM » |
0
|
There is no doubt that the sill is not as good as a new one and I am now fairly confident that there are no more paper thin areas. I have carefully tapped every square centimeter of the sills with the round end of a ball peen hammer and other than the bits already spoken about they seem ok. Yes it did take a while  Of course the sill is not as good as new and would probably find thinner areas if I hit hard enough, but for me I am happy enough with it the way it is. The inner sills look excellent and did not have to rust repair that side of it. The big challenge is to keep up the prevention work in the future, ie re-blowing oil into the sills at regular intervals. 6 monthly?? Ahh the battles and hard choices we must all make as we go along. (or is that part of the fun?) Cheers all, M |
|
|
|
|
 Logged
|
Our Lady of Blessed Acceleration, don't fail us now!
|
|
|
julius
act-club
Full Member
  
 Offline Offline
Posts: 142
I love YaBB 1G - SP1!

|
 |
« Reply #16 on: July 01, 2008, 01:42:35 PM » |
0
|
Hi Mickey
I have been reading your post and as you squirting oil from a hole in the A pillar and a hole at the rear you will have a problem as the bottom of the A pillar is like another sill panel inside and is blocked of roughly beneath the start of the scuff plate.
When I removed the sill of the FC I was building for MG is when I noticed it and FYI rares sills don't fit without modification and are a different profile and to long.
If you are going to R and R the sill make sure your doors are on so you get the gaps right.
build looks great, would love to see it at Orange.
Kind regards
Julius
|
|
|
|
|
 Logged
|
|
|
|
|
mikey
|
 |
« Reply #17 on: July 01, 2008, 03:35:52 PM » |
0
|
you will have a problem as the bottom of the A pillar is like another sill panel inside and is blocked of roughly beneath the start of the scuff plate.
Thanks J that's what I need to know regarding what on earth is inside there. Doesn't matter if it partitioned off as long as I know what is where. Just need more access holes and grommets. Must troll through all the photos here and see if there is one good pic with a whole outer sill off. The rare spares ones are hopeless aren't they? I really don't understand why the repros are not identical to the NOS sills. The people who designed and built the dies for the press tools would have presumably gotten the dimensions off a bare sill but somewhere down the track those dimensions were not transposed to the programmers/machinists. To me, the problems with these sills would be the same as going to buy a set of pistons and finding out that they are just a touch too big. Close enough is just not good enough, or is there something wrong with the way my brain works? Cheers M |
|
|
|
|
 Logged
|
Our Lady of Blessed Acceleration, don't fail us now!
|
|
|
pedro
qld-club
Guru
    
 Offline Offline
Model: FC
Posts: 1683
If you haven't grown up by 50, you don't have to.

|
 |
« Reply #18 on: July 01, 2008, 04:34:44 PM » |
0
|
|
|
|
|
|
 Logged
|
I love animals - they taste great
F4+
|
|
|
|
greyone
|
 |
« Reply #19 on: July 01, 2008, 06:12:40 PM » |
0
|
mikey I have a sect of sill approx 1m from that place in qld your welcome to it could pick up in ballan or brooklyn
regards mal
|
|
|
|
|
 Logged
|
|
|
|
|


