Hi Cruiser,
Re-forming the headlights is a fairly involved procedure, but here are is some information you may find handy.
there are many different ways to recess the headlight, you can see how Leon (FCCOOL59) has recessed his lights using a tube edge then hand formed the panel around the edge.
you can use headlight rings off other cars and weld them to the panel and then access and adjust the headlight from behind. They make kits for this in the US.
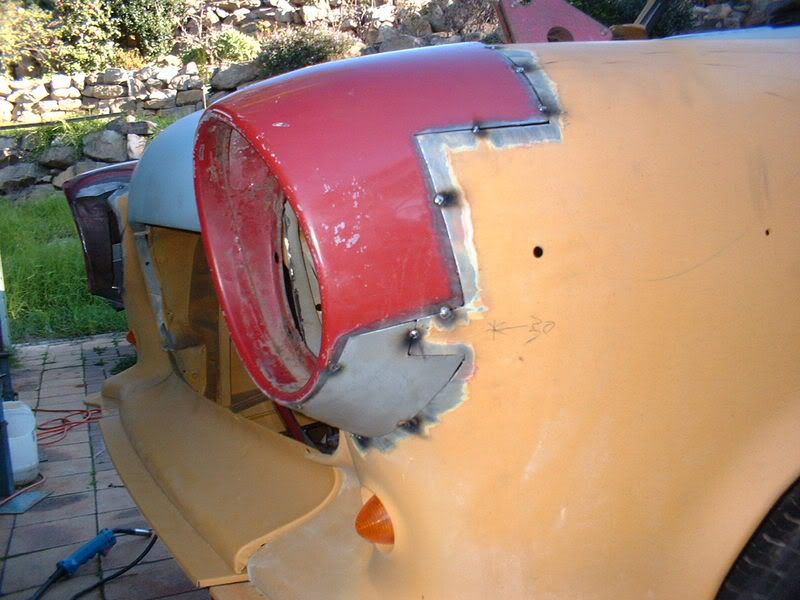
anyway I chose to use headlights off another car based on an idea provided by Alex (customfc).
1) get a good cut of the headlights and surrounding panel.
2) cut the donor panel to a suitable shape which will blend nicely into the FE FC guard. you may need to re-shape the donor panel a little.
3) cut the guard to suit the donor panel.
4) weld it in.
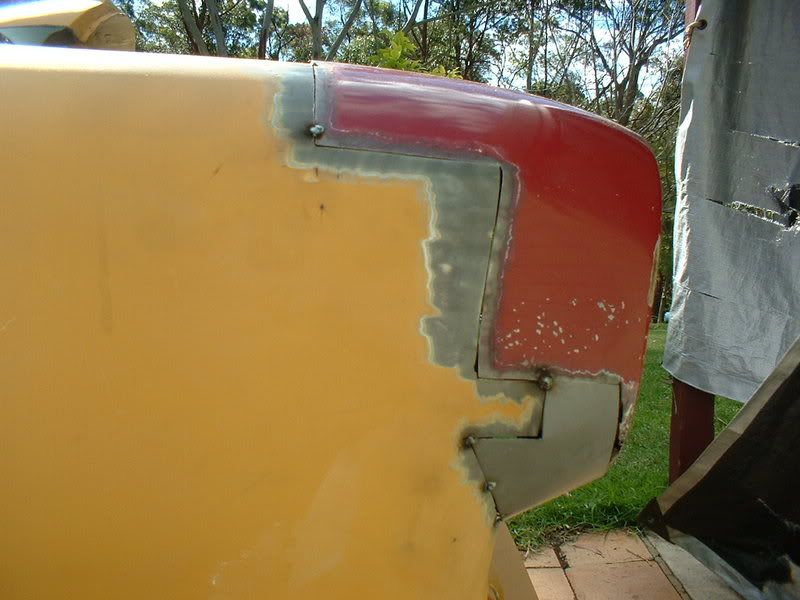
from the pics you can see the shapes which were cut to fit the light in nicely. this took into account position of the headlight, flow of the lines. Care has to be taken to get the proportions right. too short or too long and it will look horribly wrong.
remember to allow for the final position of the headlight and provide allowances for adjustment of the beam.
Be prepared to hand work alot of the surrounding metal into shape. in the pics you can see the region under the lights was hand formed to get the correct contour.
at this stage the lights were tacked in and minor adjustments were still made. hand filing to get the best panel gap is advisable and the less gap the better to limit any distortion.
so, a good eye for aesthetics and proportion is essential, metal and welding skills and loads of patience.
oh.. doing one is easy.. matching the pair is the challenge.
hope you find these pics helpful.
Cheers
Ed